
It doesn’t matter if you’ve only owned a Mustang for a few months or over a decade (or longer!), you know as soon as you get behind the wheel, you’re a target. If today’s social media videos haven’t proved it yet you’re simply not spending enough time online. From cars & coffee exits to “testing in Mexico” there are plenty of videos showing just how Mustangs always seem to be getting the wrong type of attention. We’re not saying every Mustang owner is a bad apple, but there are plenty of guilty parties out there. Us Mustang enthusiasts shouldn’t have to drive with a target on our backs just because of these few bad apples, but sadly that’s the issue right now.
This cause and affect means you need to protect yourself while driving and one of the best ways to do so is with a dashcam. Back in the day we used to run a GoPro action cam as a way of recording our driving in case anything happened (good or bad!). But just like today’s popular 360-cams, or “gap cams” as they are called, that are mounted on a suction cupped pole off the back of a car, these rely not only on an internal battery for power, but their recording is often tied to an app. What this means is that in the heat of the moment you may forget to stop the recording and lose that critical footage that shows you were not at fault. The same issue lies with the battery. I’ve had my GoPro battery die halfway home from an event and now you have no recording at all. Not to mention these types of cameras are easy to steal mounted outside the car.
Using a modern dash camera, while not as cool as a 360-cam, is a much better option for security and peace of mind. With automatic loop recording you’ll never miss an incident, good or bad, and since the dash camera is powered by your Mustang’s 12-volt system you never have to worry about carrying extra batteries or your action cam battery dropping dead at the wrong time. Modern dash cams also have features like shock load sensing that automatically records and locks the recording upon impact with another vehicleor object. They also can monitor your Mustang’s surroundings in a parking lotand record automatically if someone hits your parked Mustang or tries to breakinto it. All in all, a dash cam is a much wiser investment and security tool than an action camera. While installation is a little more involved, a good dash cam should be a major consideration for your Mustang, whether it is your daily driver or a weekend toy.
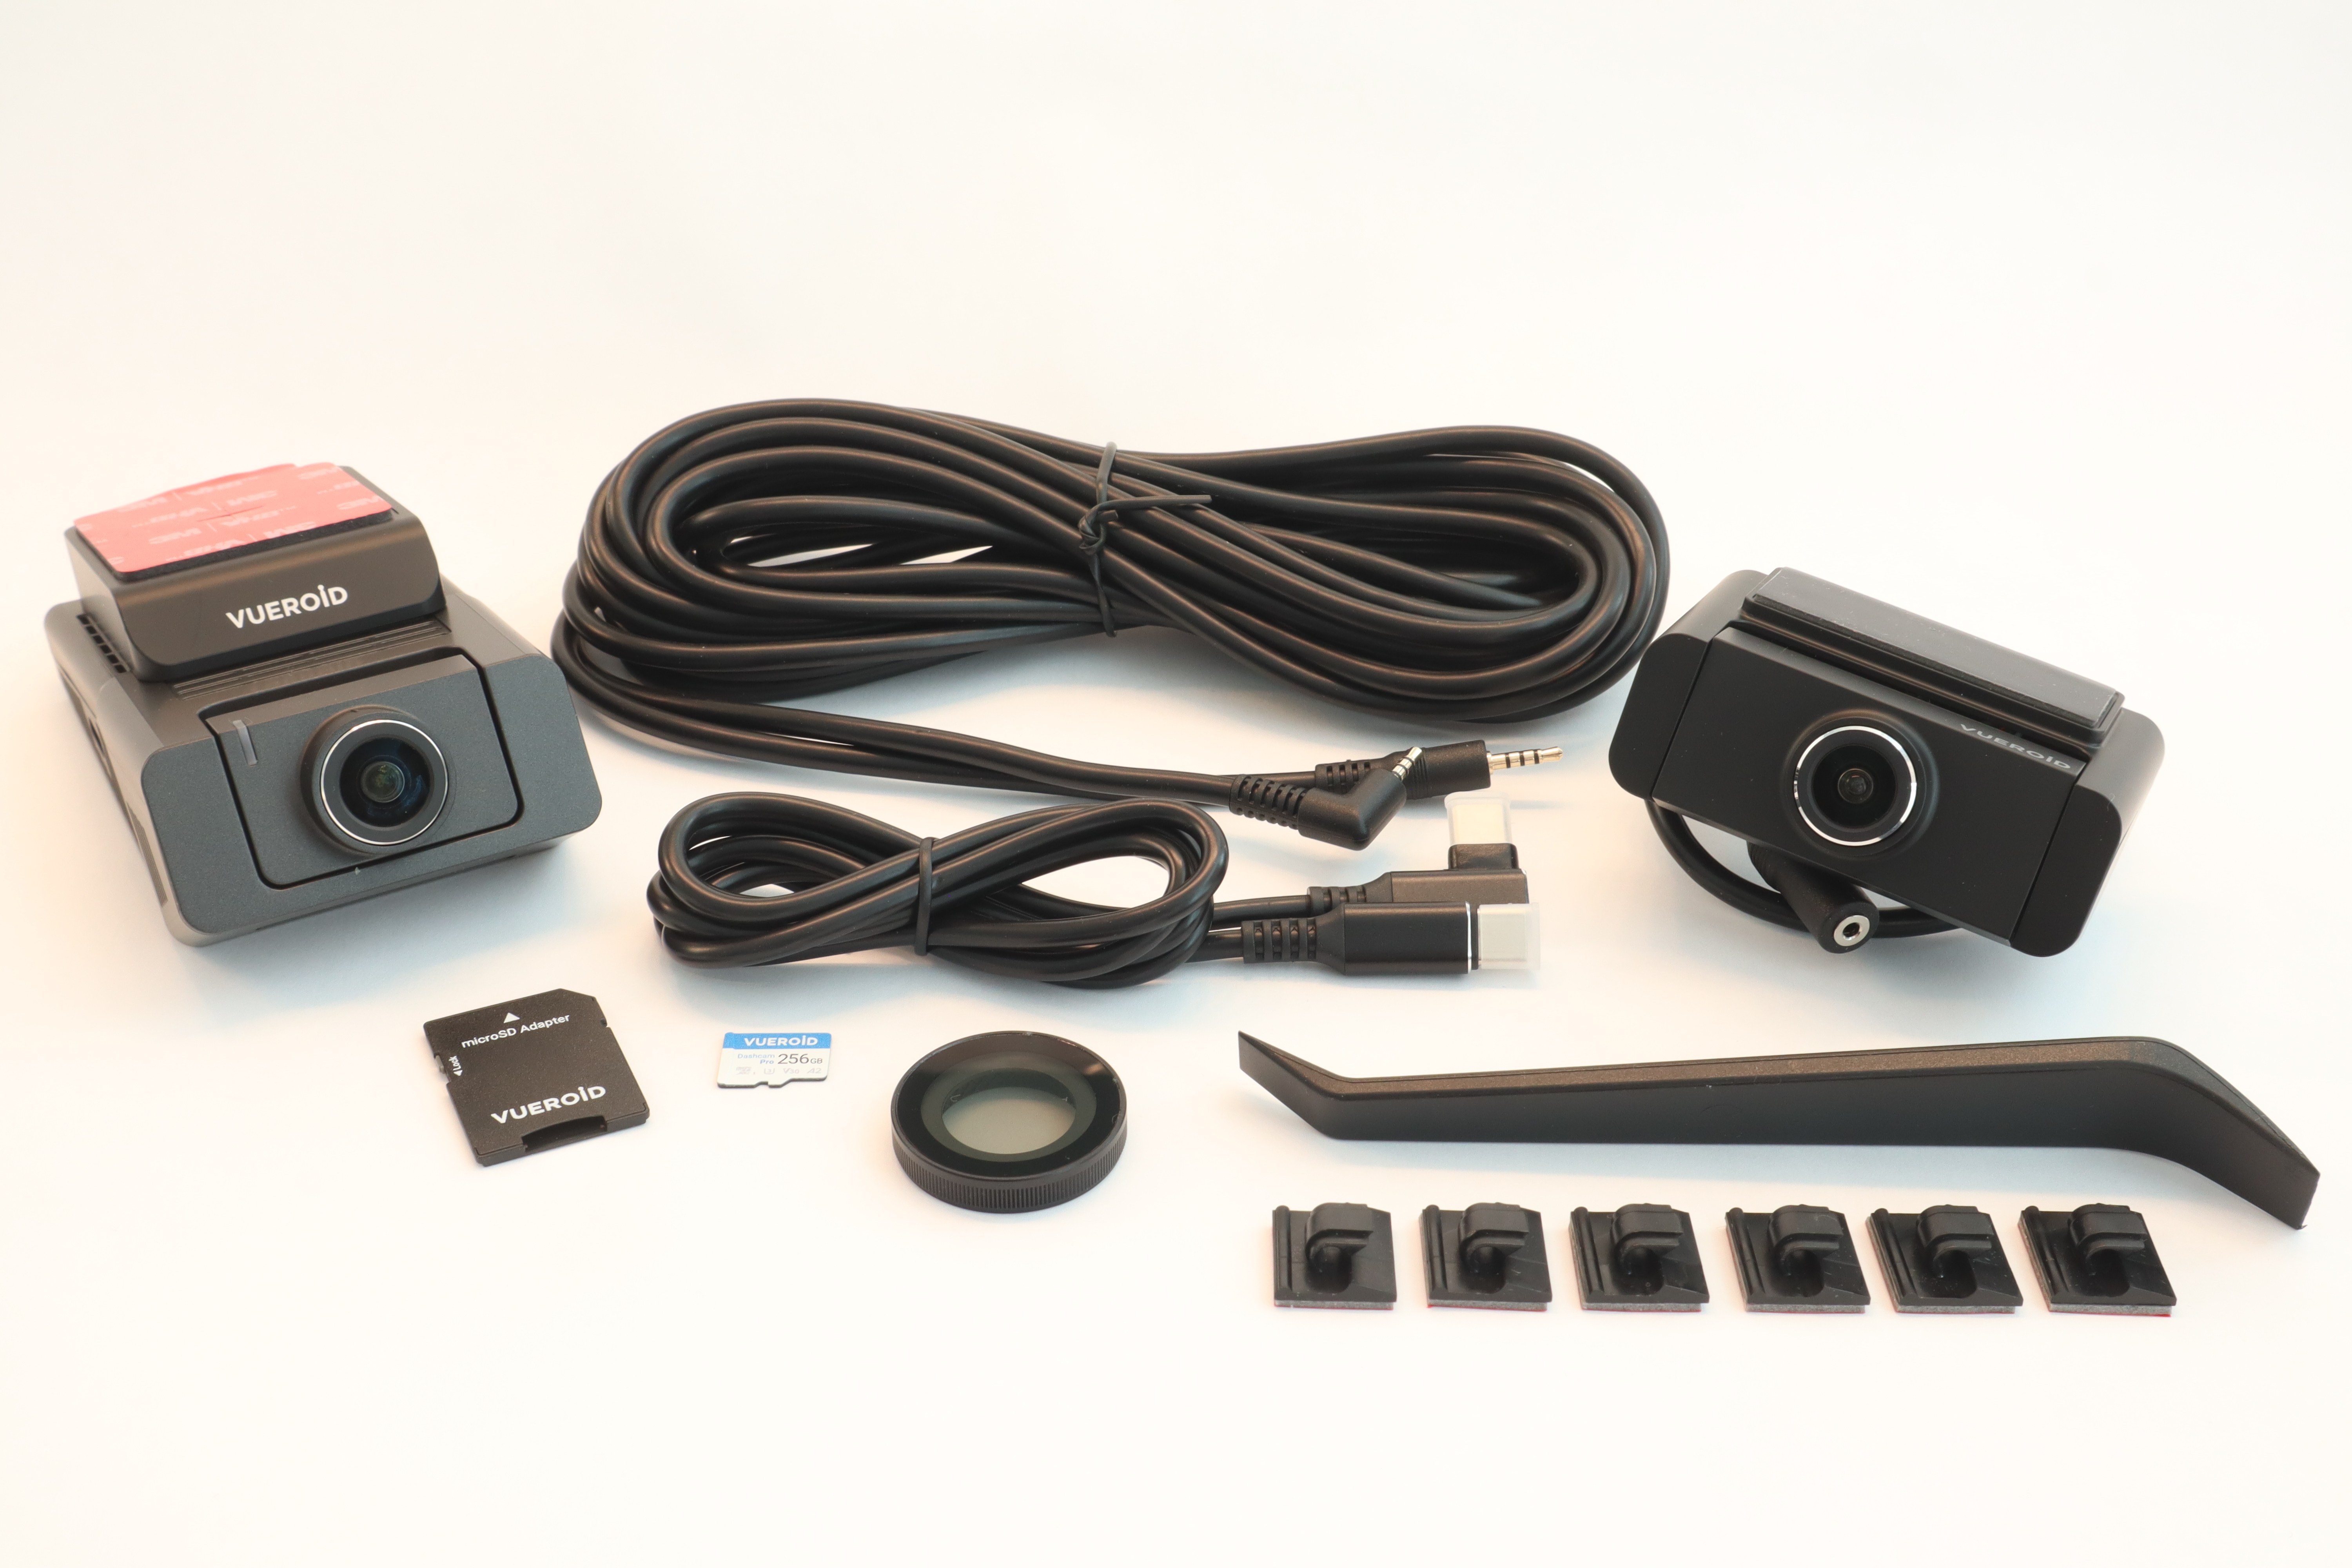
We researched dash cam options, and while there are a lot of choices out there, we wanted a couple of important features that narrowed the playing field for us a bit and helped with the decision-making process. We knew we wanted a Sony Starvis image sensor, 4K resolution, super clear night vision, motion detection for parking, an easy-to-use app that provides quick sharing of files, and the ability to expand with rear view and interior cameras. Our search results kept having us coming back to the Vueroid S1 4K Infinite] series of dash cams. Available as a base dash cam, a two-channel system (front and separate rear cameras), or a three-channel system (front, rear, and interior cameras),we opted for the middle option, the S1 4K Infinite 2 CH system bundle that includes a 256GB micro SD card. If you’ve installed aftermarket car audio before or even something like a radar detector, then this will be a breeze for you.Hit the photos and see for yourself. Get yours today from Vueroid’s Amazon store and have that digital evidence in your corner to protect your investment.
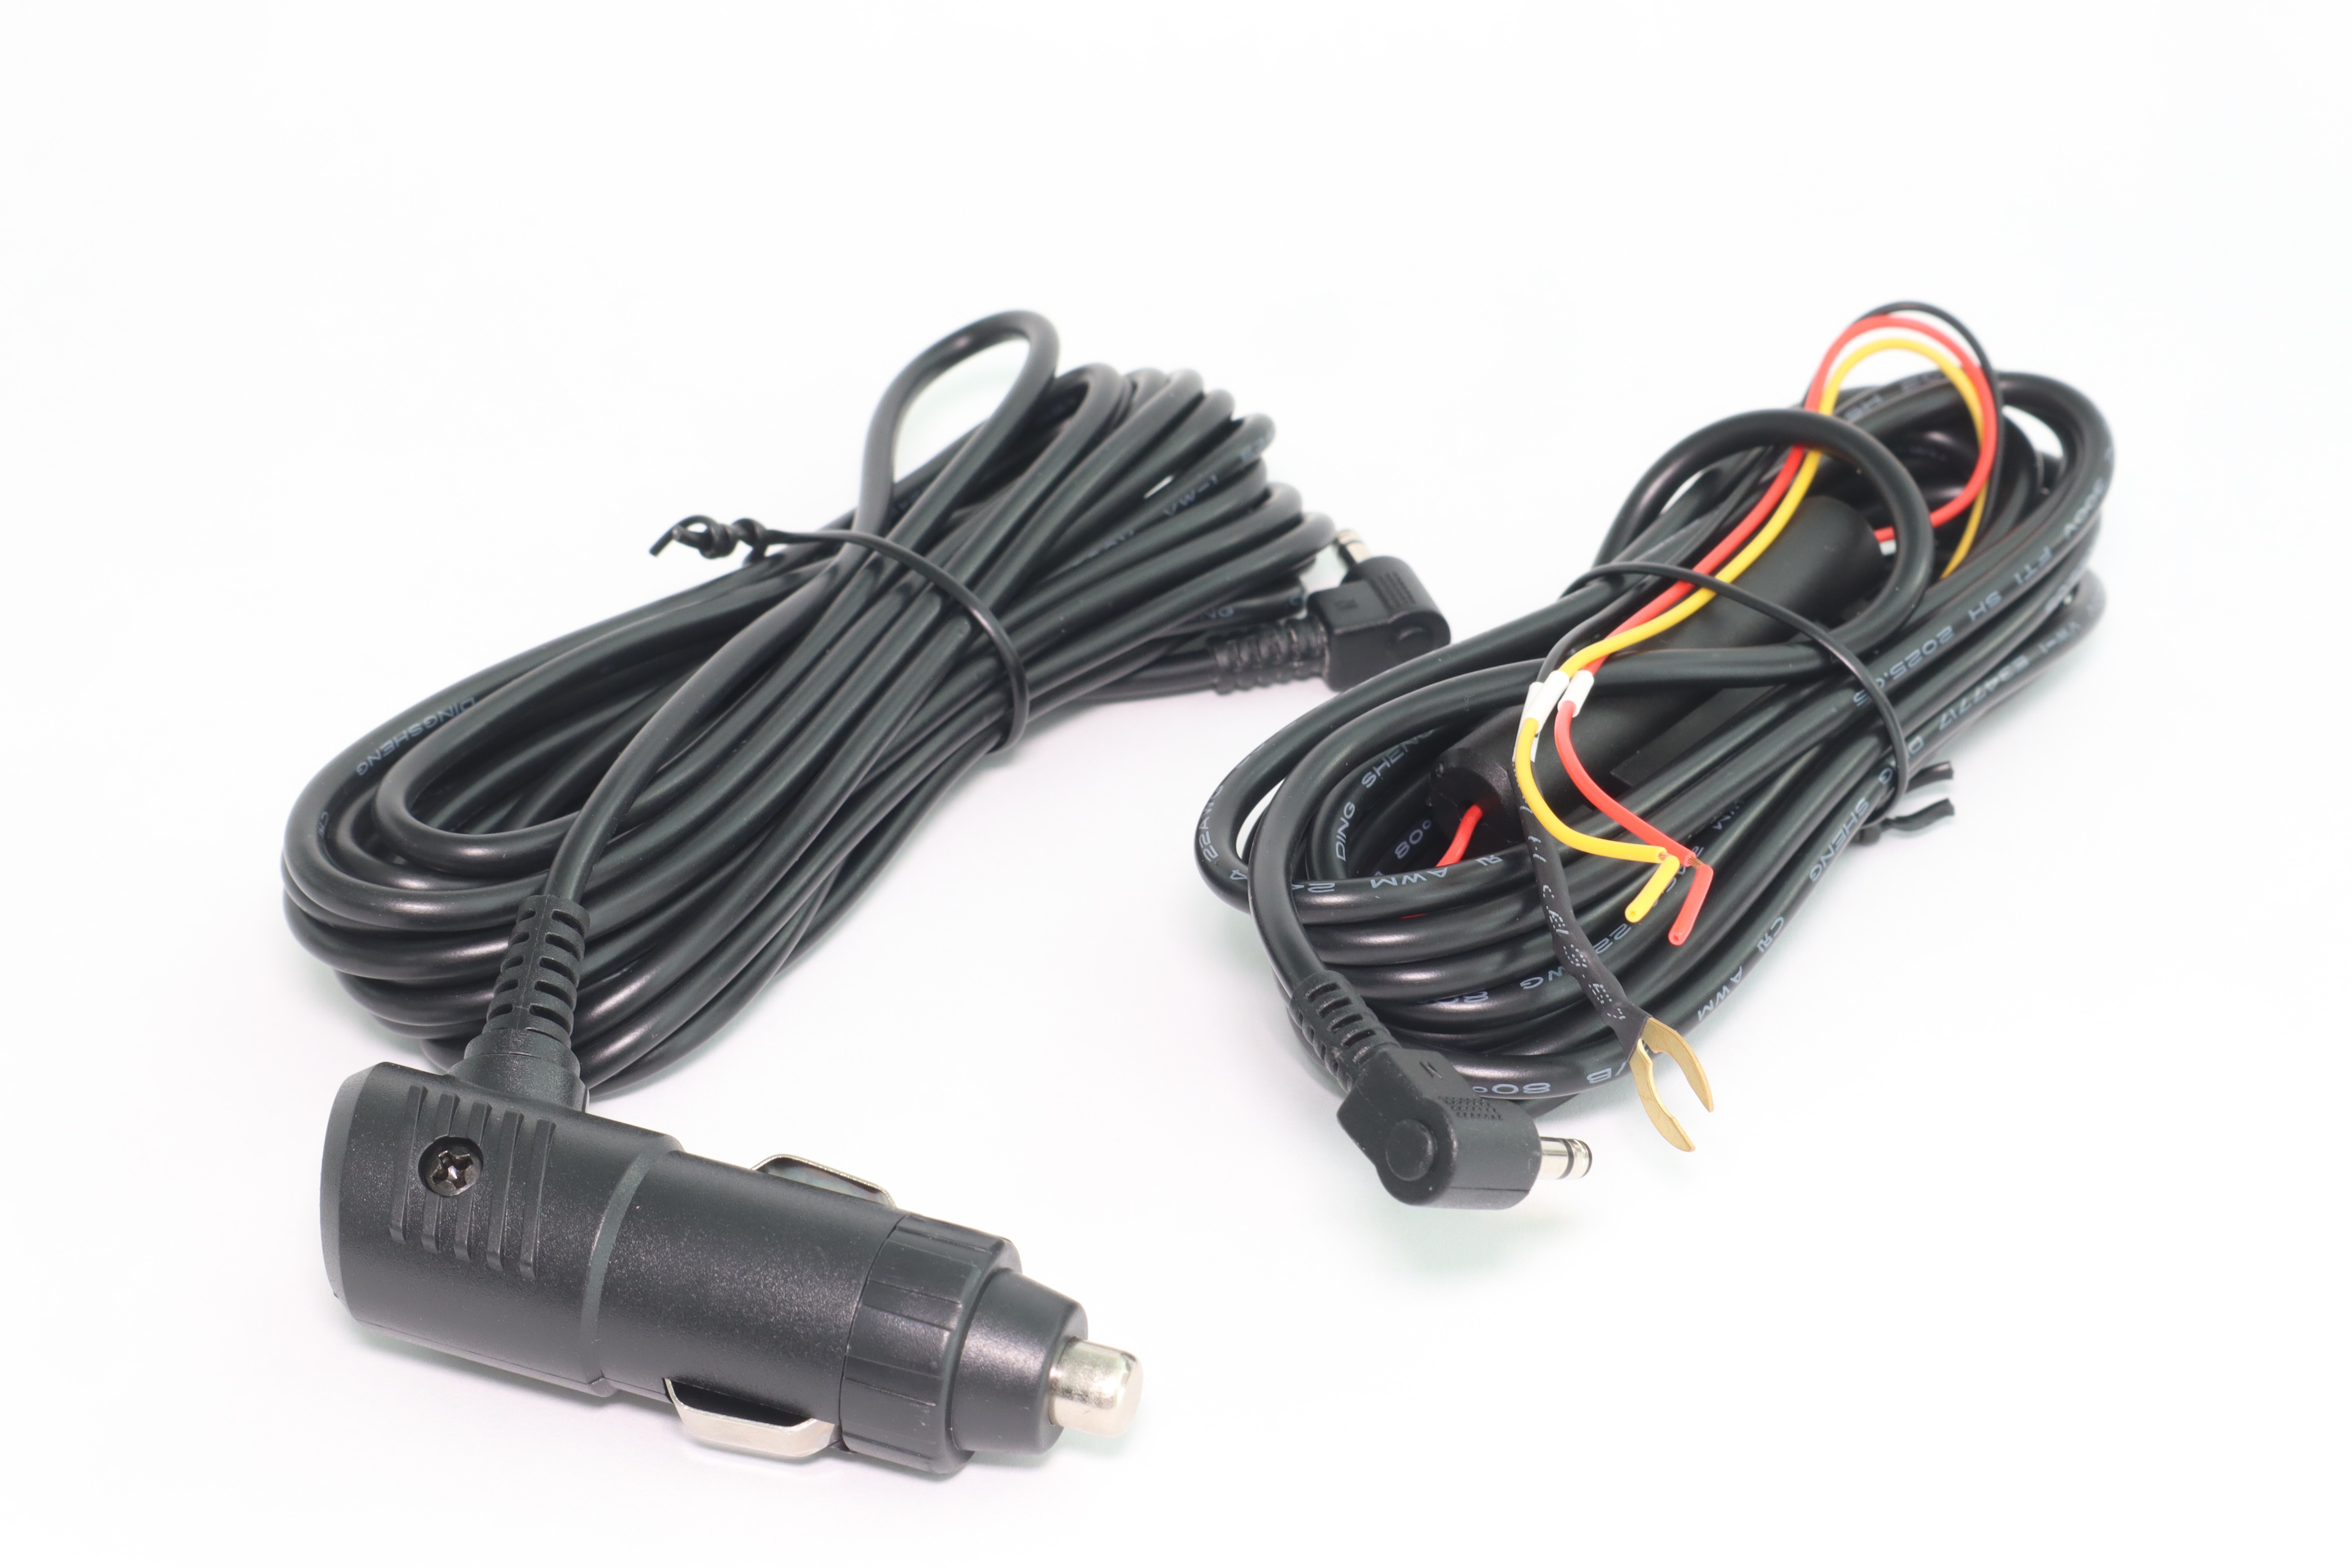
Included in the box with the front and rear camera modules, rear camera cable, and more are the two main power supply options you can use; 12V power port or direct wire. Vueroid does offer a fuse tap option with several fuse tap sizes (standard ATO, mini, etc.) if you prefer to connect to a fuse in your fuse box. There is also an OBDII port connection option as well. These are available in their online store.

With our Vueroid S1 4K Infinite system laid out on our work bench we opted to print the available online instructions out to have a hard copy easily accessible while working in the car. Step one is to install the bundle’s included micro-SD card into the camera body.
Next is finding a suitable location forthe front facing camera. You don’t want it too high, as you have power and rear camera connections to make, but you don’t want it too low either in your field of view. We had to ignore our internal struggle of needing to see the camera’s screen while driving. You don’t, it records automatically and the screen shuts off automatically as well so there’s no glare at night.
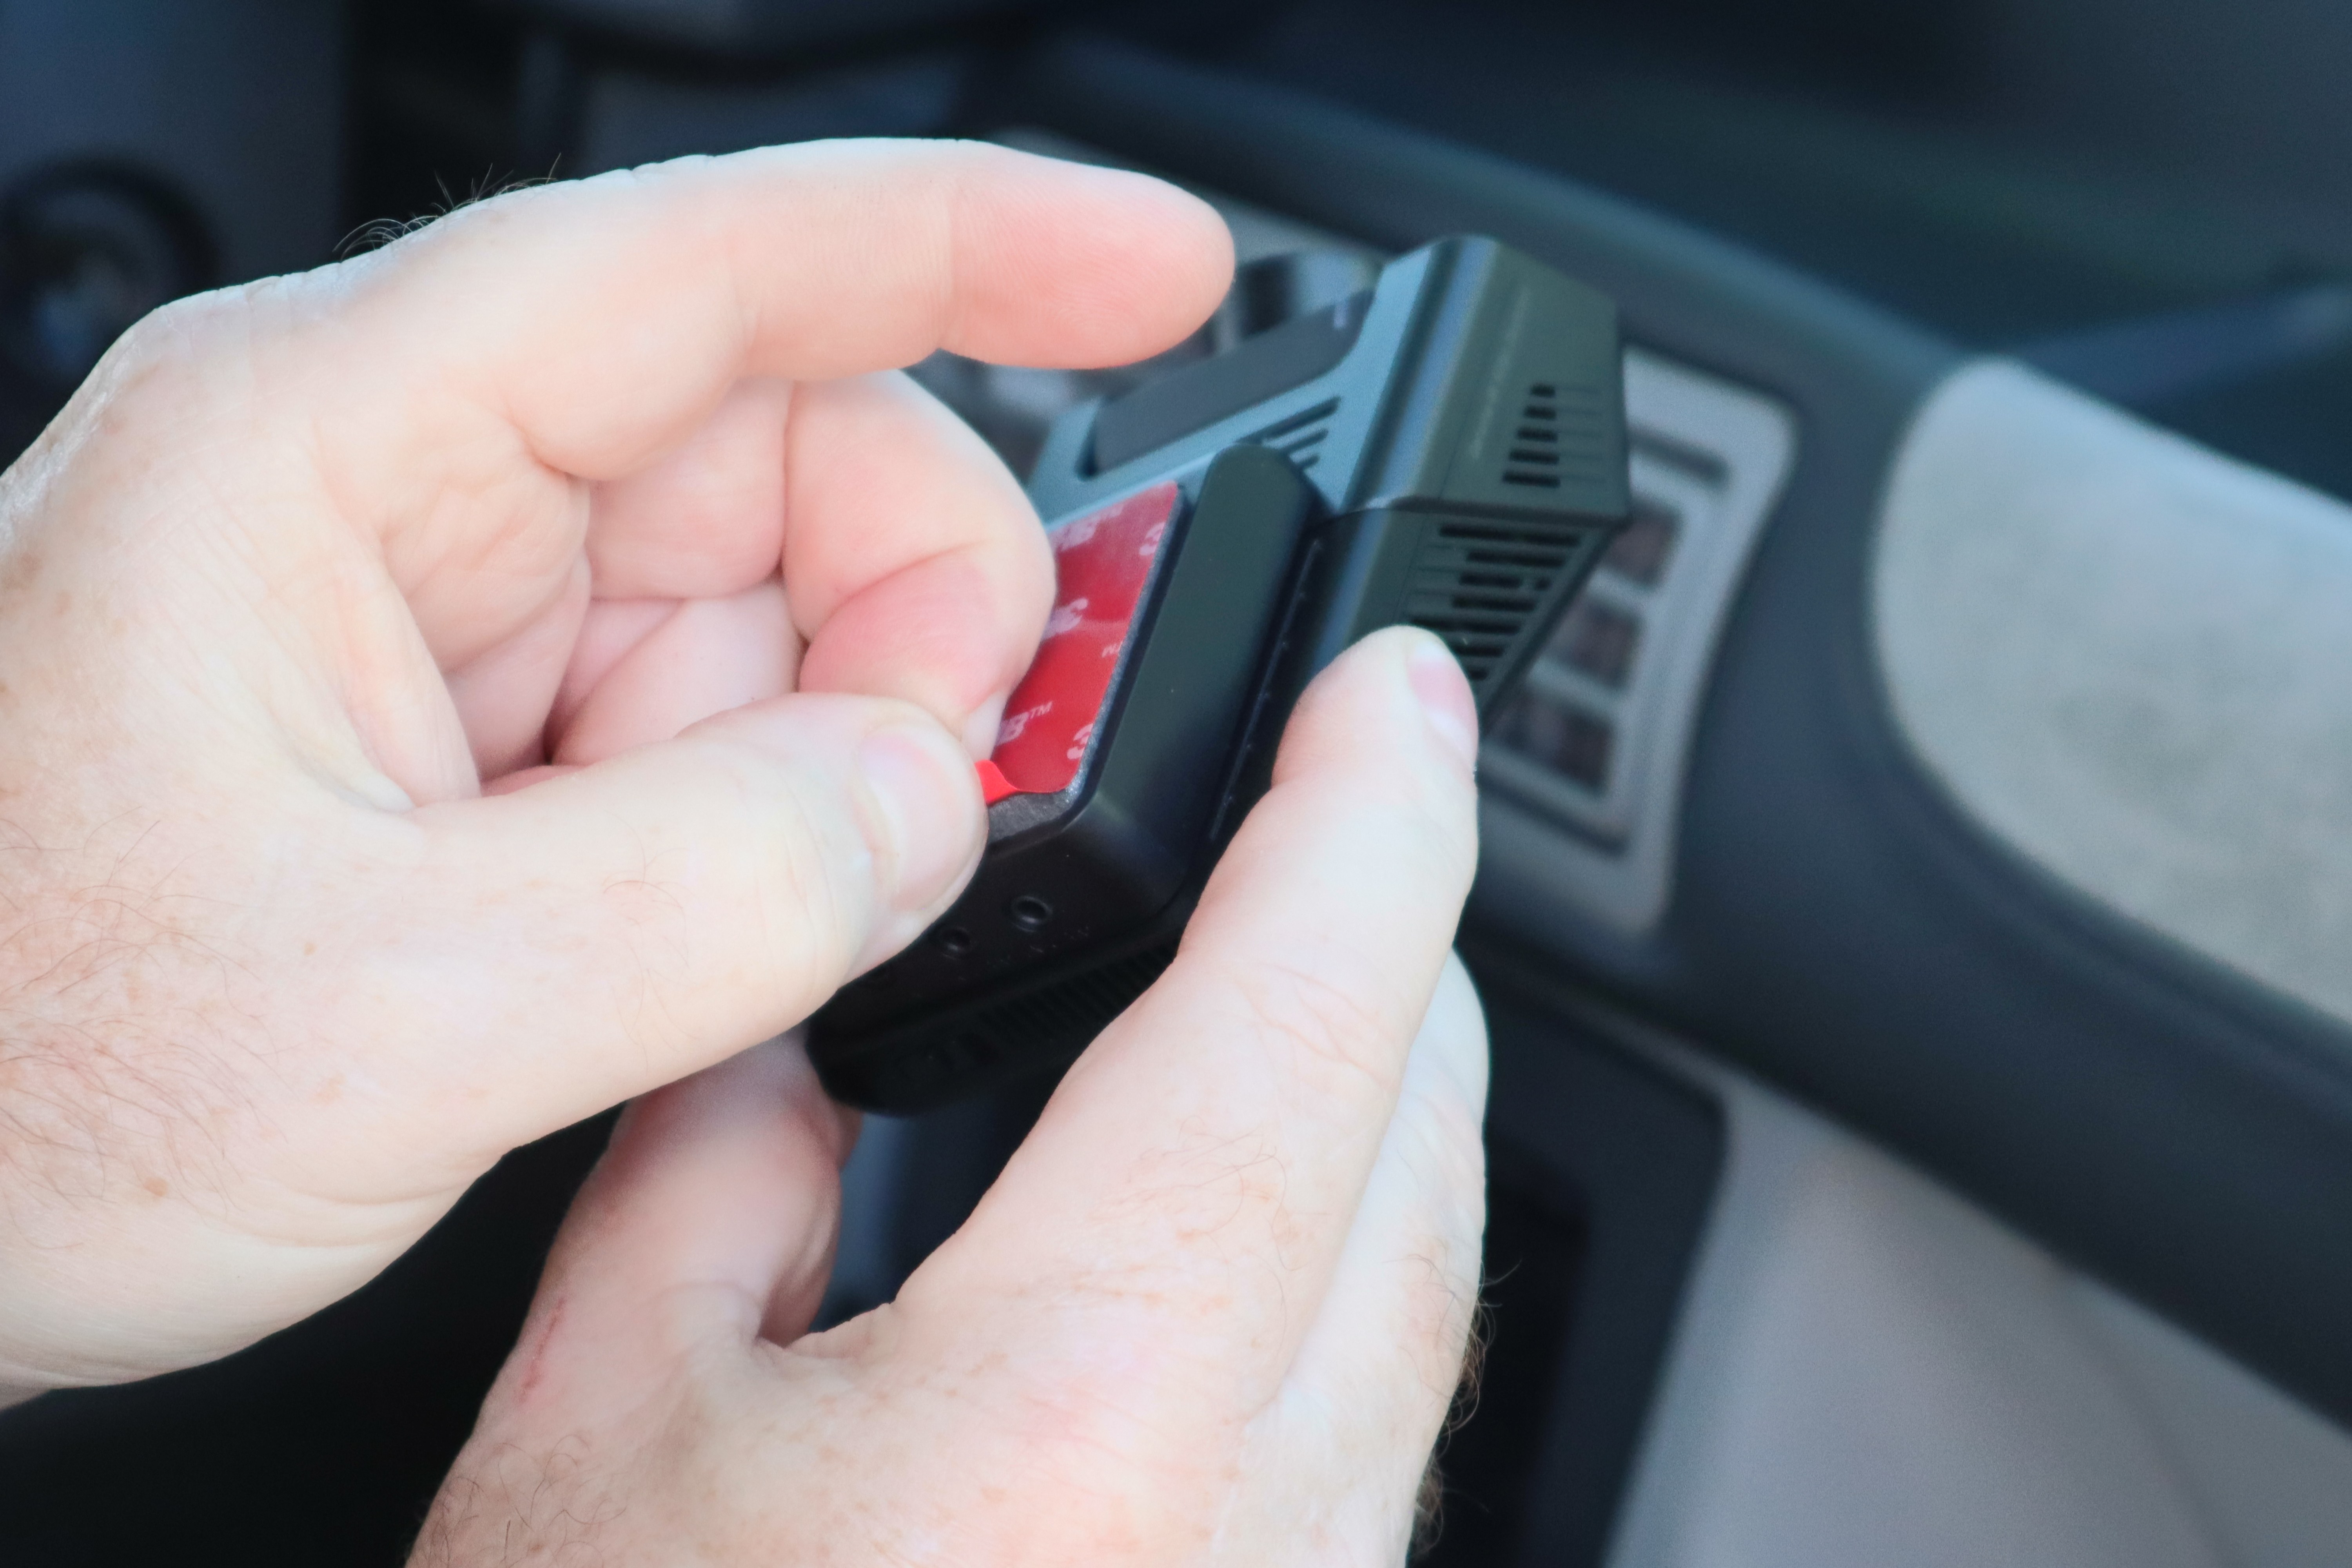
Once you’ve found a workable location you’re happy with, peel off the adhesive pad’s protective cover in preparation of placing the camera (be sure your windshield is clean and dry too!). If you’re worried about the camera view you can always power the camera up temporarily to confirm placement/view.
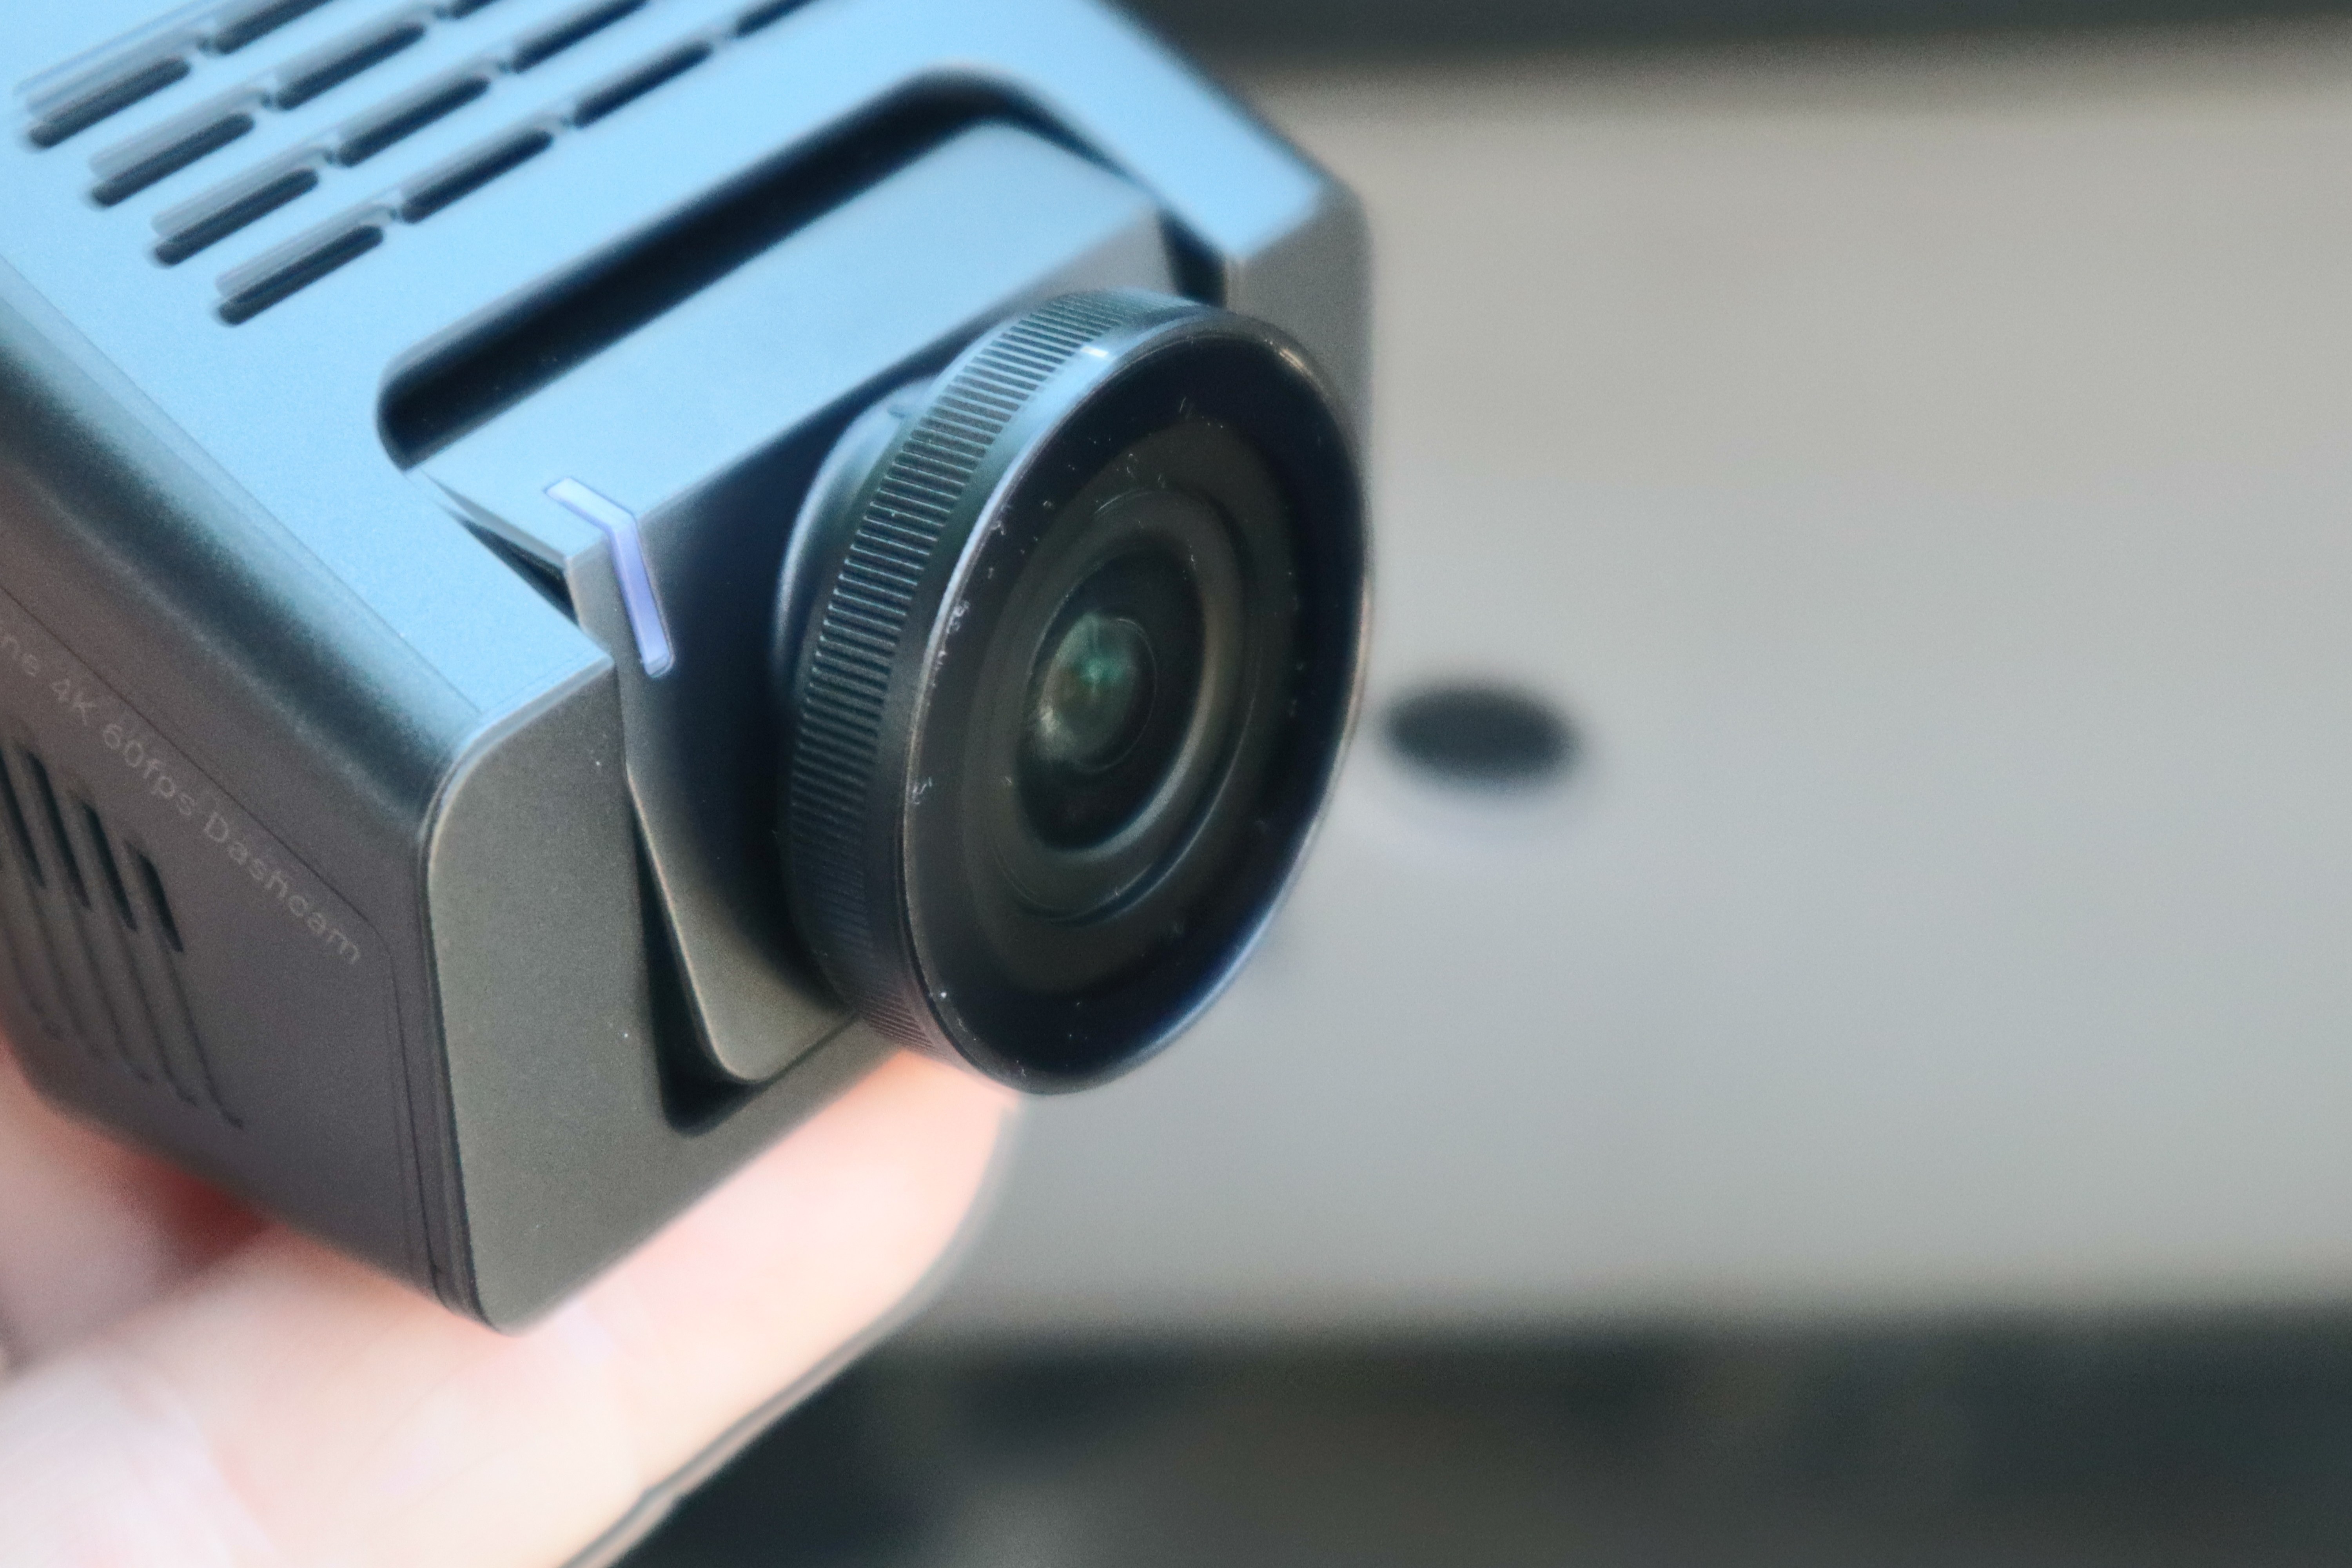
If your windshield is tinted you probably don’t need the included CPL filter for the front lens, but since our windshield was not tinted, we popped it onto the camera before final installation.
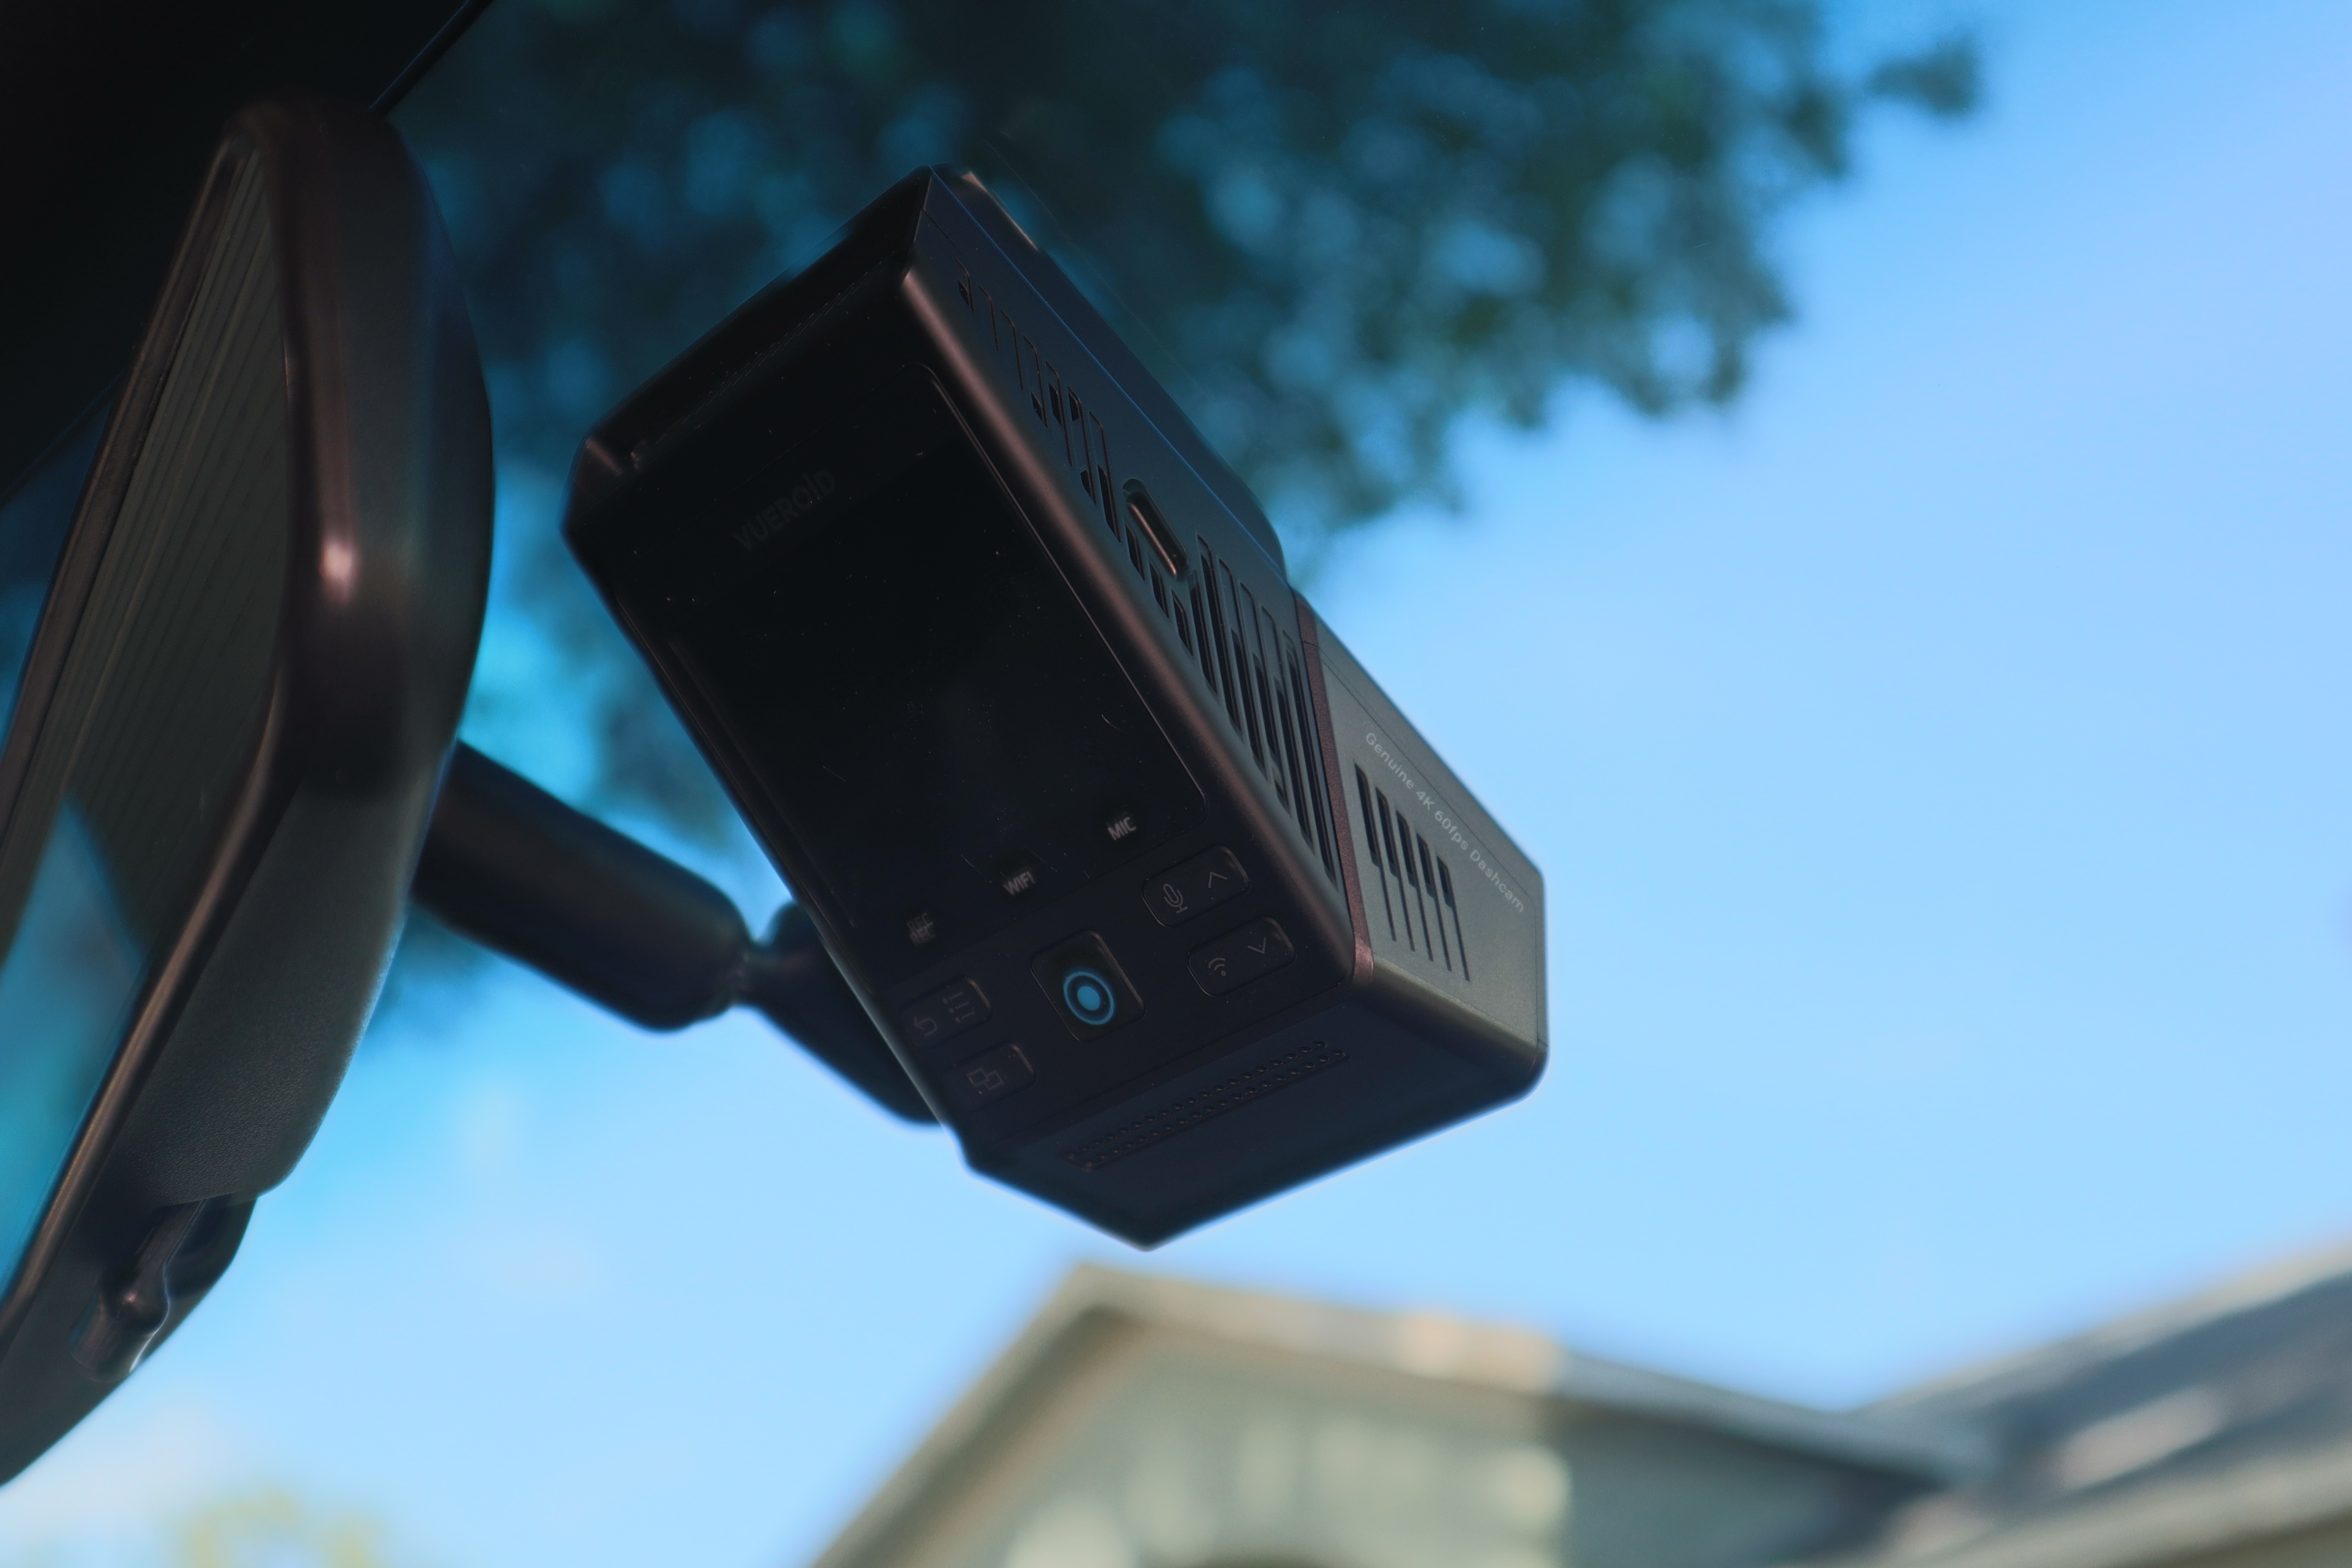
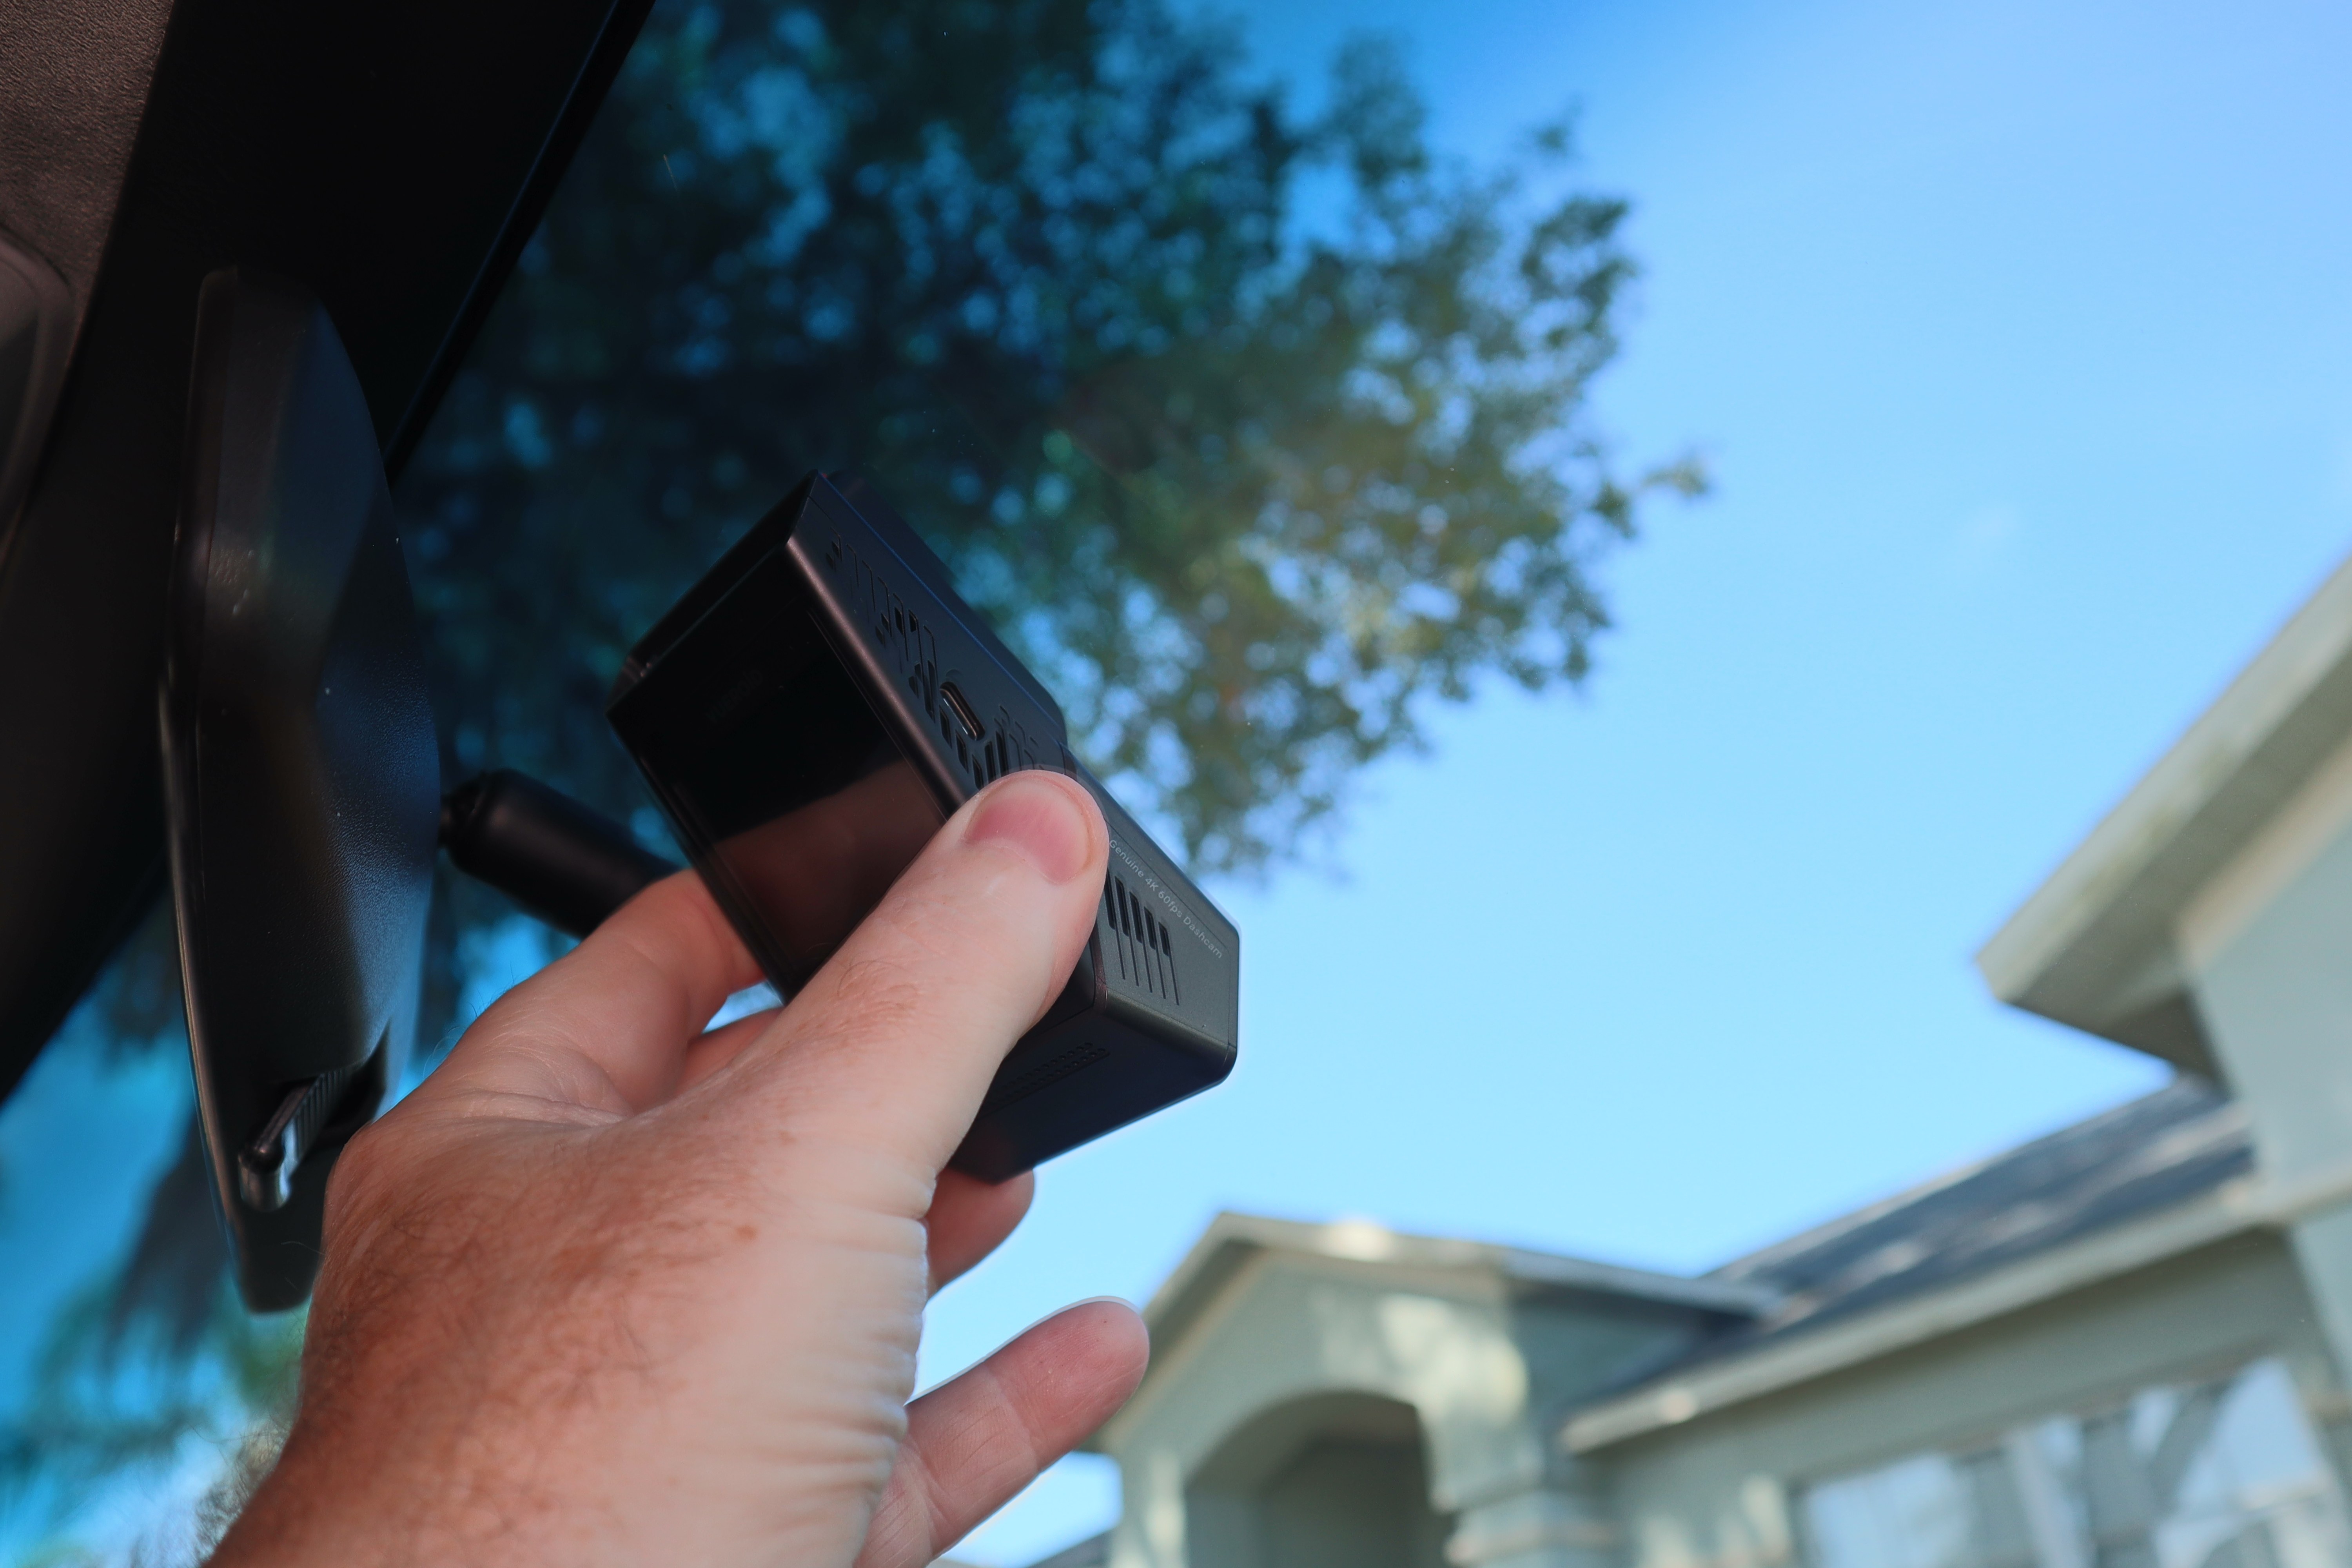
Our final installation behind the rear-view mirror on the passenger side. This will provide easy access to the camera controls if needed while keeping it out of our view while driving.
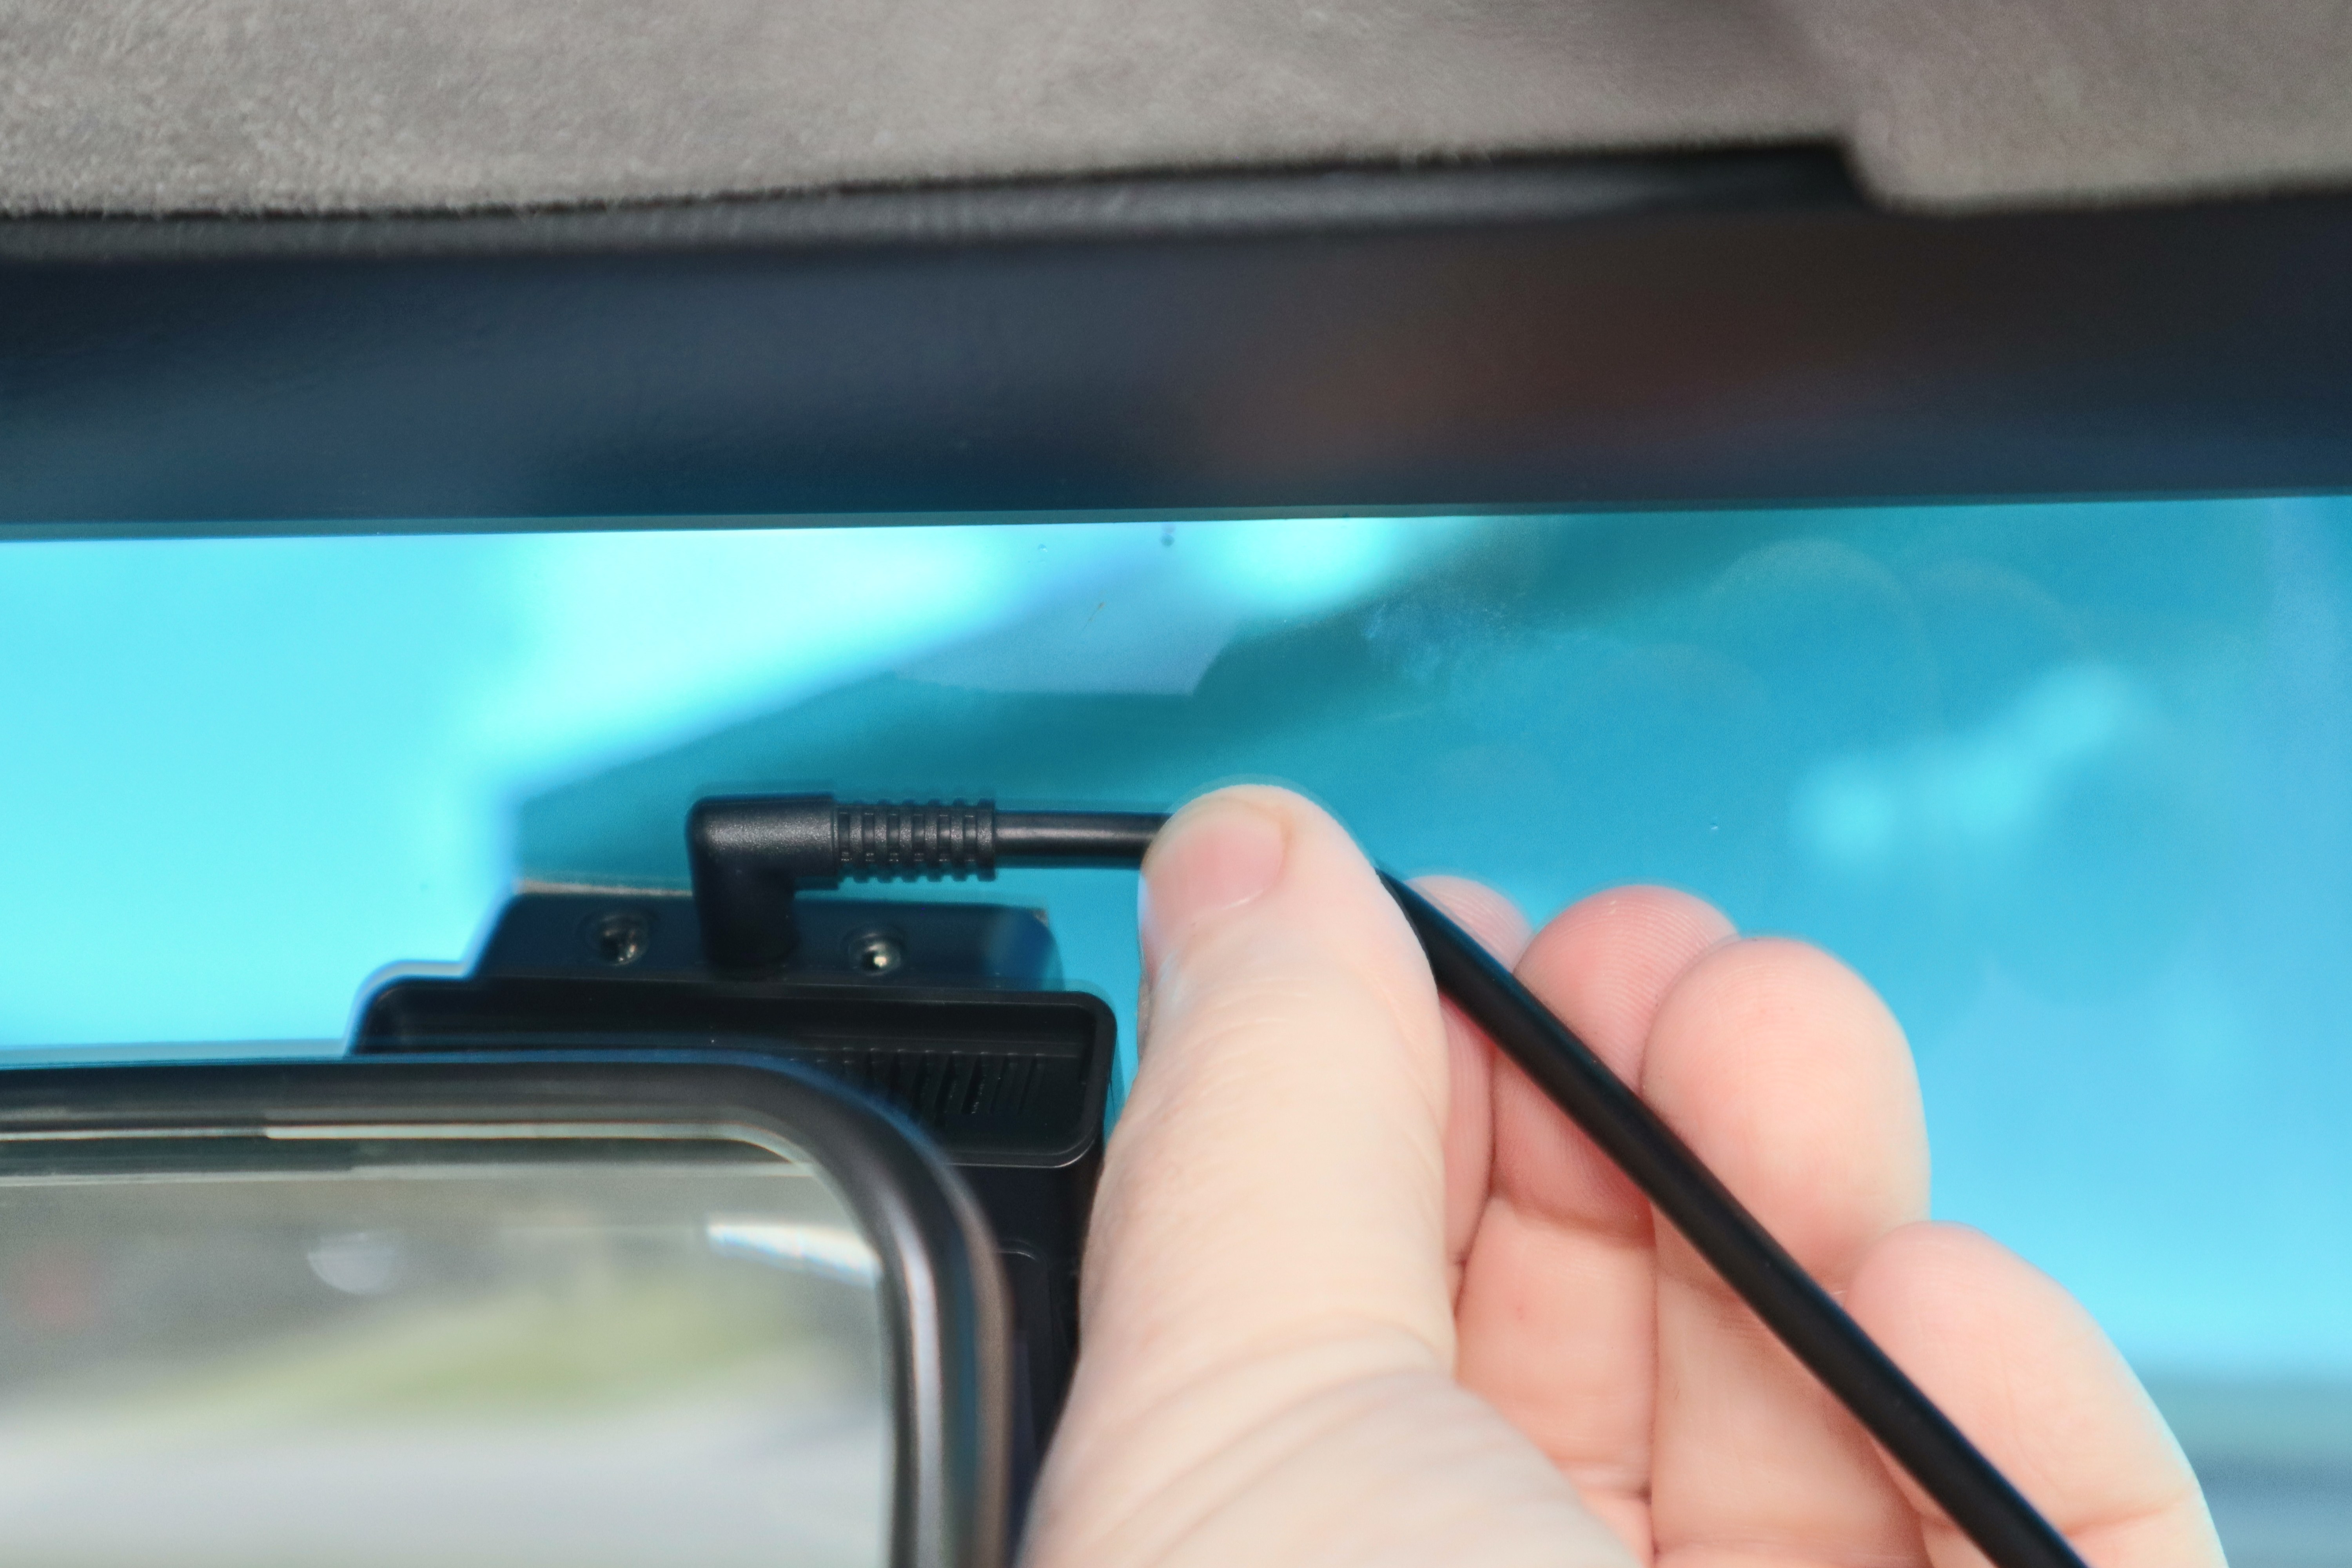
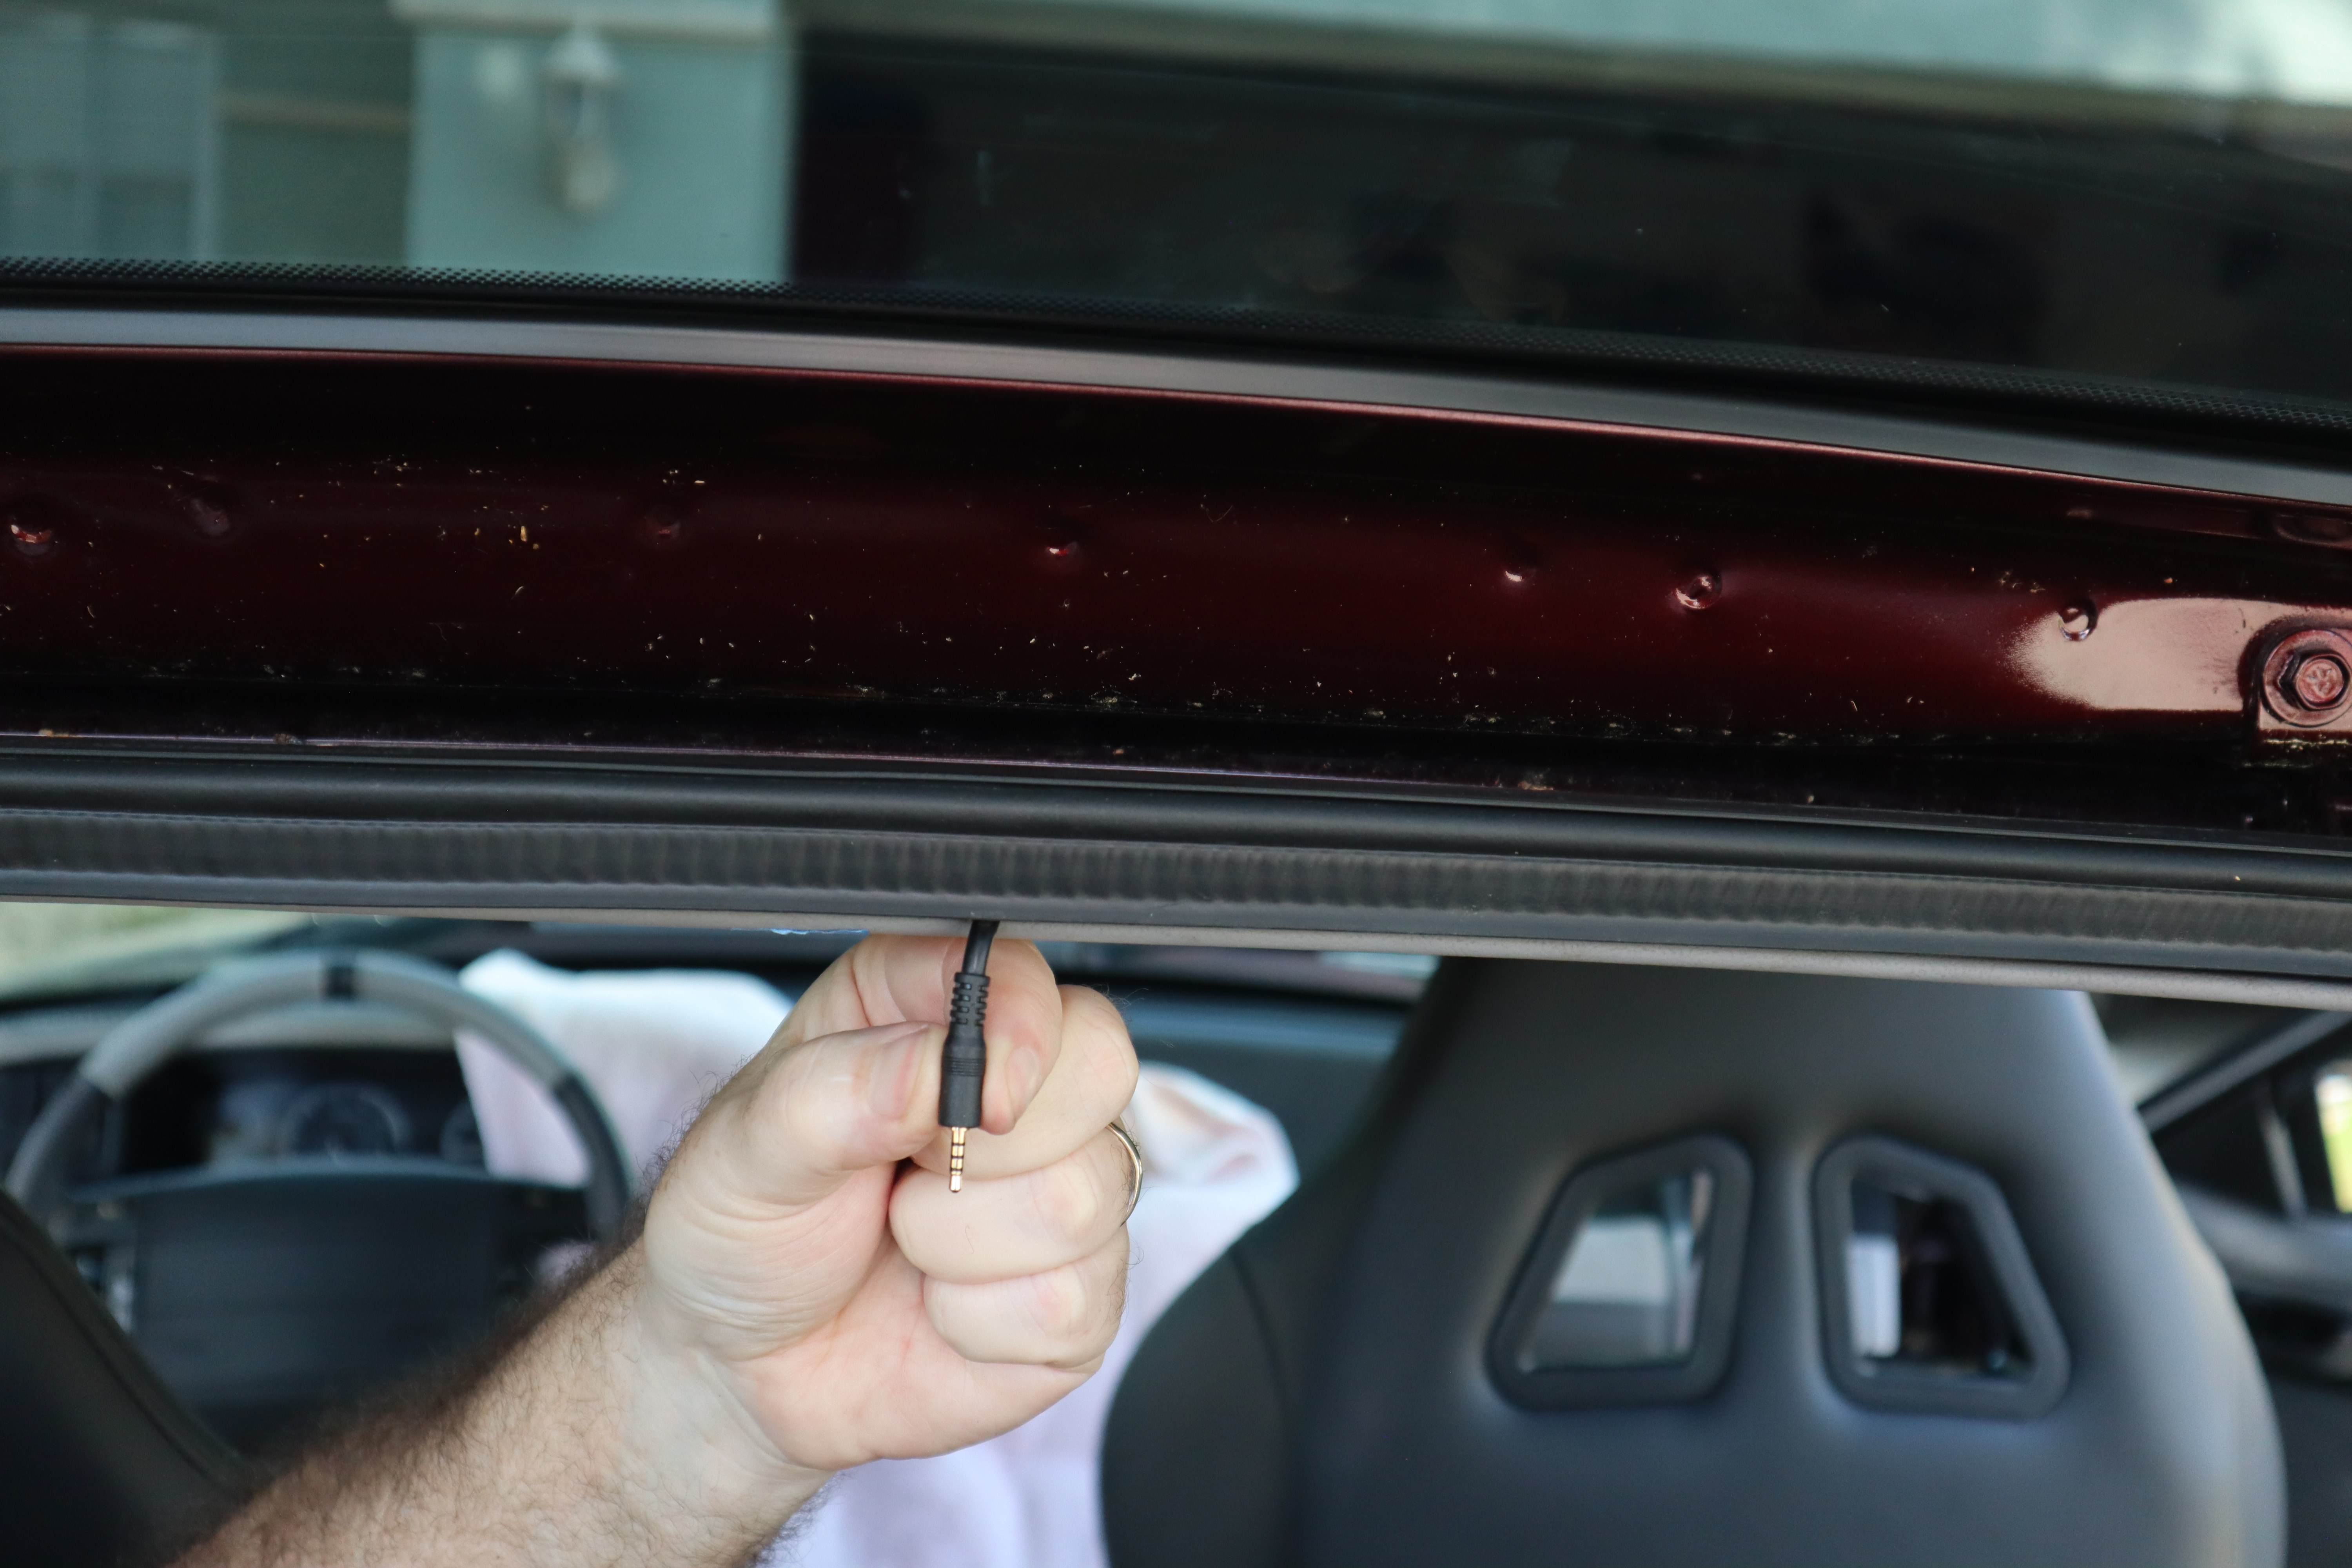
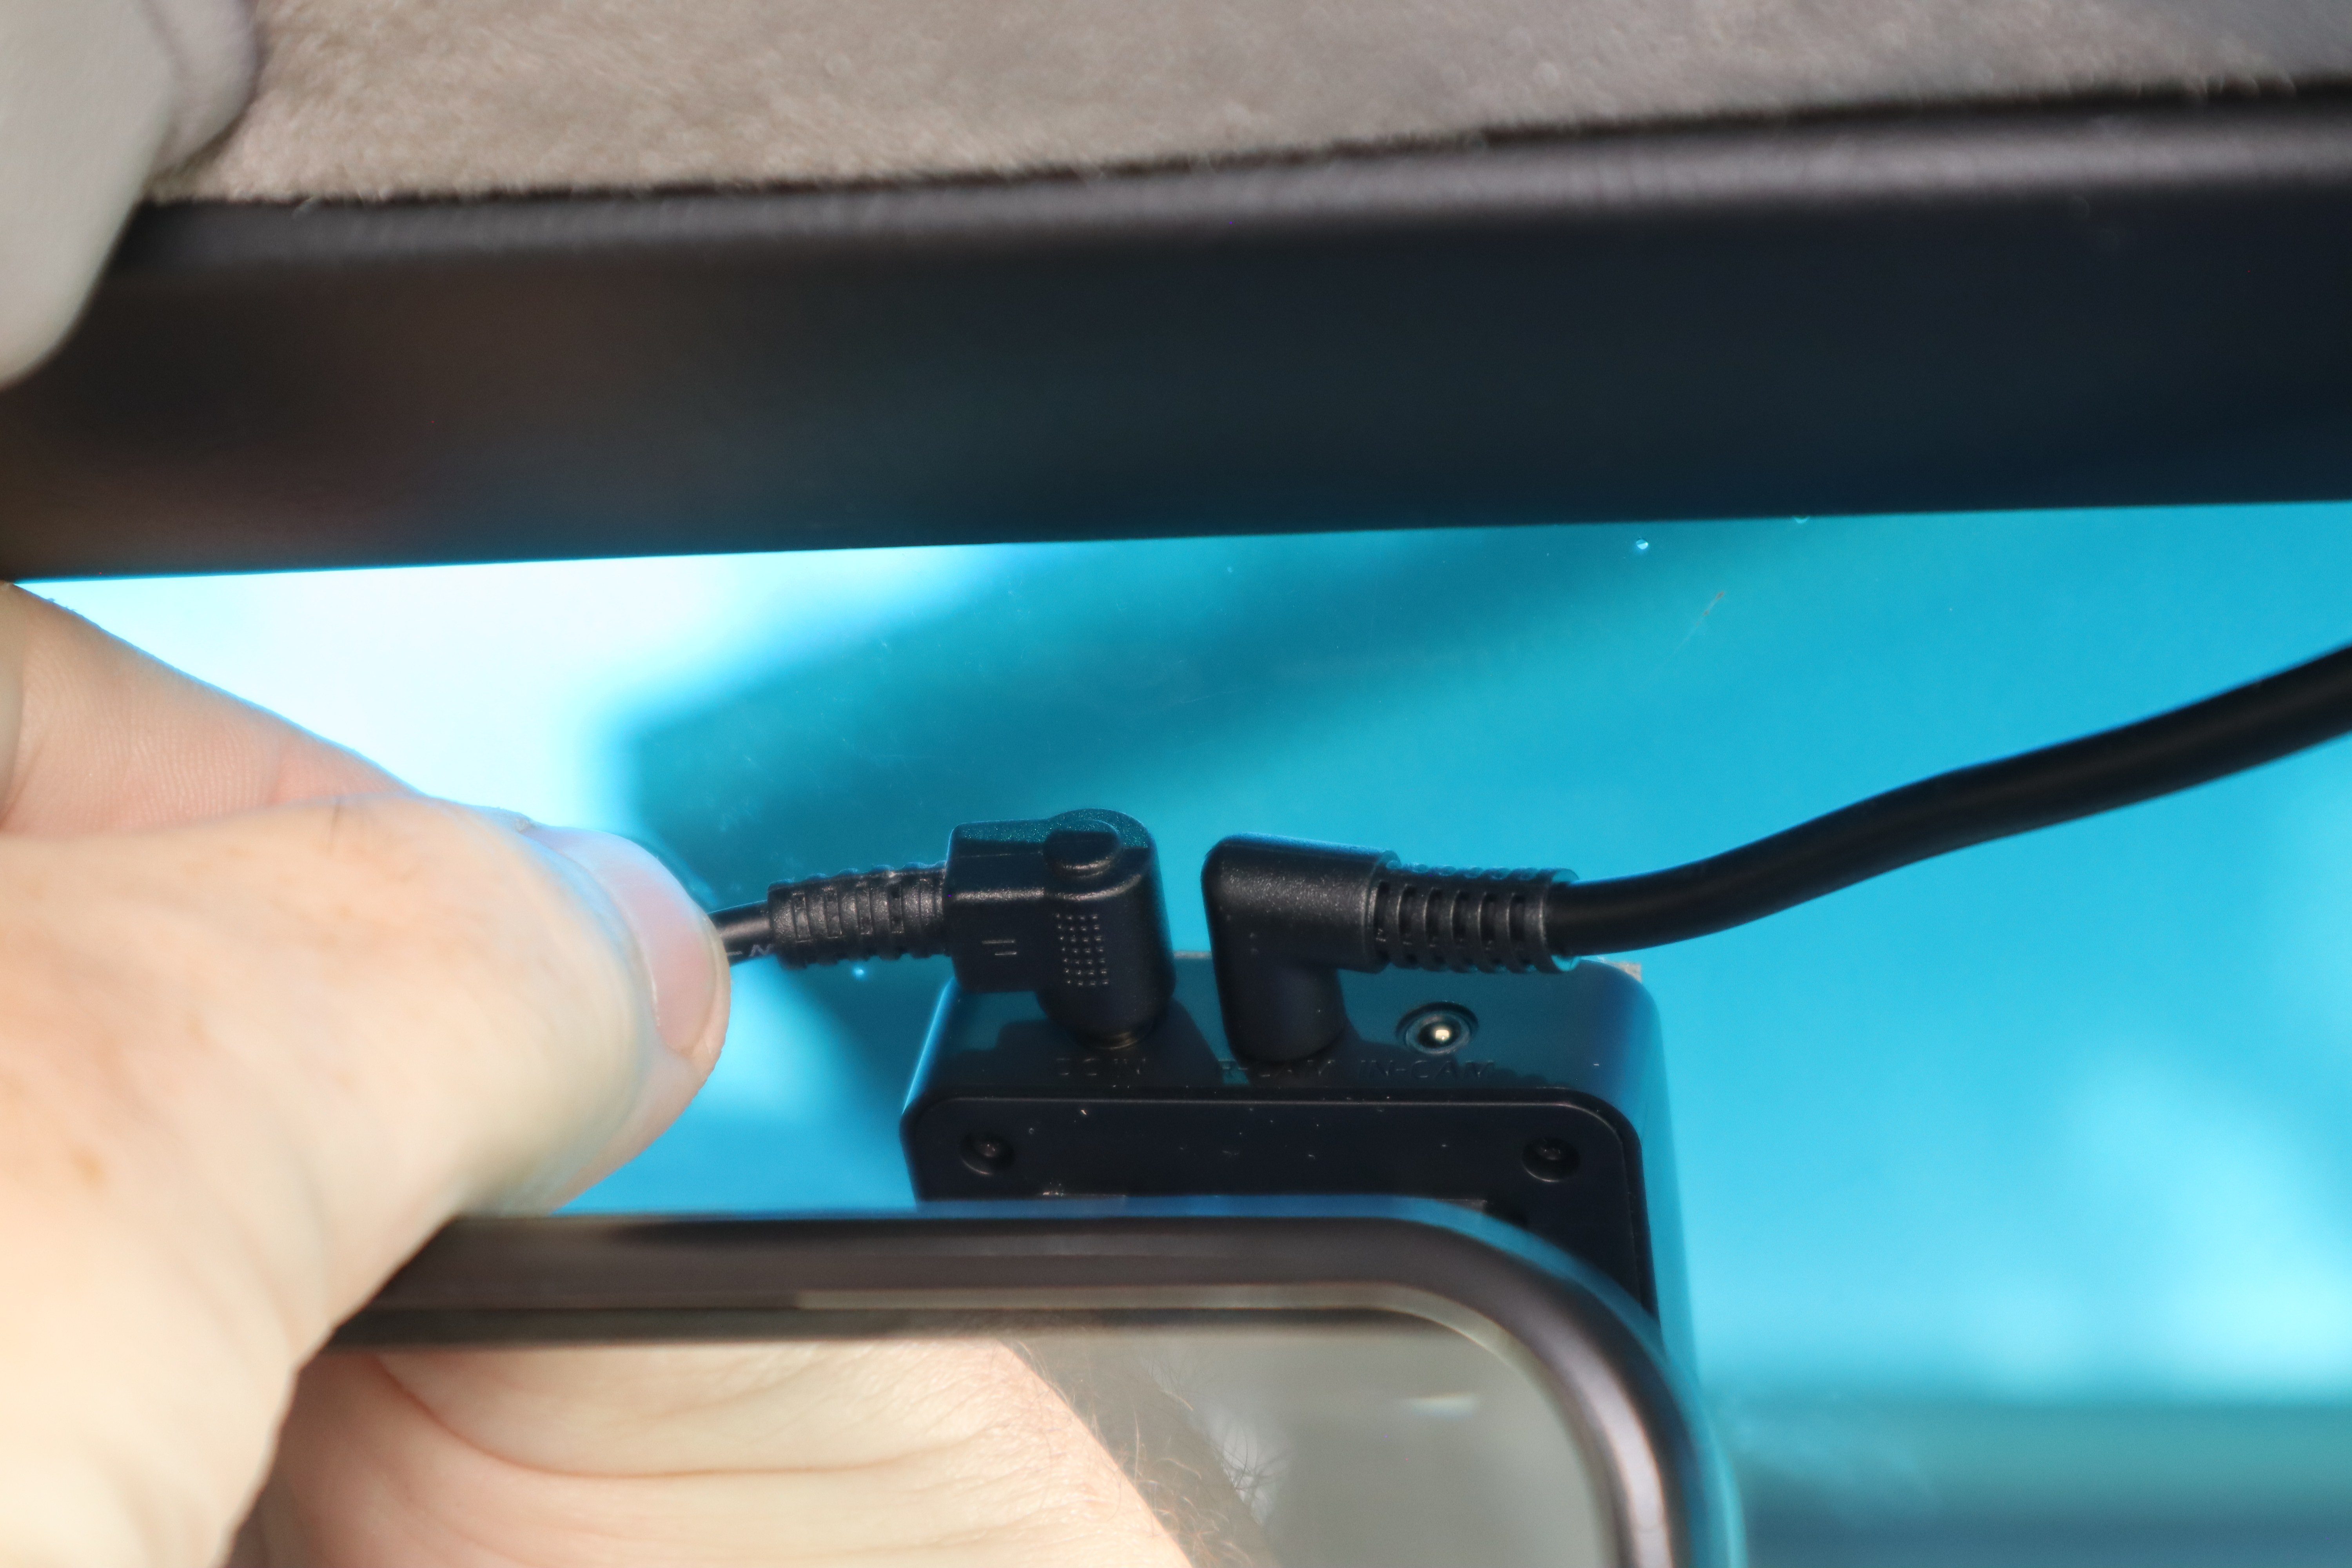
The top of the front camera houses the connections for power, rear camera, and interior camera (if optioned) shown from left to right. The long rear camera cable will be routed first, beginning with the 90-degree connector end plugged into the camera body as shown.
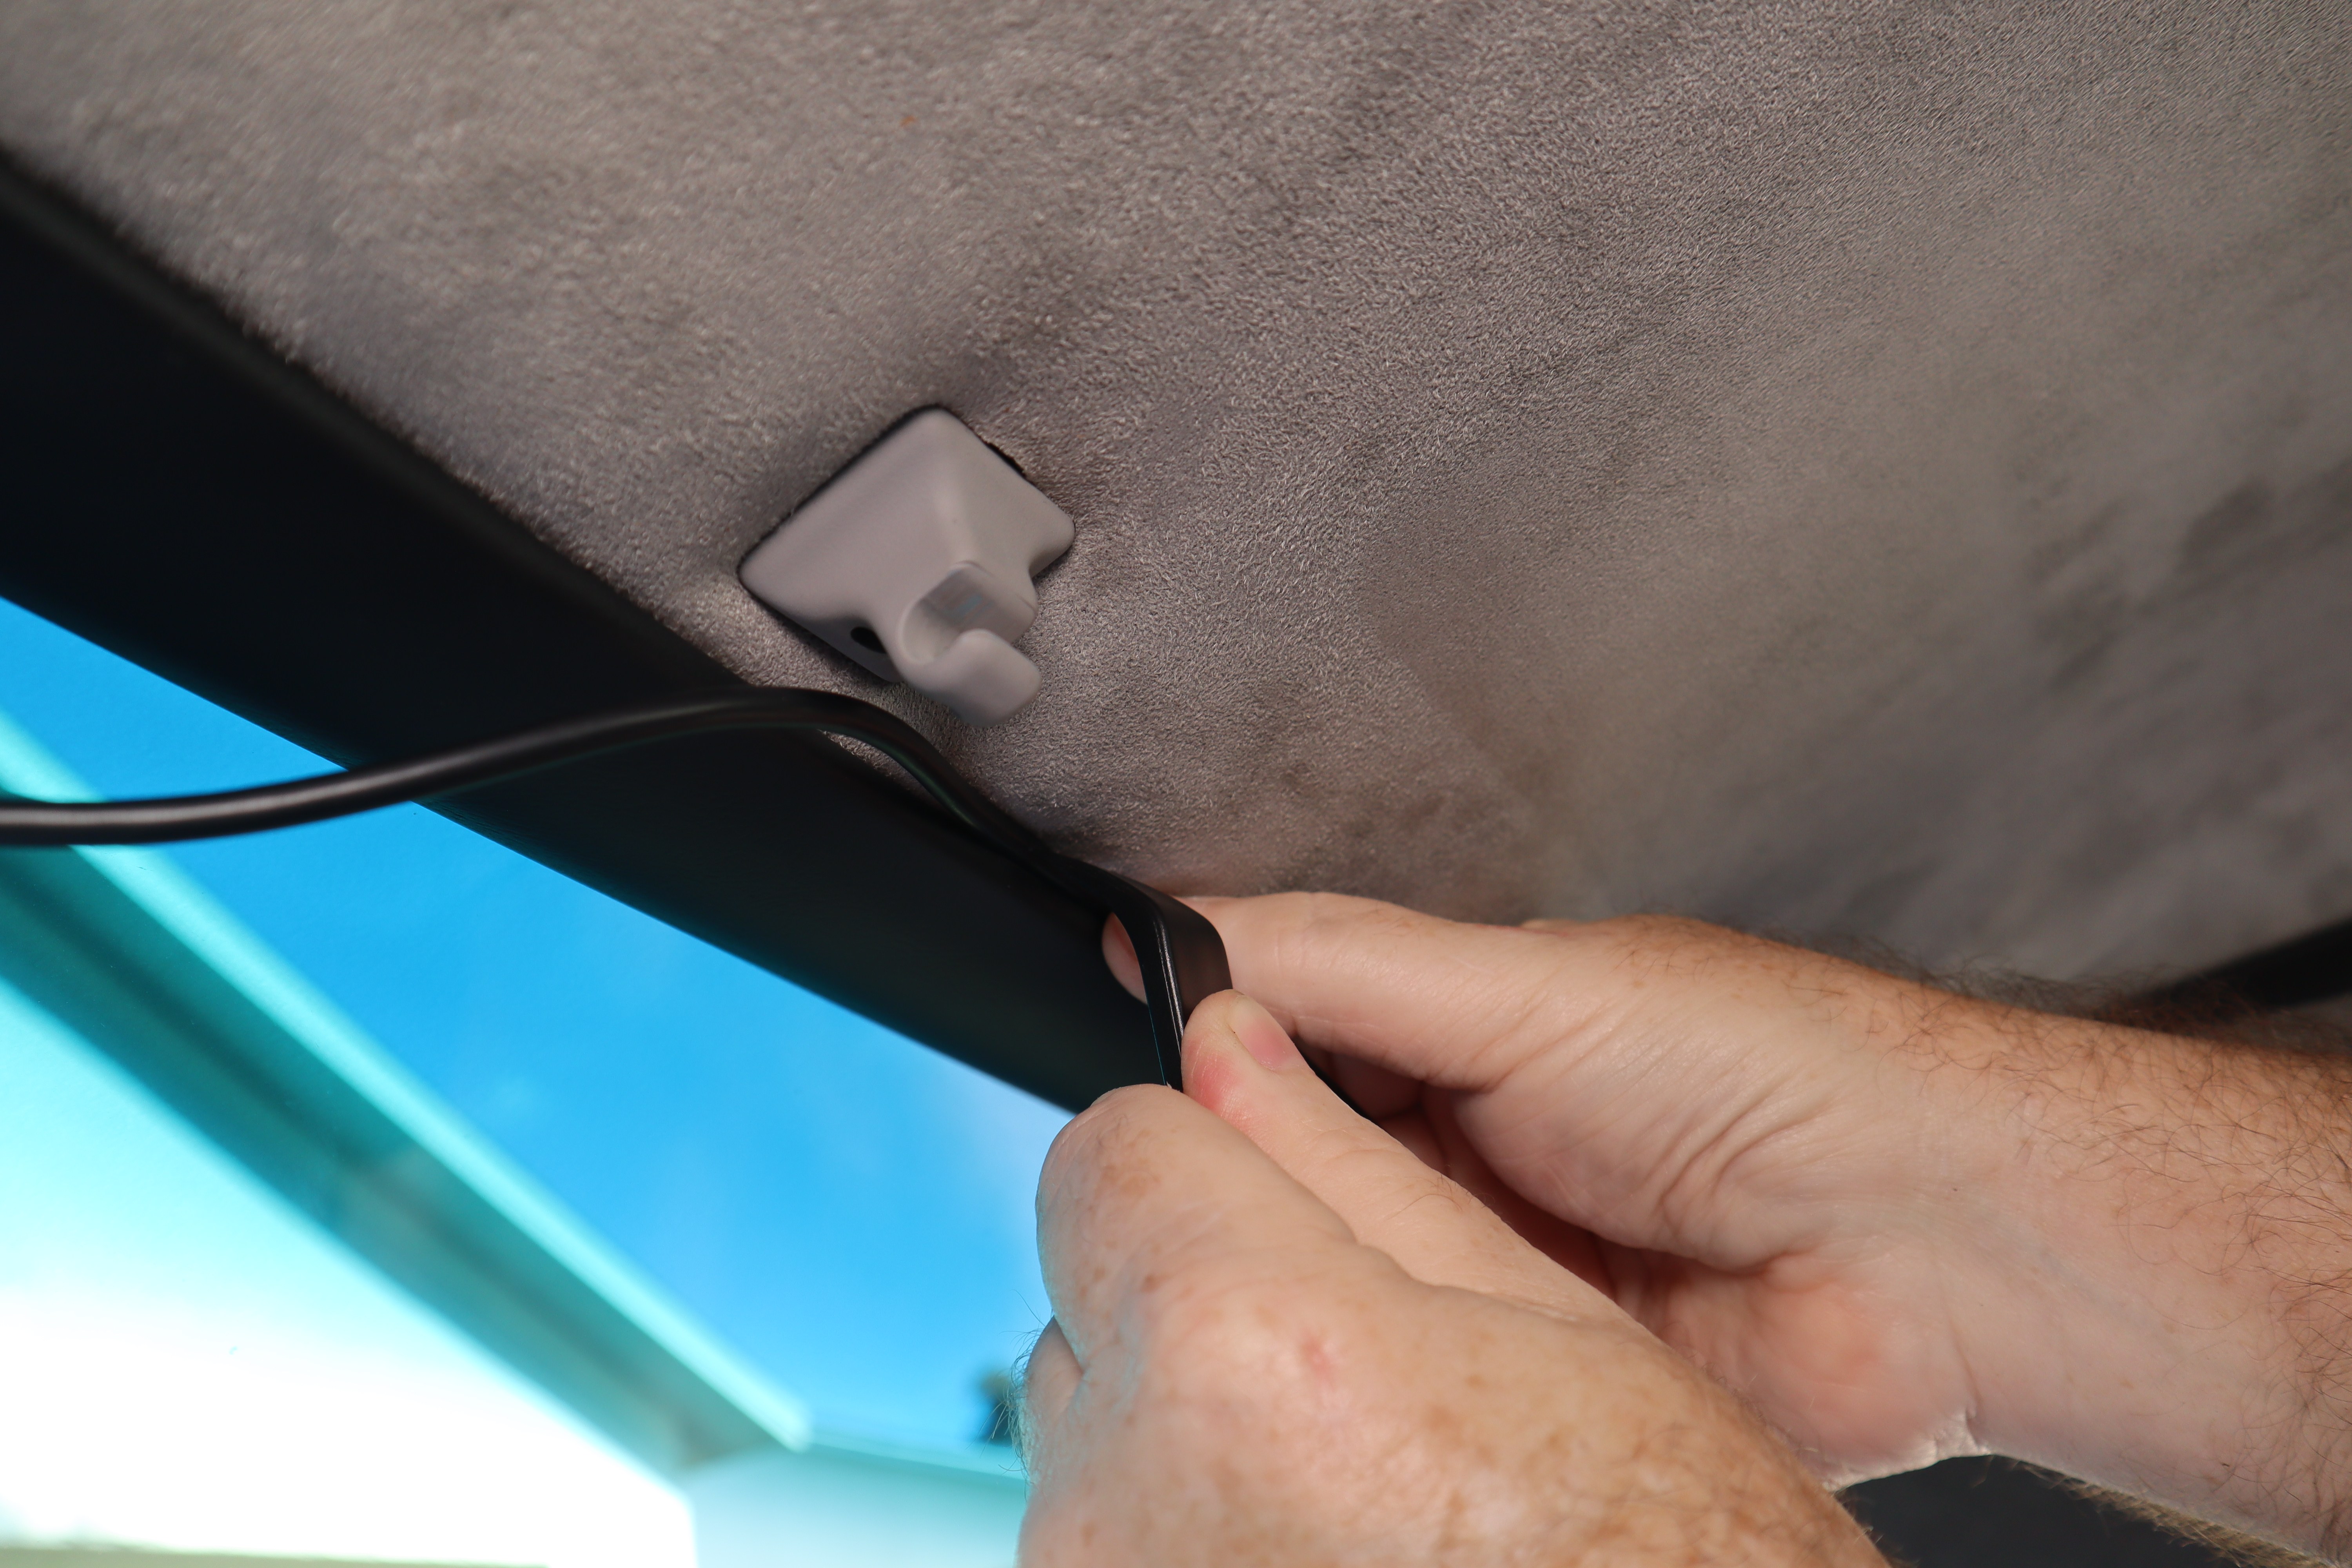
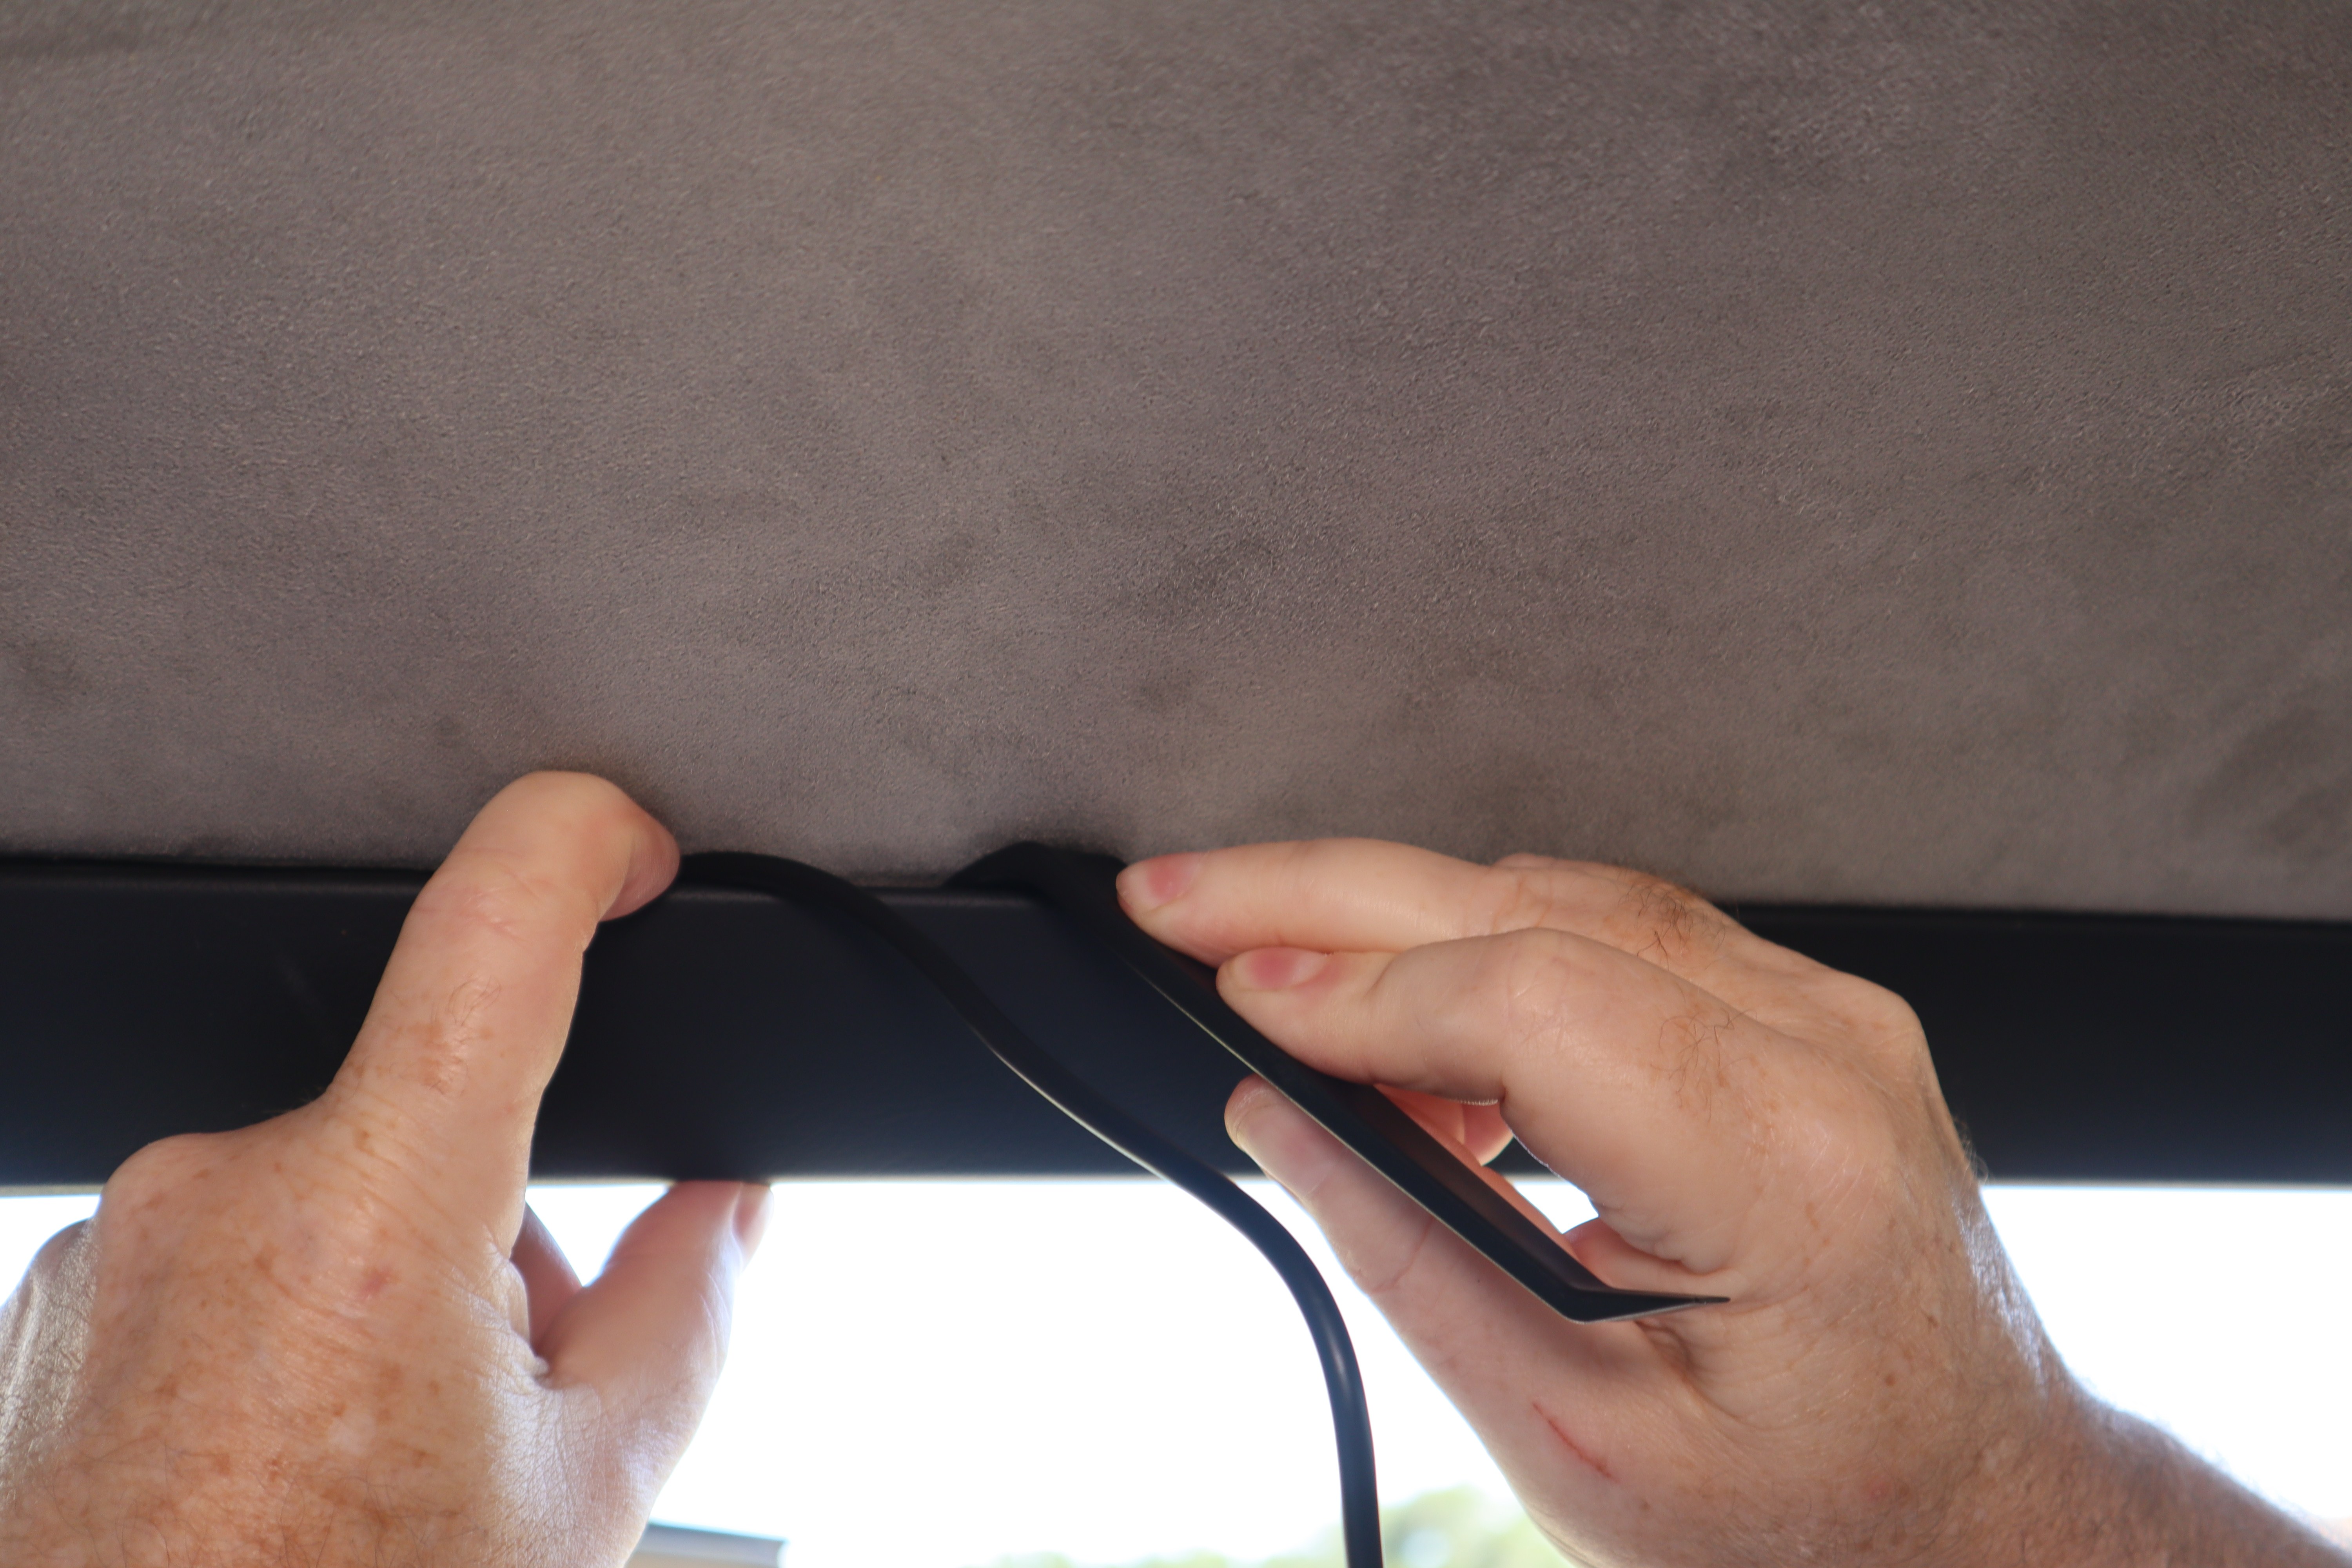
Using the included trim tool the rear camera cable is carefully pushed between the headliner and the headliner metal trim. This will work for most Mustangs until Ford moved to headliners with no front or rear trim. For those applications you can push the cable up into the headliner from the front.
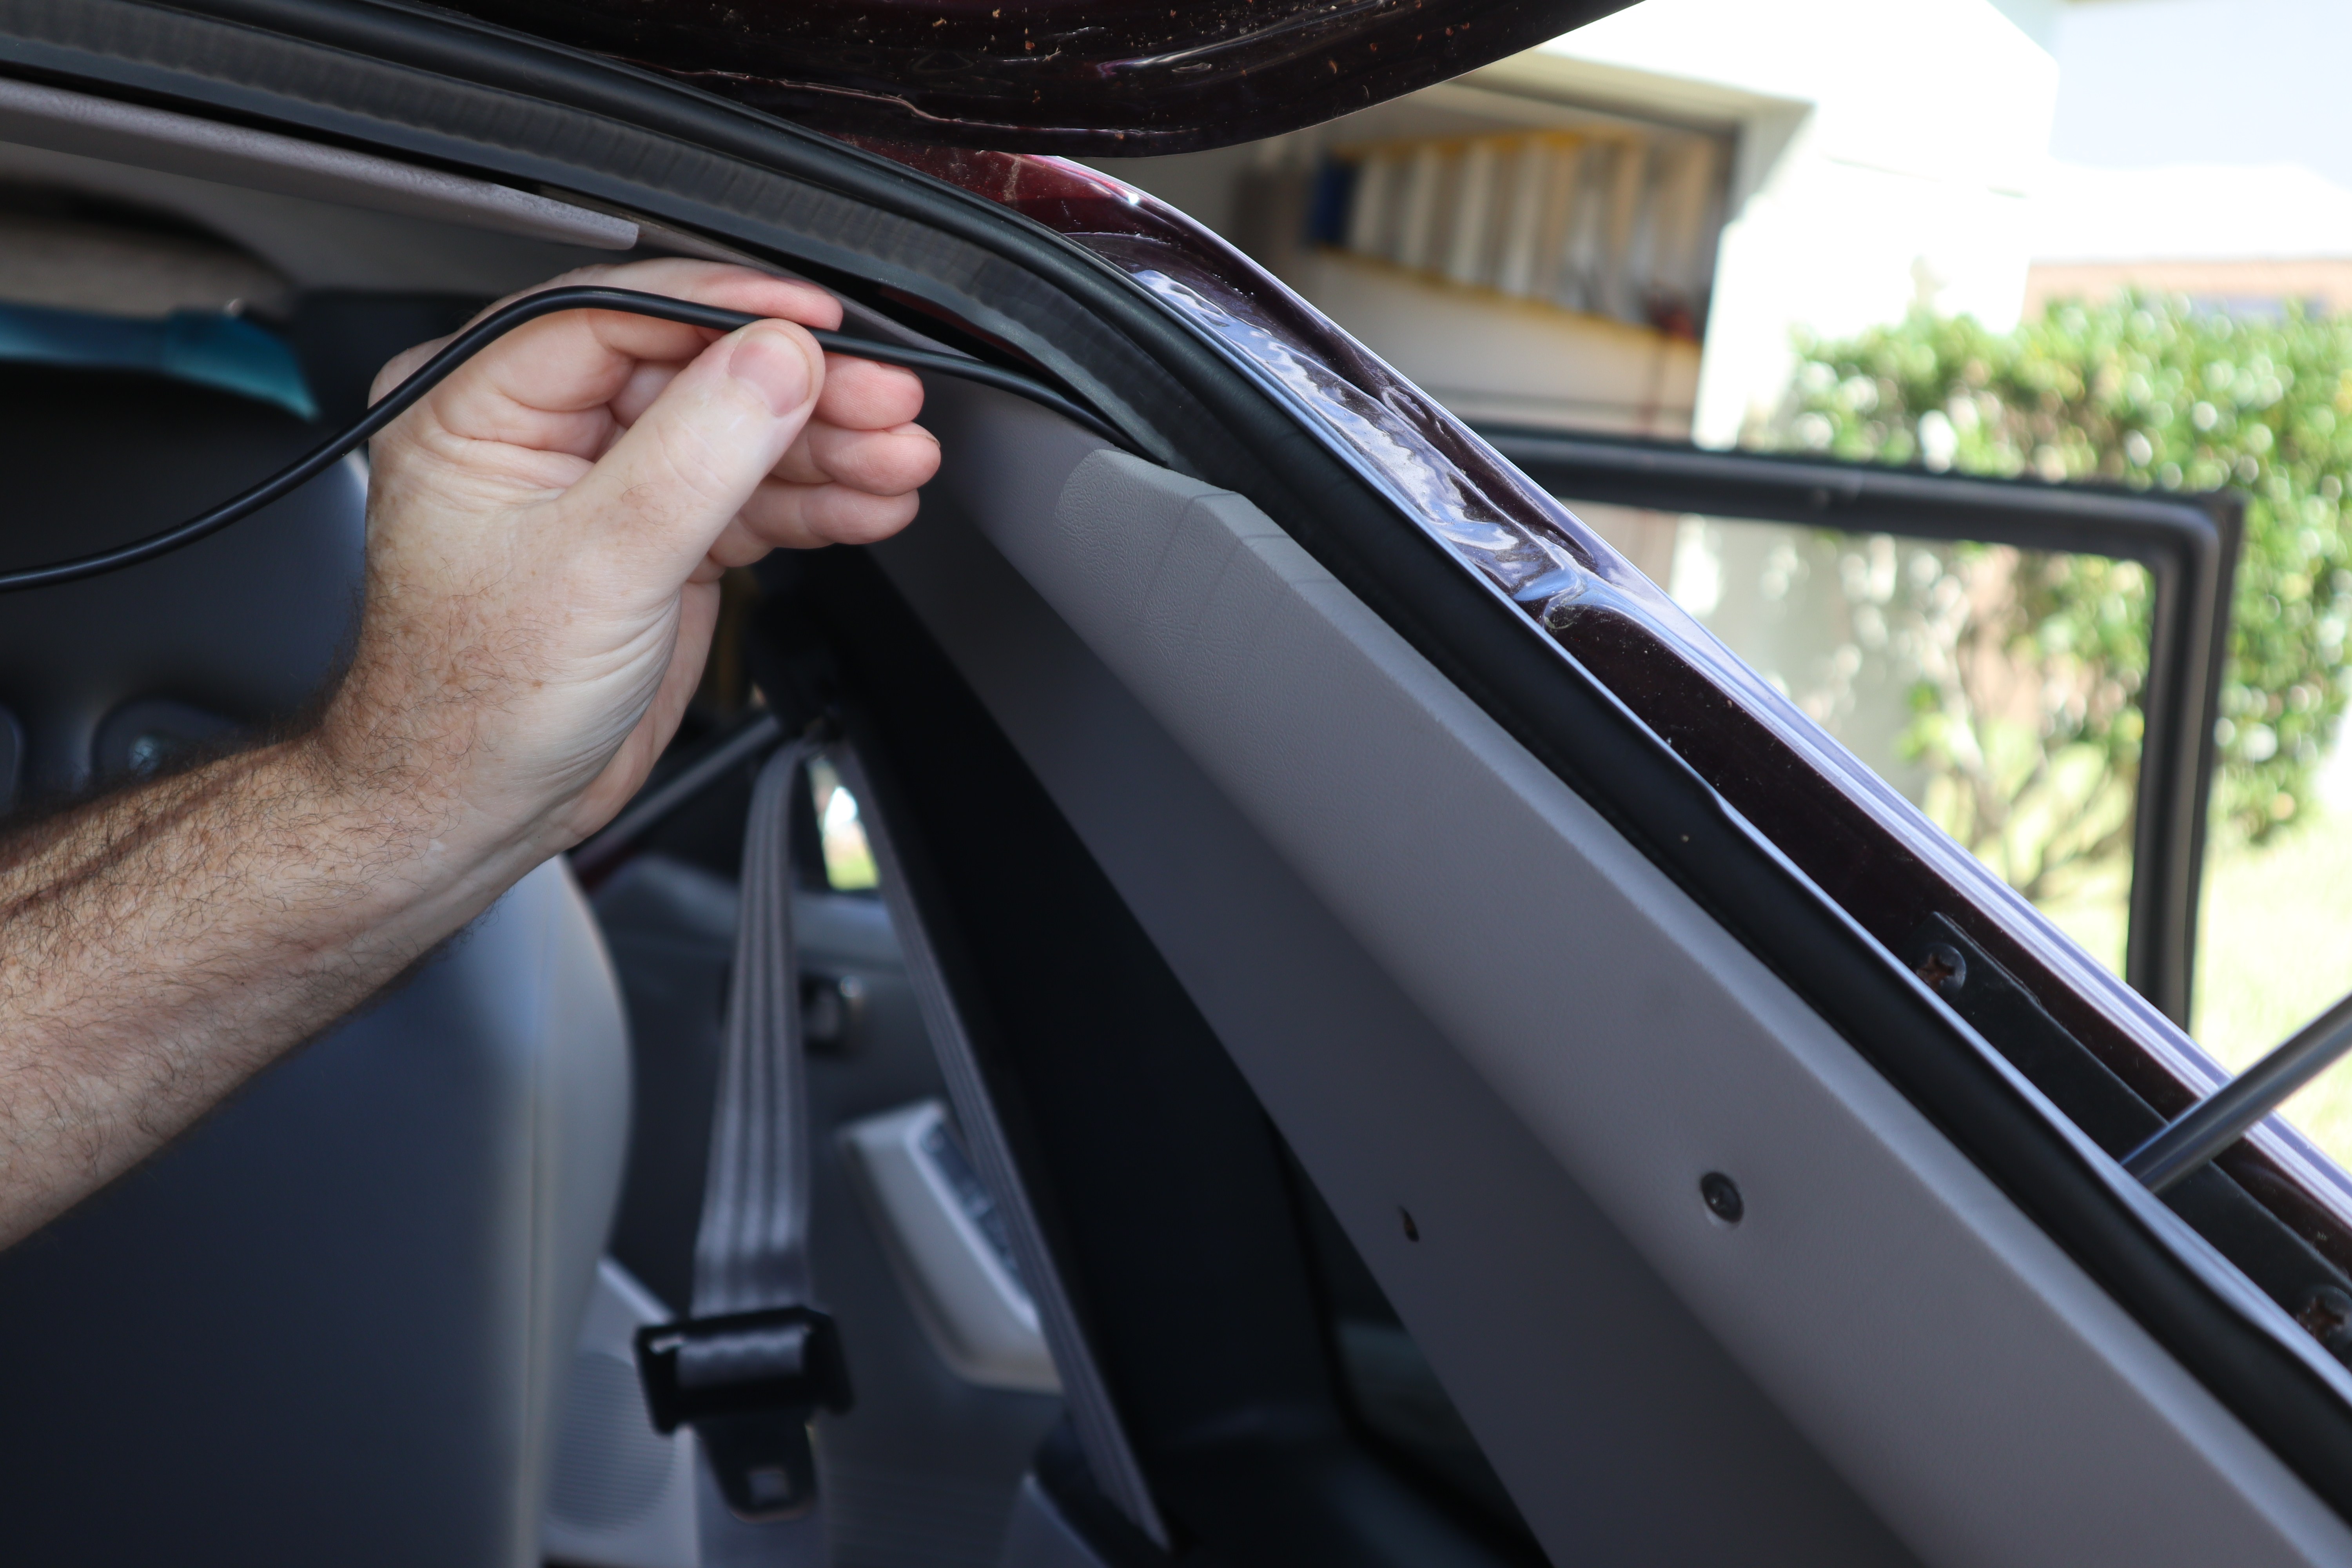
Using the same method/process the rear camera cable is routed rearward over the passenger door. Again, depending on your generation of Mustang, you may need to pull the weatherstrip down that retains the headliner to route the cable. You also have the option of routing the cable down through the kick panel and under the door sill plate, as the cable has plenty of length.
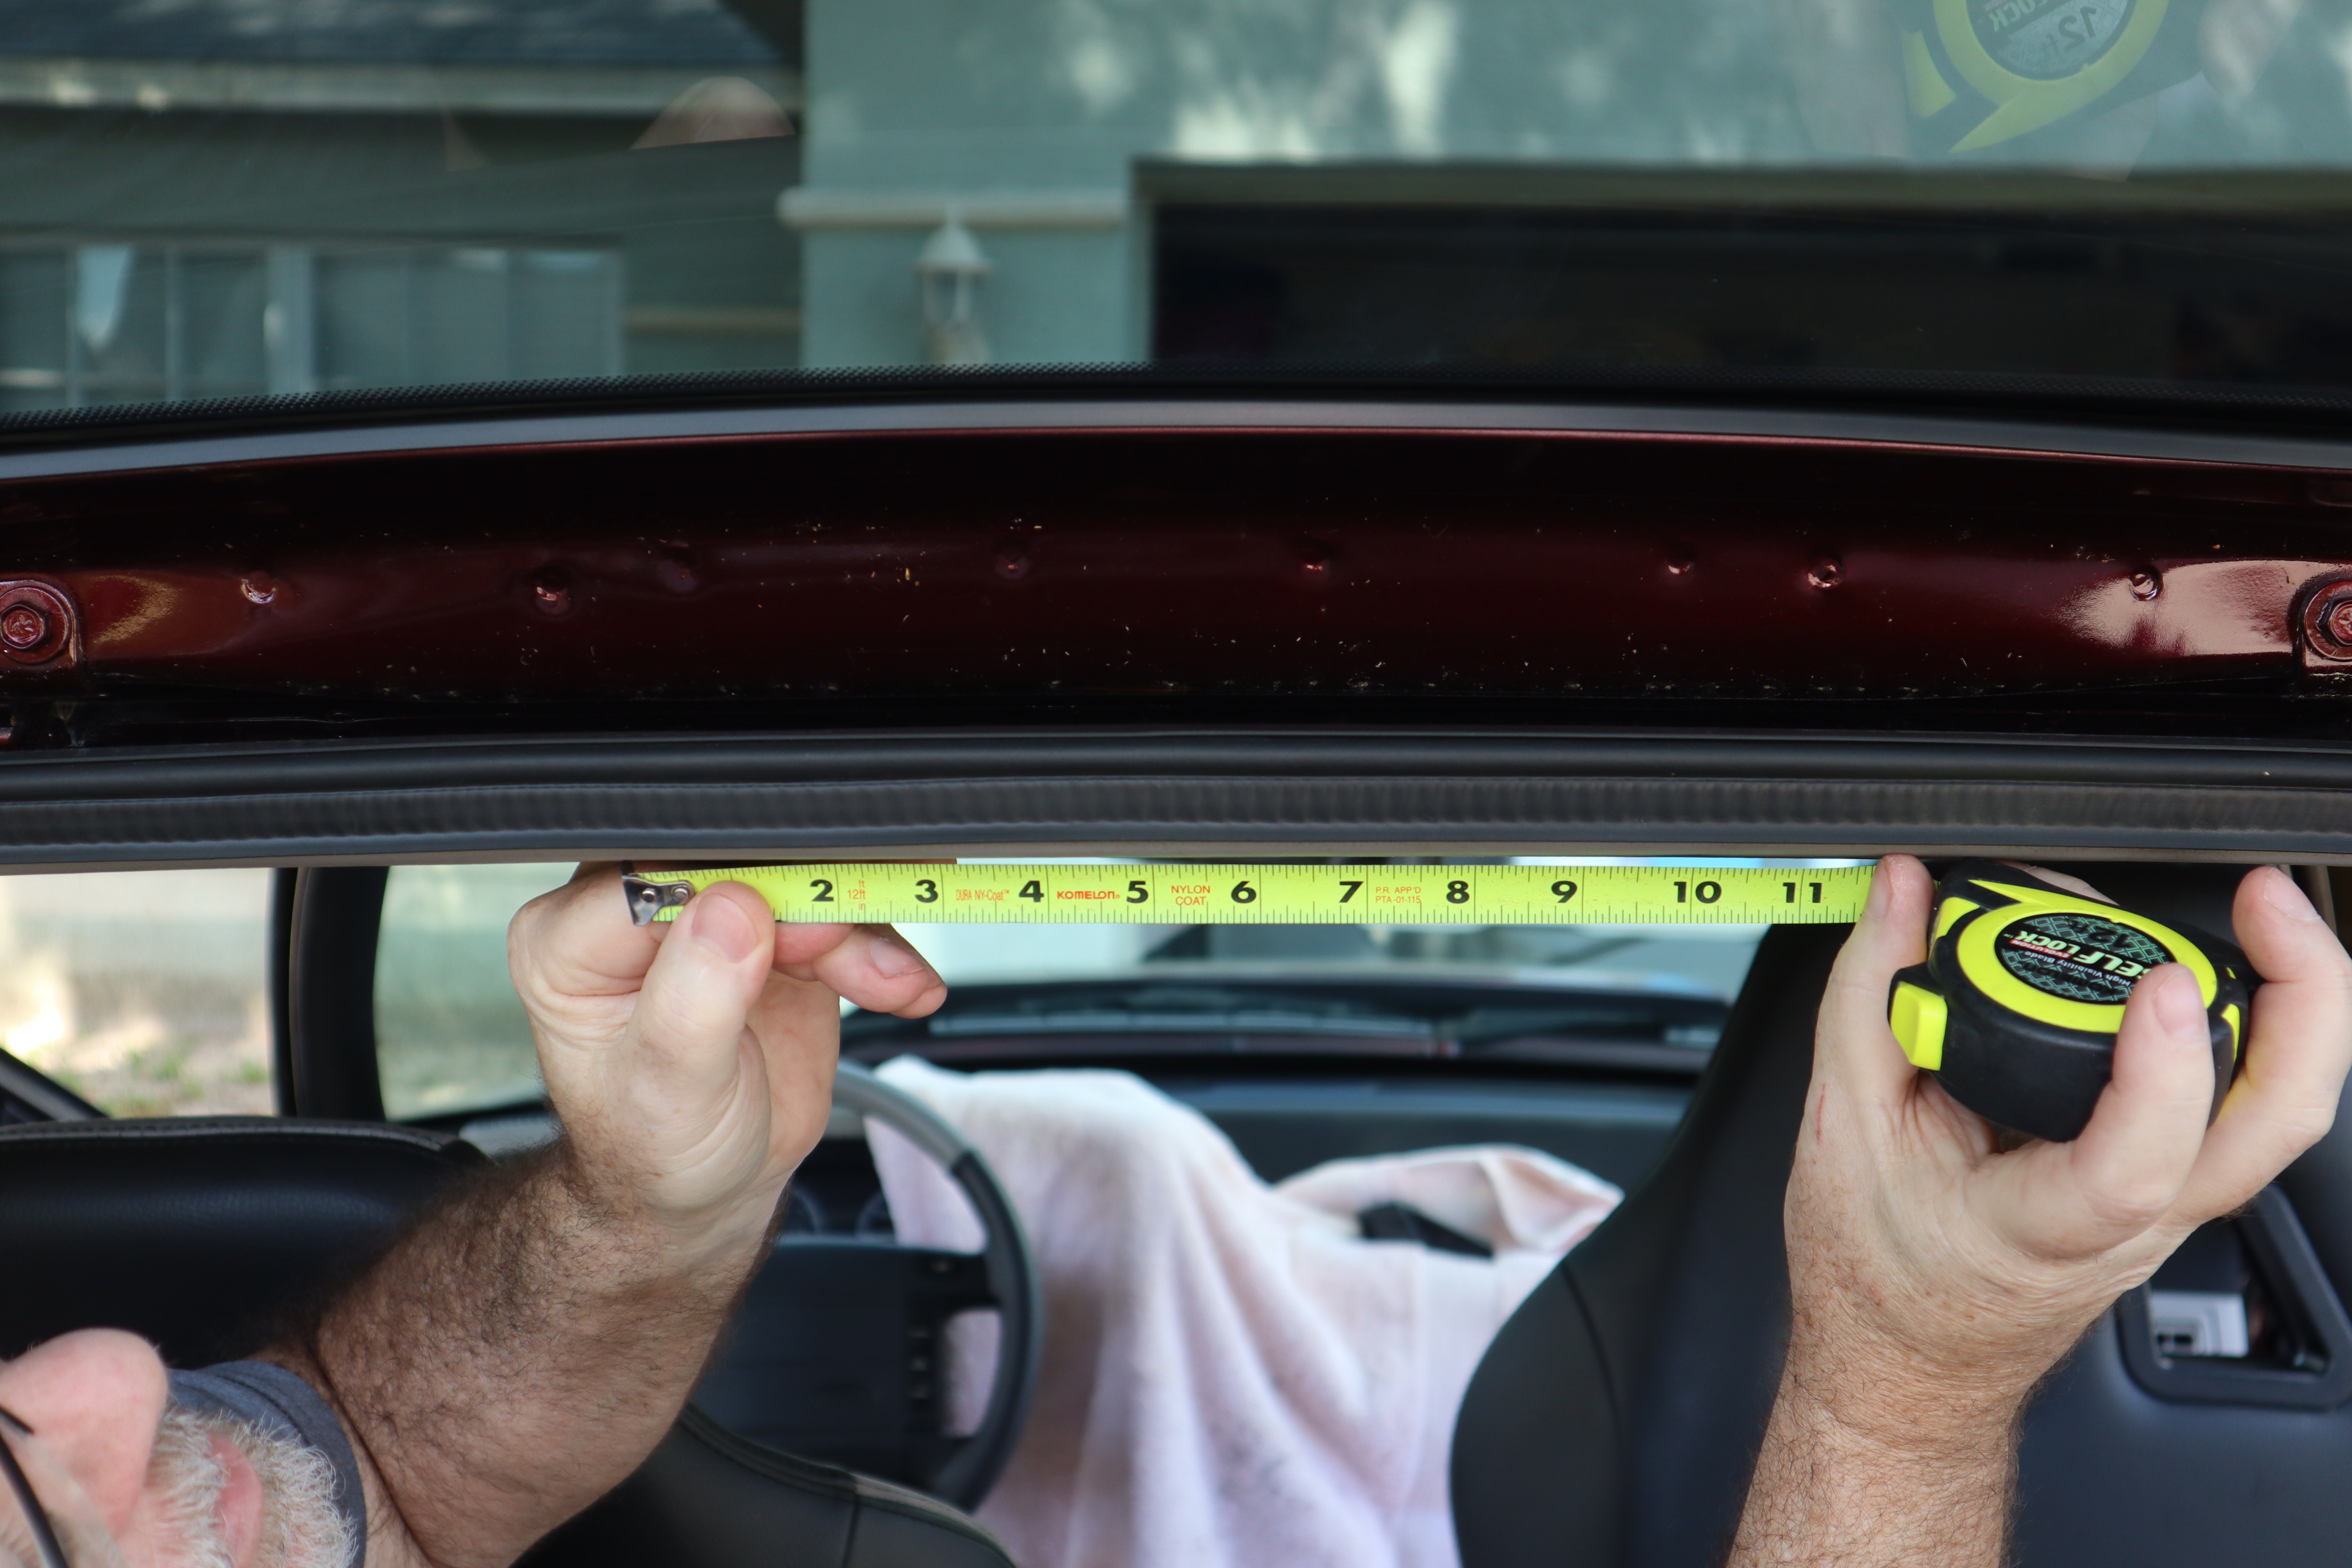
At the rear of our Fox hatch we wanted to ensure the camera would be centered and have enough space to not be an issue with opening or closing the hatch. Working off of the rear headliner trim screws we found the center of the hatch opening and marked it with tape.
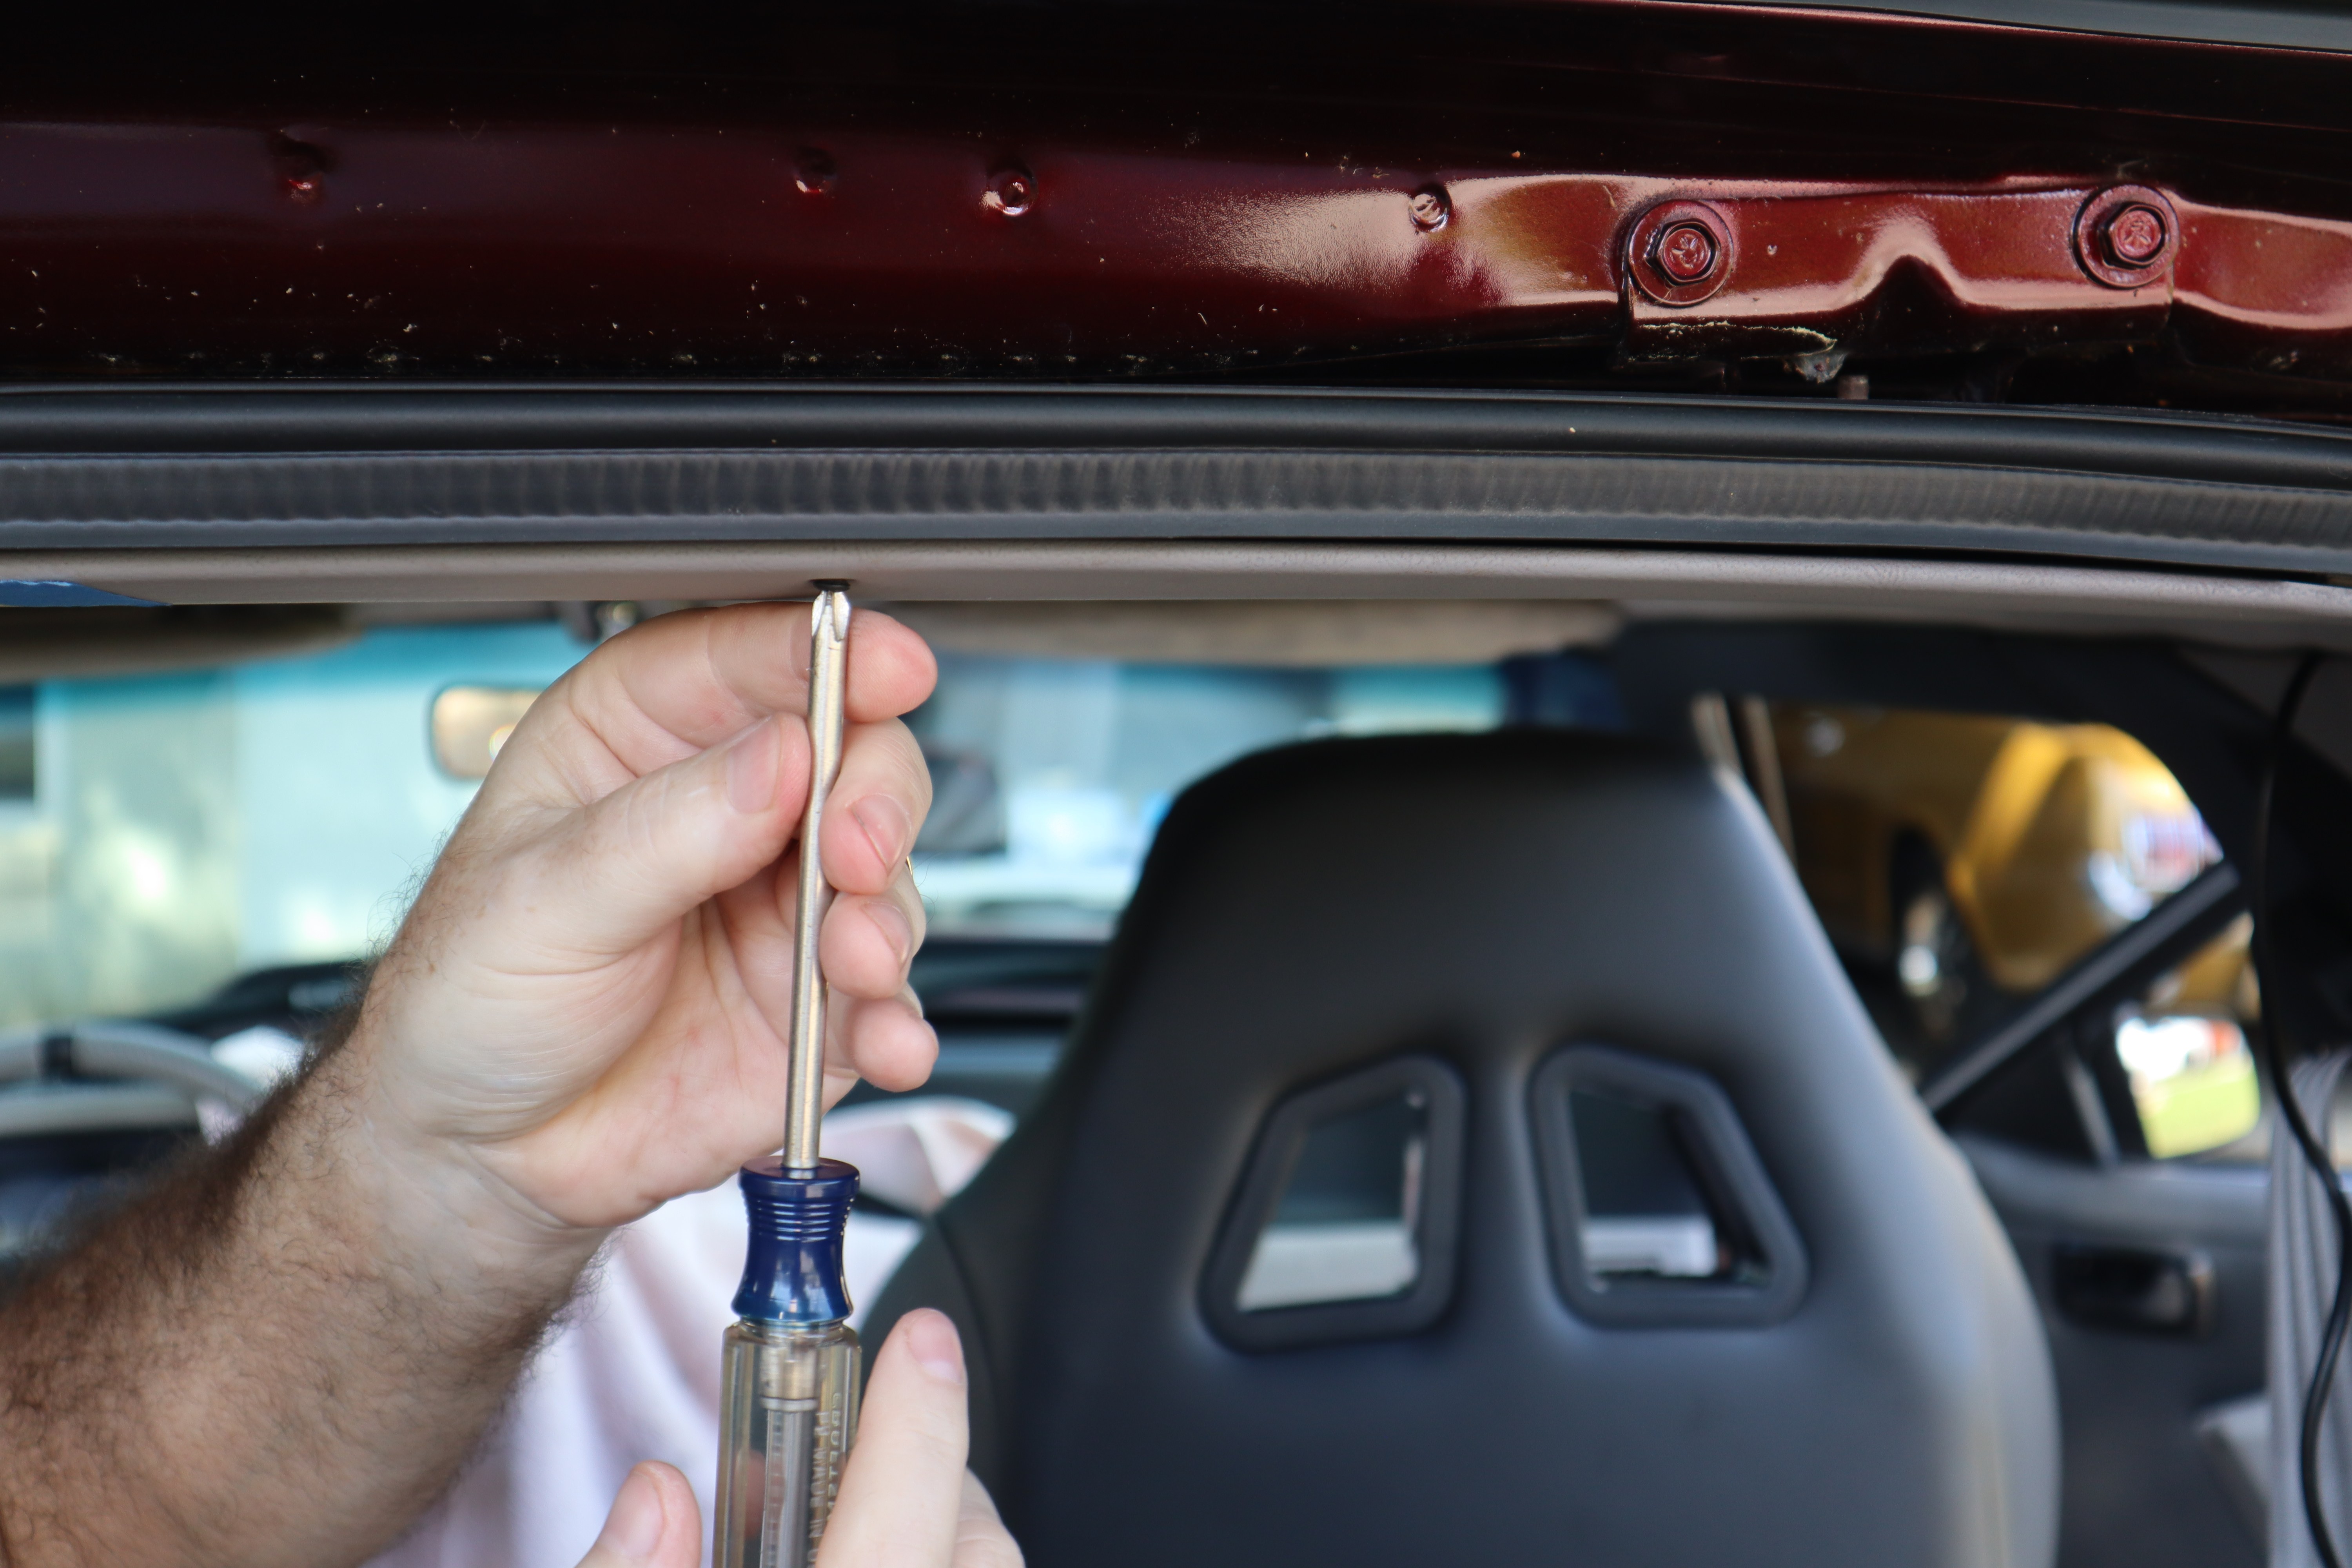
Due to the rear headliner metal trim’s gap being tighter than the front or side, we had to remove two Phillips screws to provide room to route the rear camera cable.
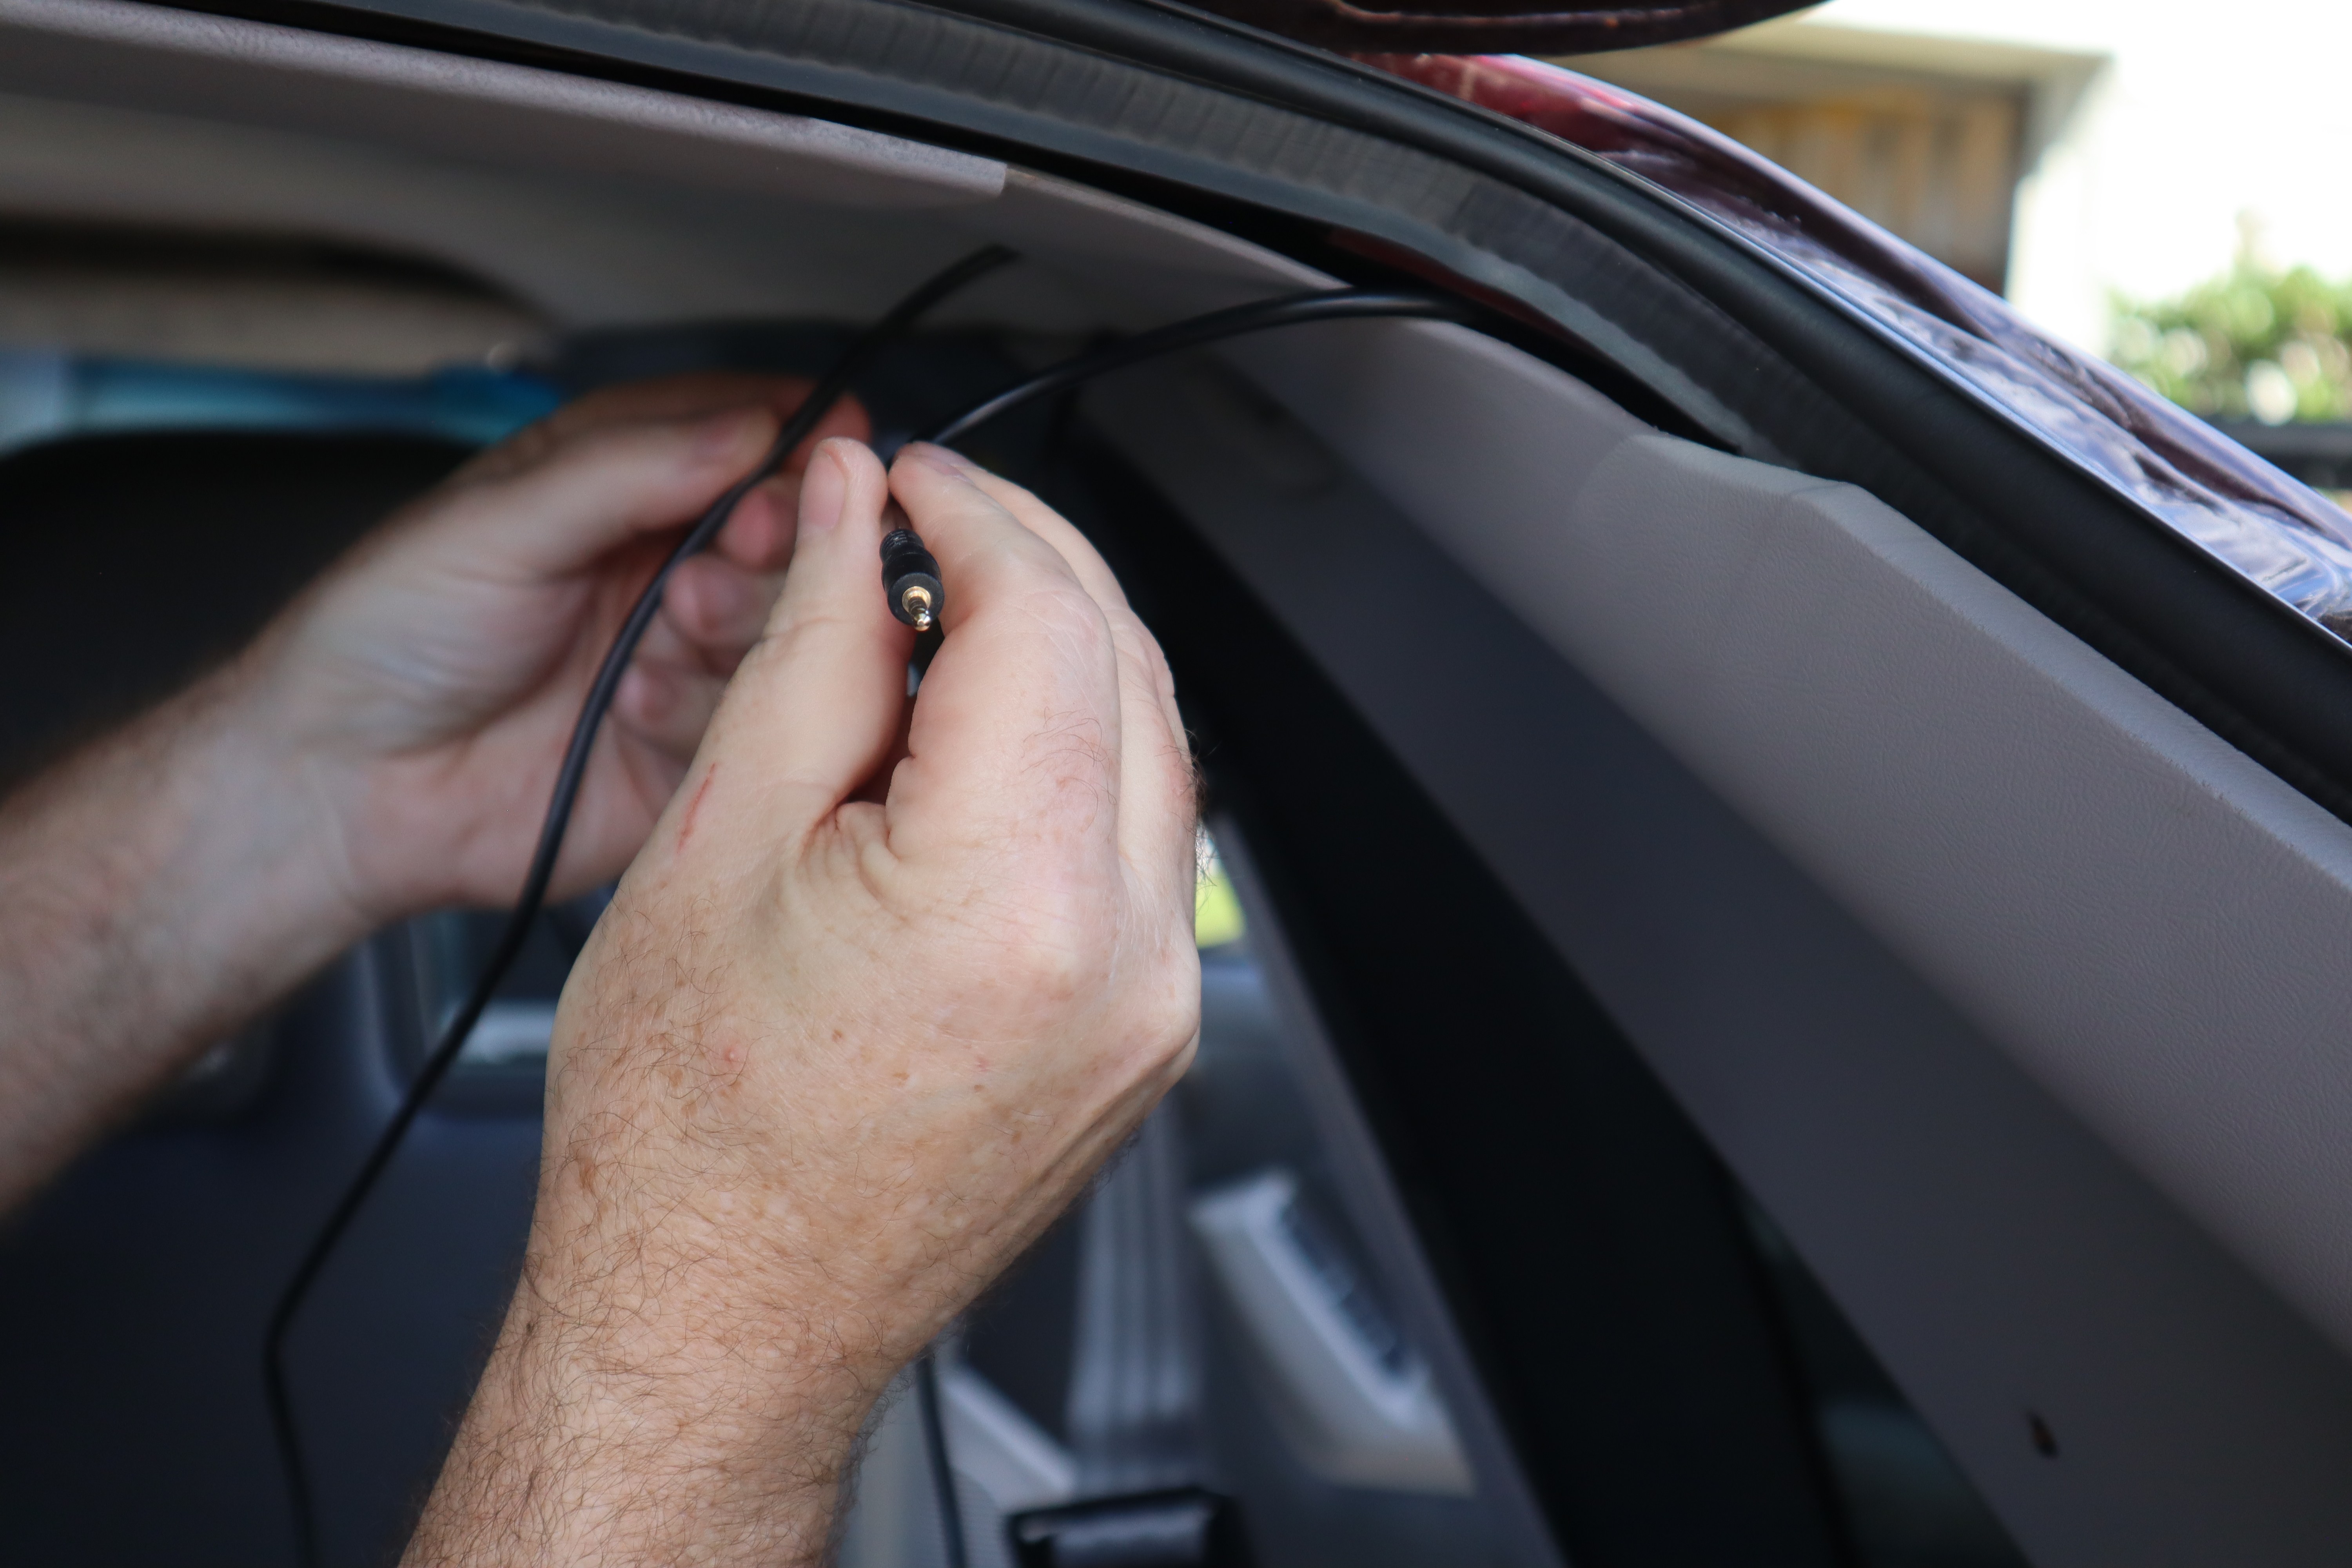
Once we had the rear camera cable routed to the rear we had to pass it from the front of the headliner rear molding to the back side. It took a few tries, but we were able to grab it and pull it through without removing any further trim.
Since the rear camera has its own pigtail connection, we were able to keep the cable routing exiting the headliner trim to just the end connector.
With the rear camera cable routed and the connection end placed we had to stash the extra cable length (you can’tsimply cut and shorten it). Thankfully the Fox Mustang hatchback trim has a lot of empty space behind it and we were able to simply push the excess into the trim panel opening to tidy everything up.
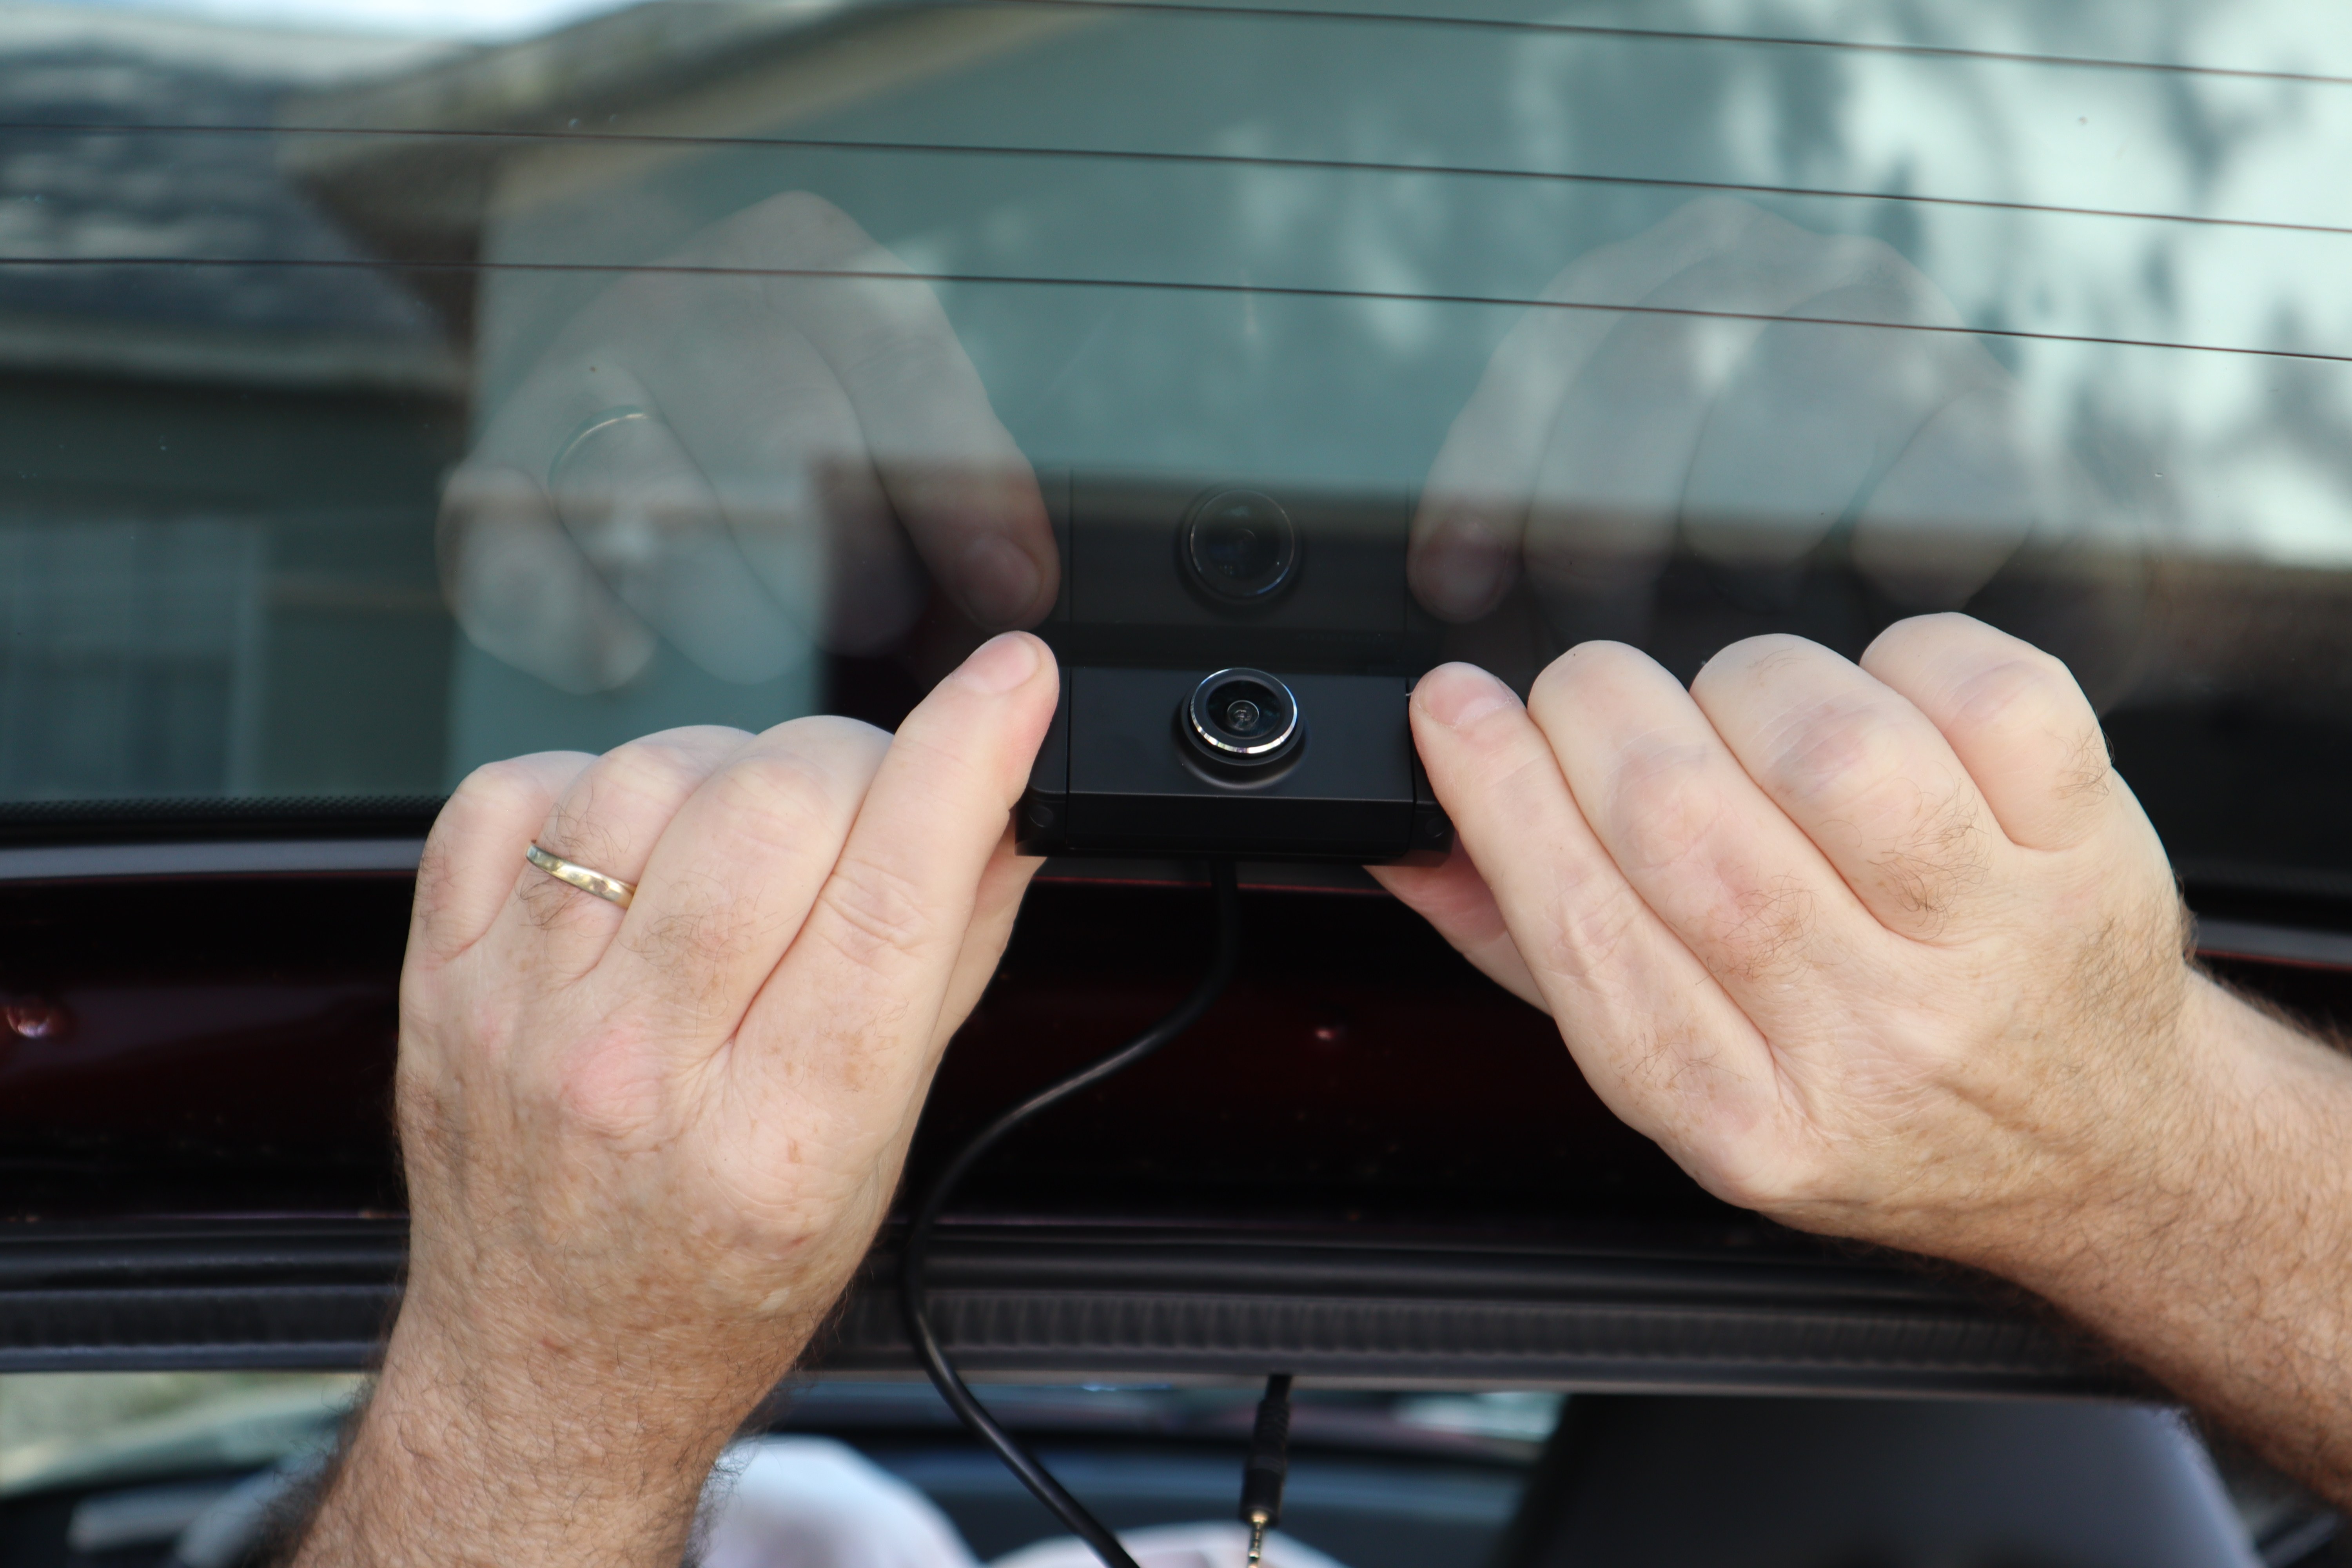
With the rear camera wiring in place, it was time to mount the camera. Peel off the adhesive protector and place the camera. Just like the front camera, you don’t want it too low or too high. A nice feature of both the front and rear Vueroid cameras is that even once the main bodies are attached, the lenses can be rotated up or down for the best viewing angle.
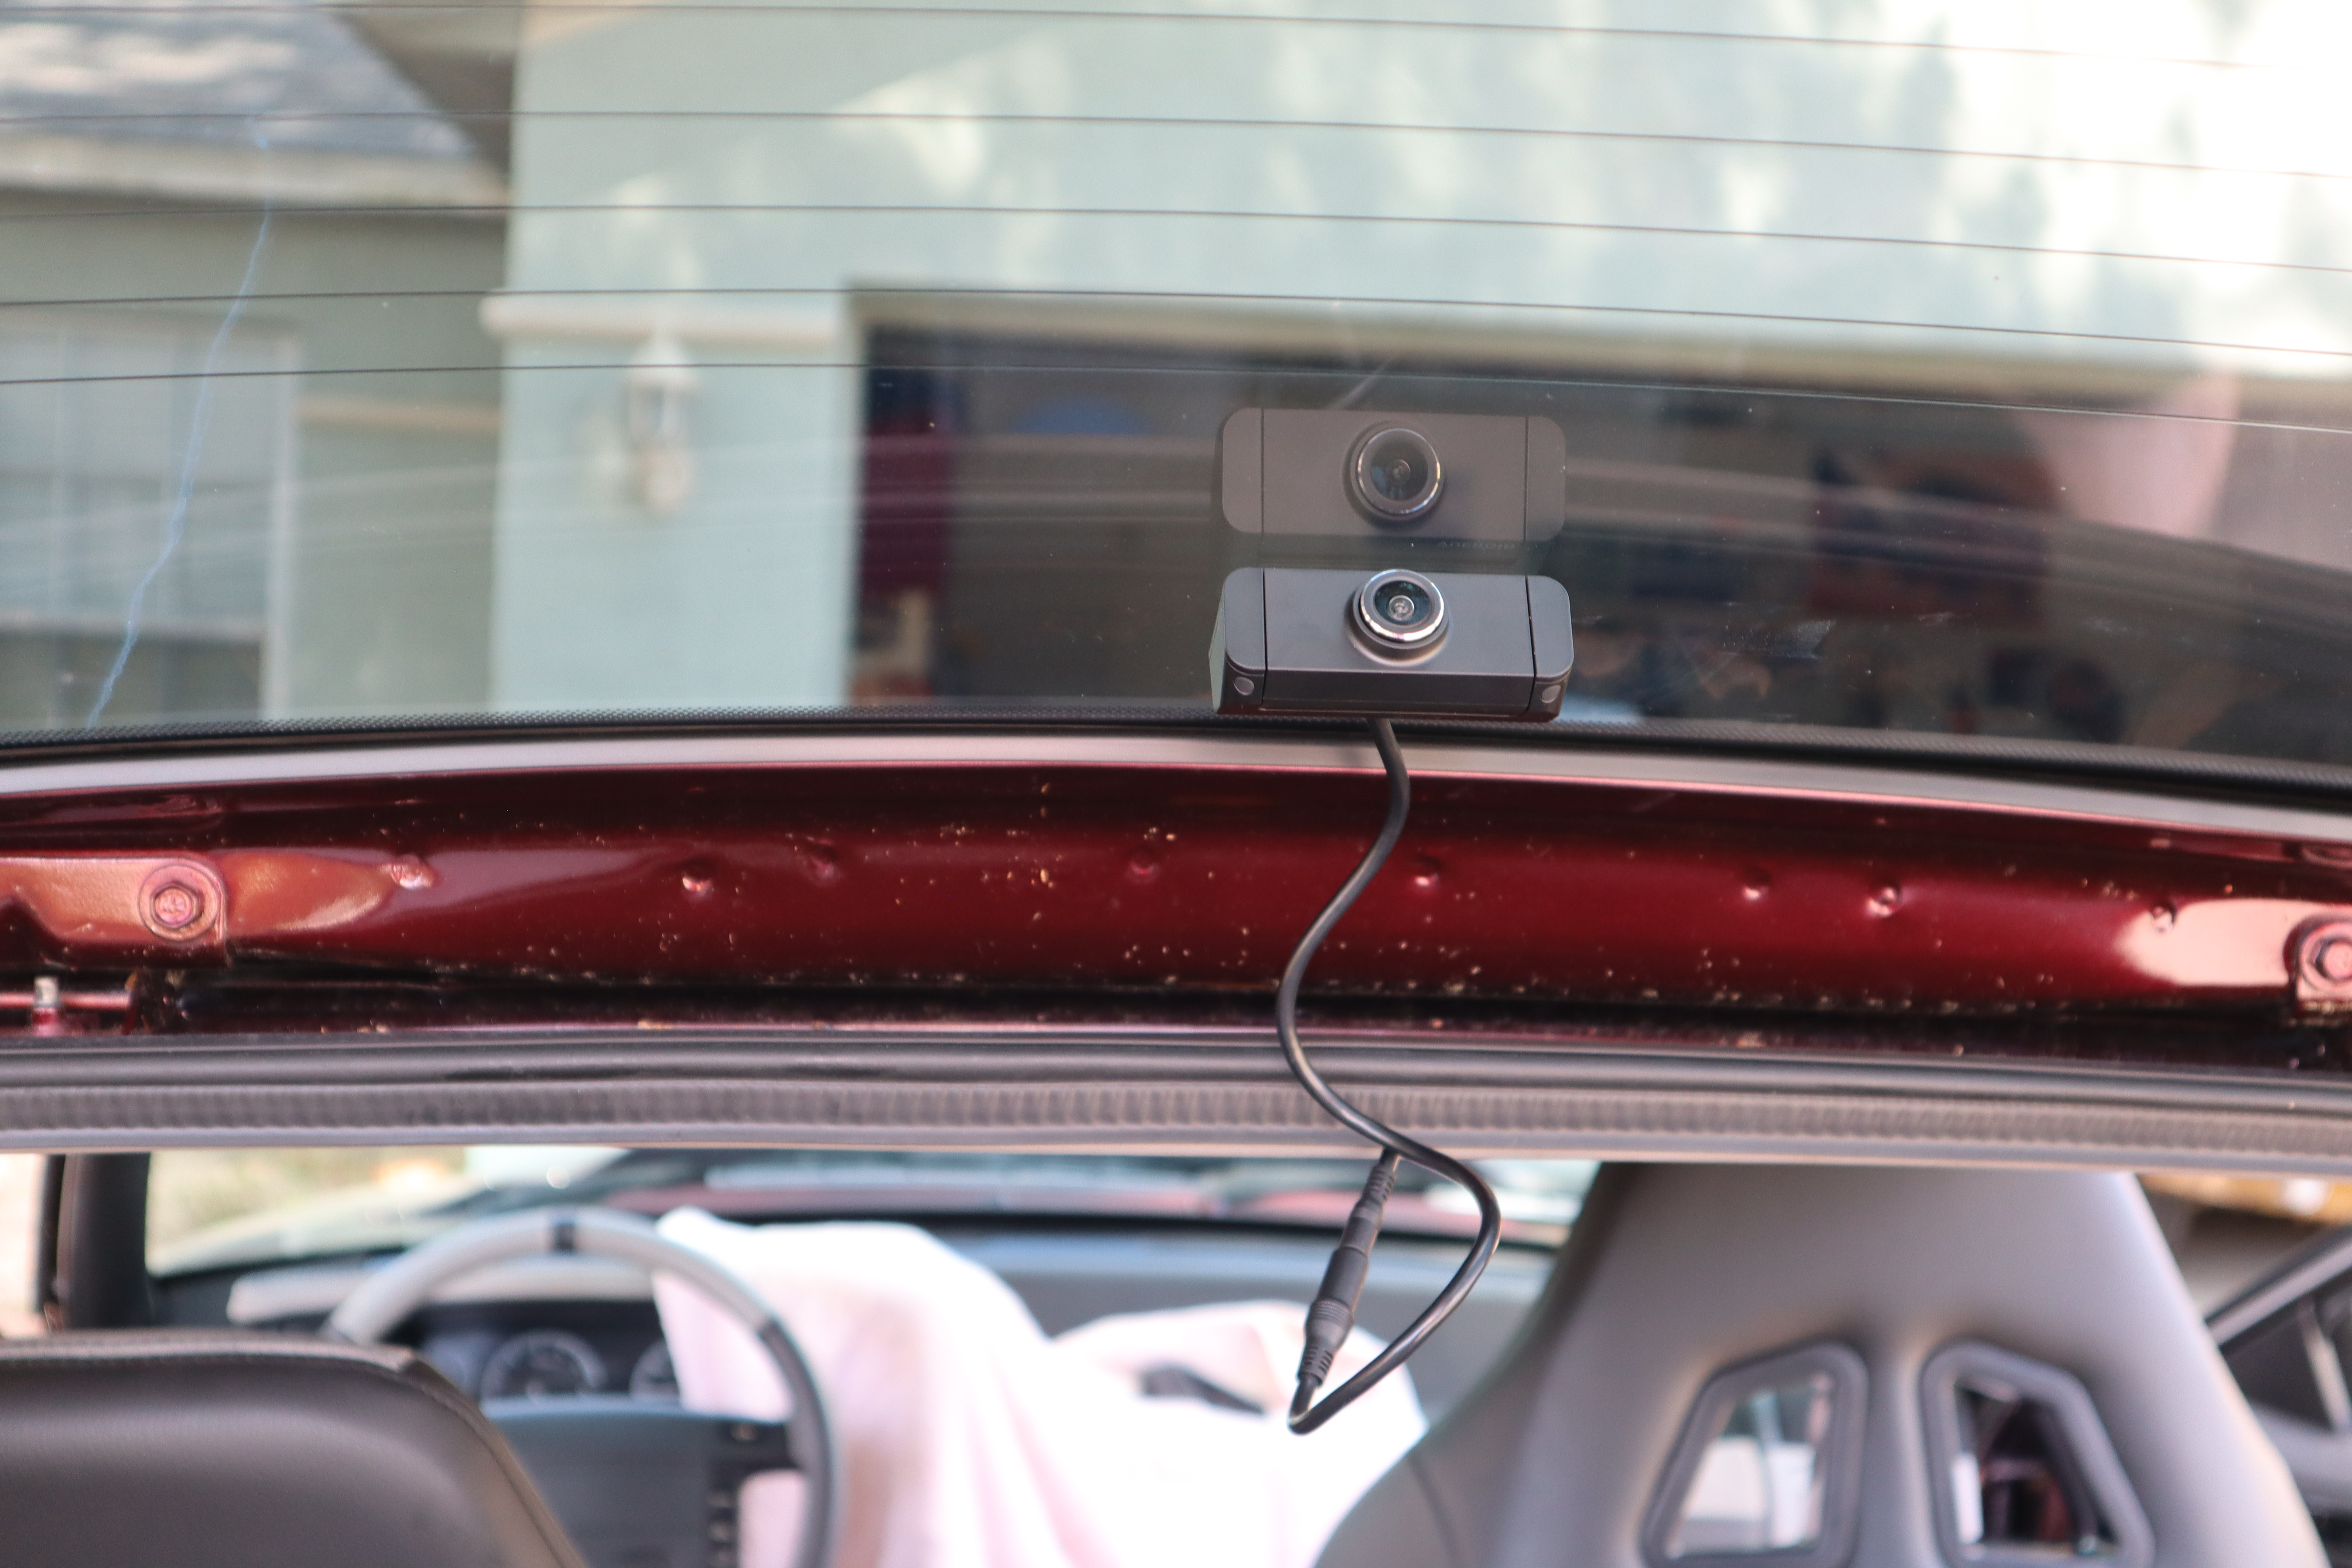
The Fox Mustang’s hatch configuration also means you need some cable length/slack for opening and closing the hatch. On fixed rear glass (coupe/fastback cars) won’t have to worry about this andyou can tuck and hide the wiring to your heart’s content.
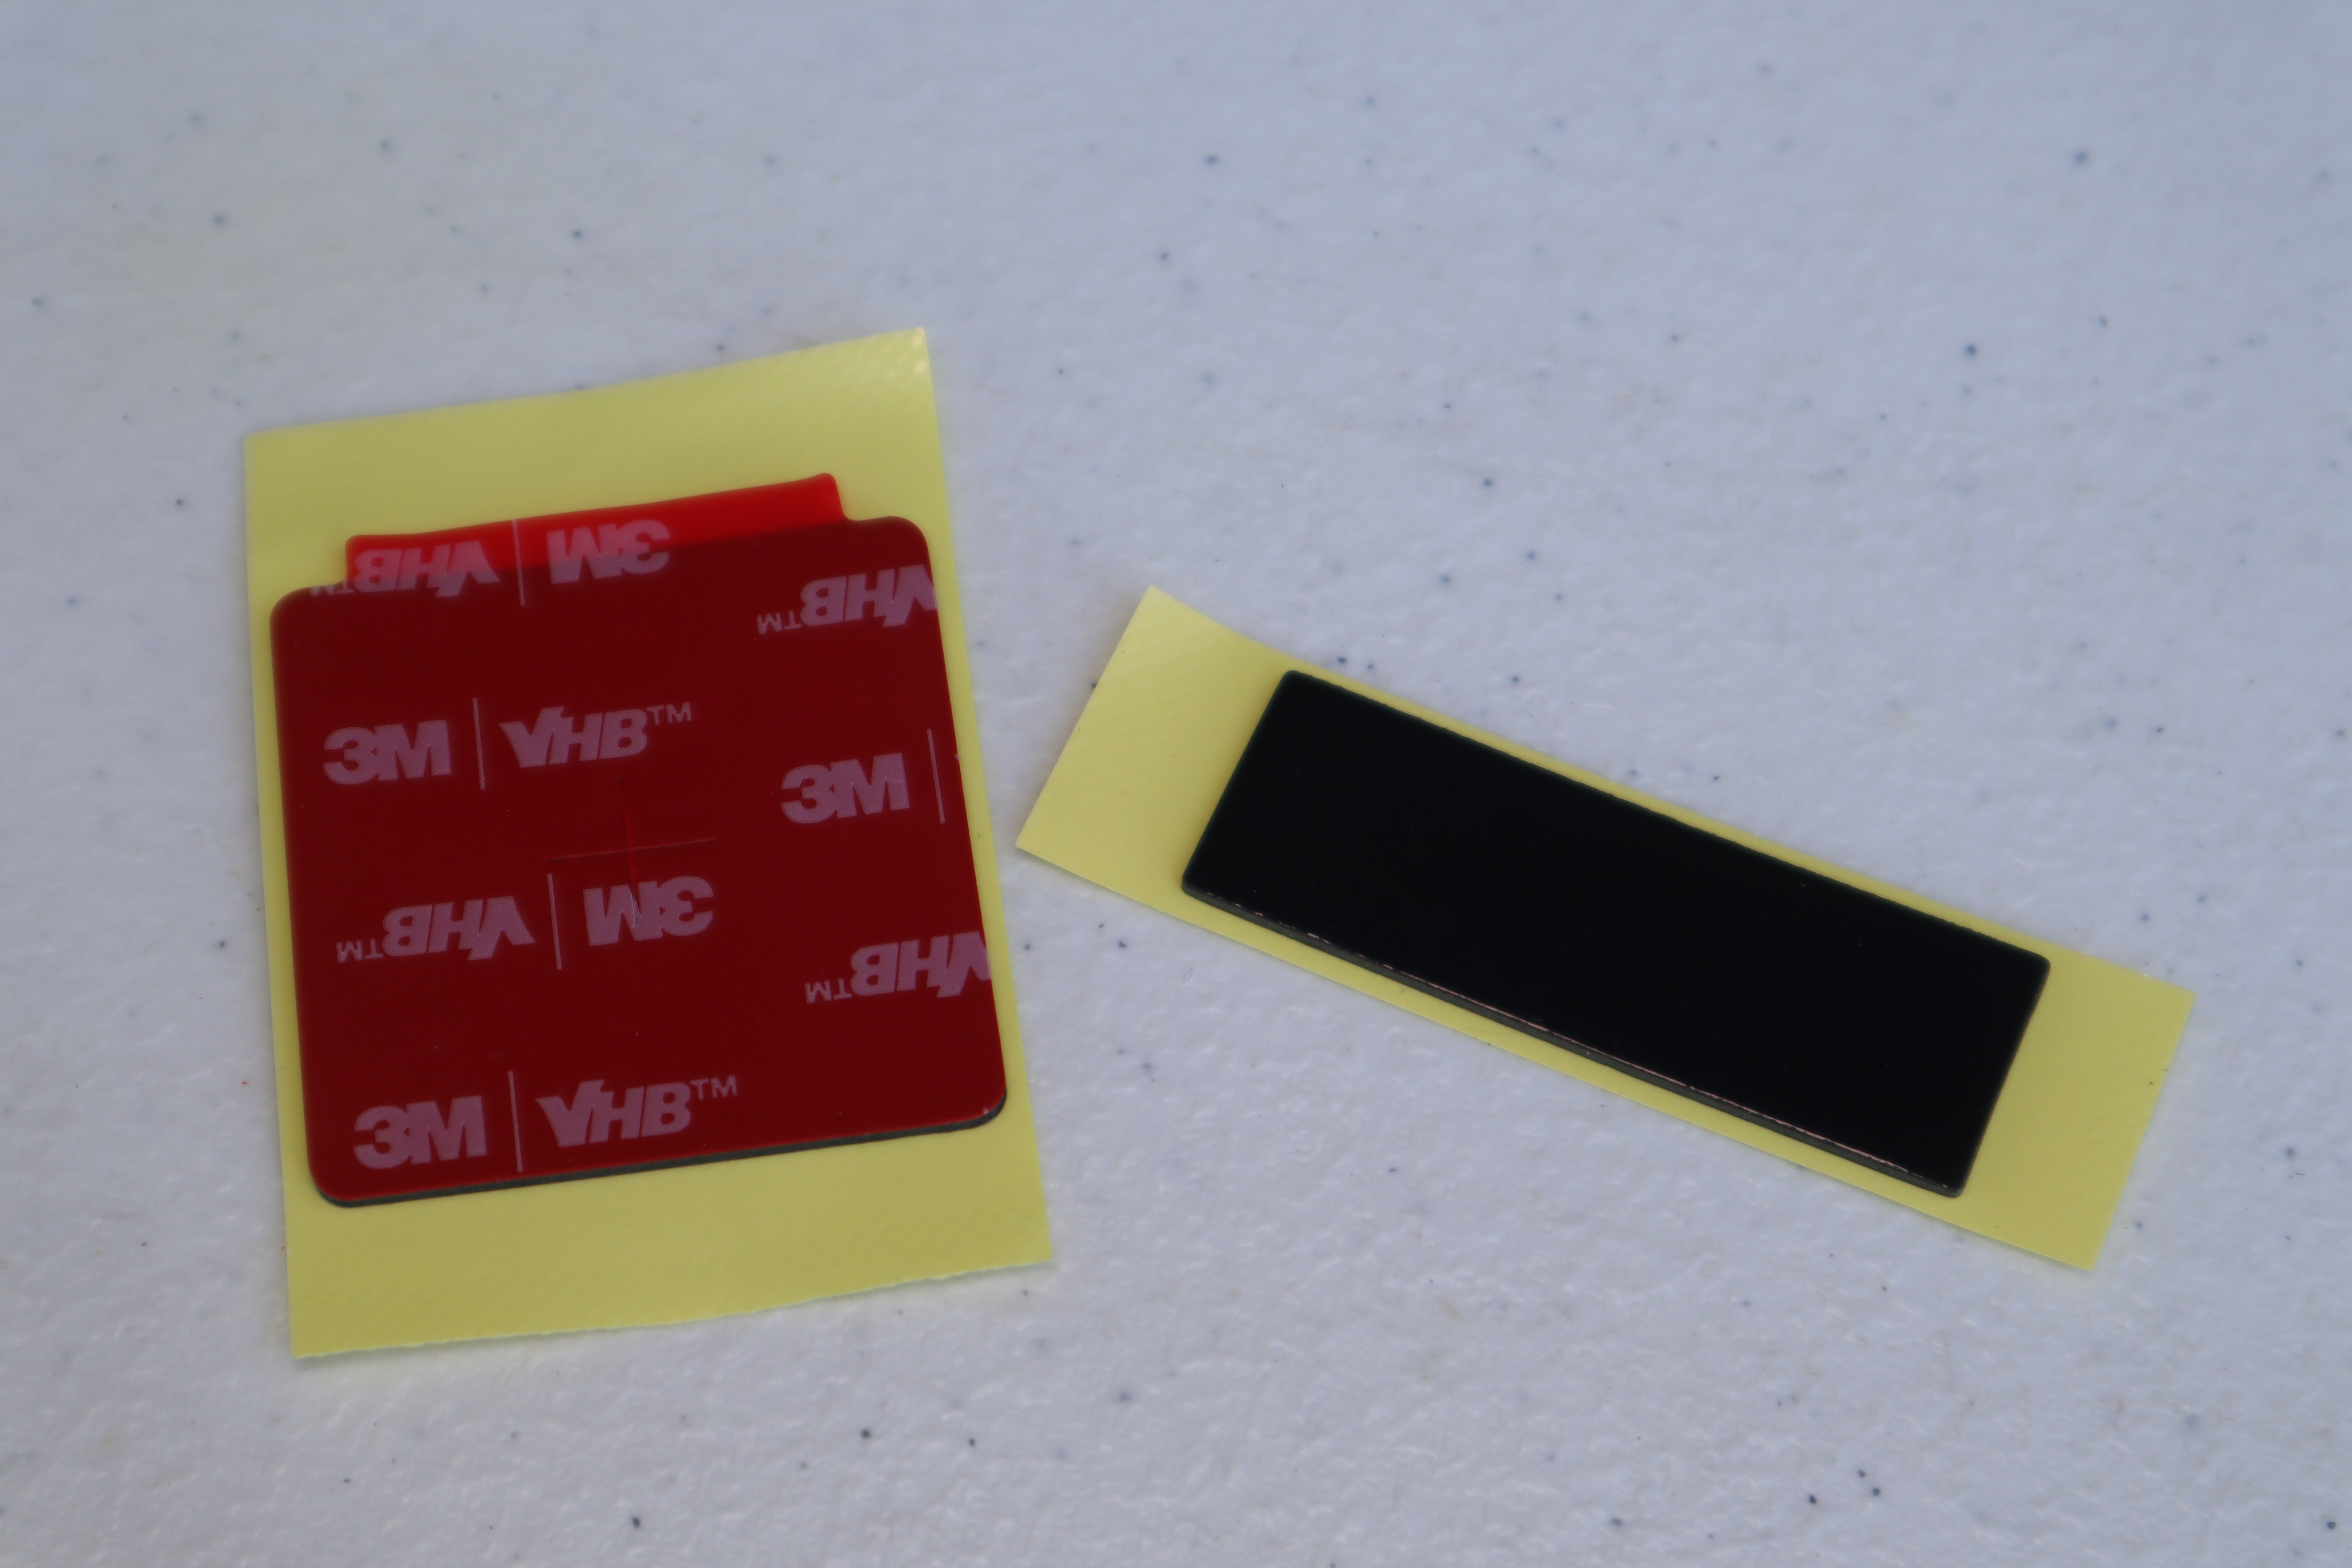
The adhesive foam pads used to mount the front and rear cameras should give you a lifetime of use without failure, but if you find yourself replacing your windshield, or perhaps moving to a newer Mustang (congrats!) you can always take your Vueroid S1 4K Infinite with you thanks to a replacement set of adhesive pads that come in the installation kit.
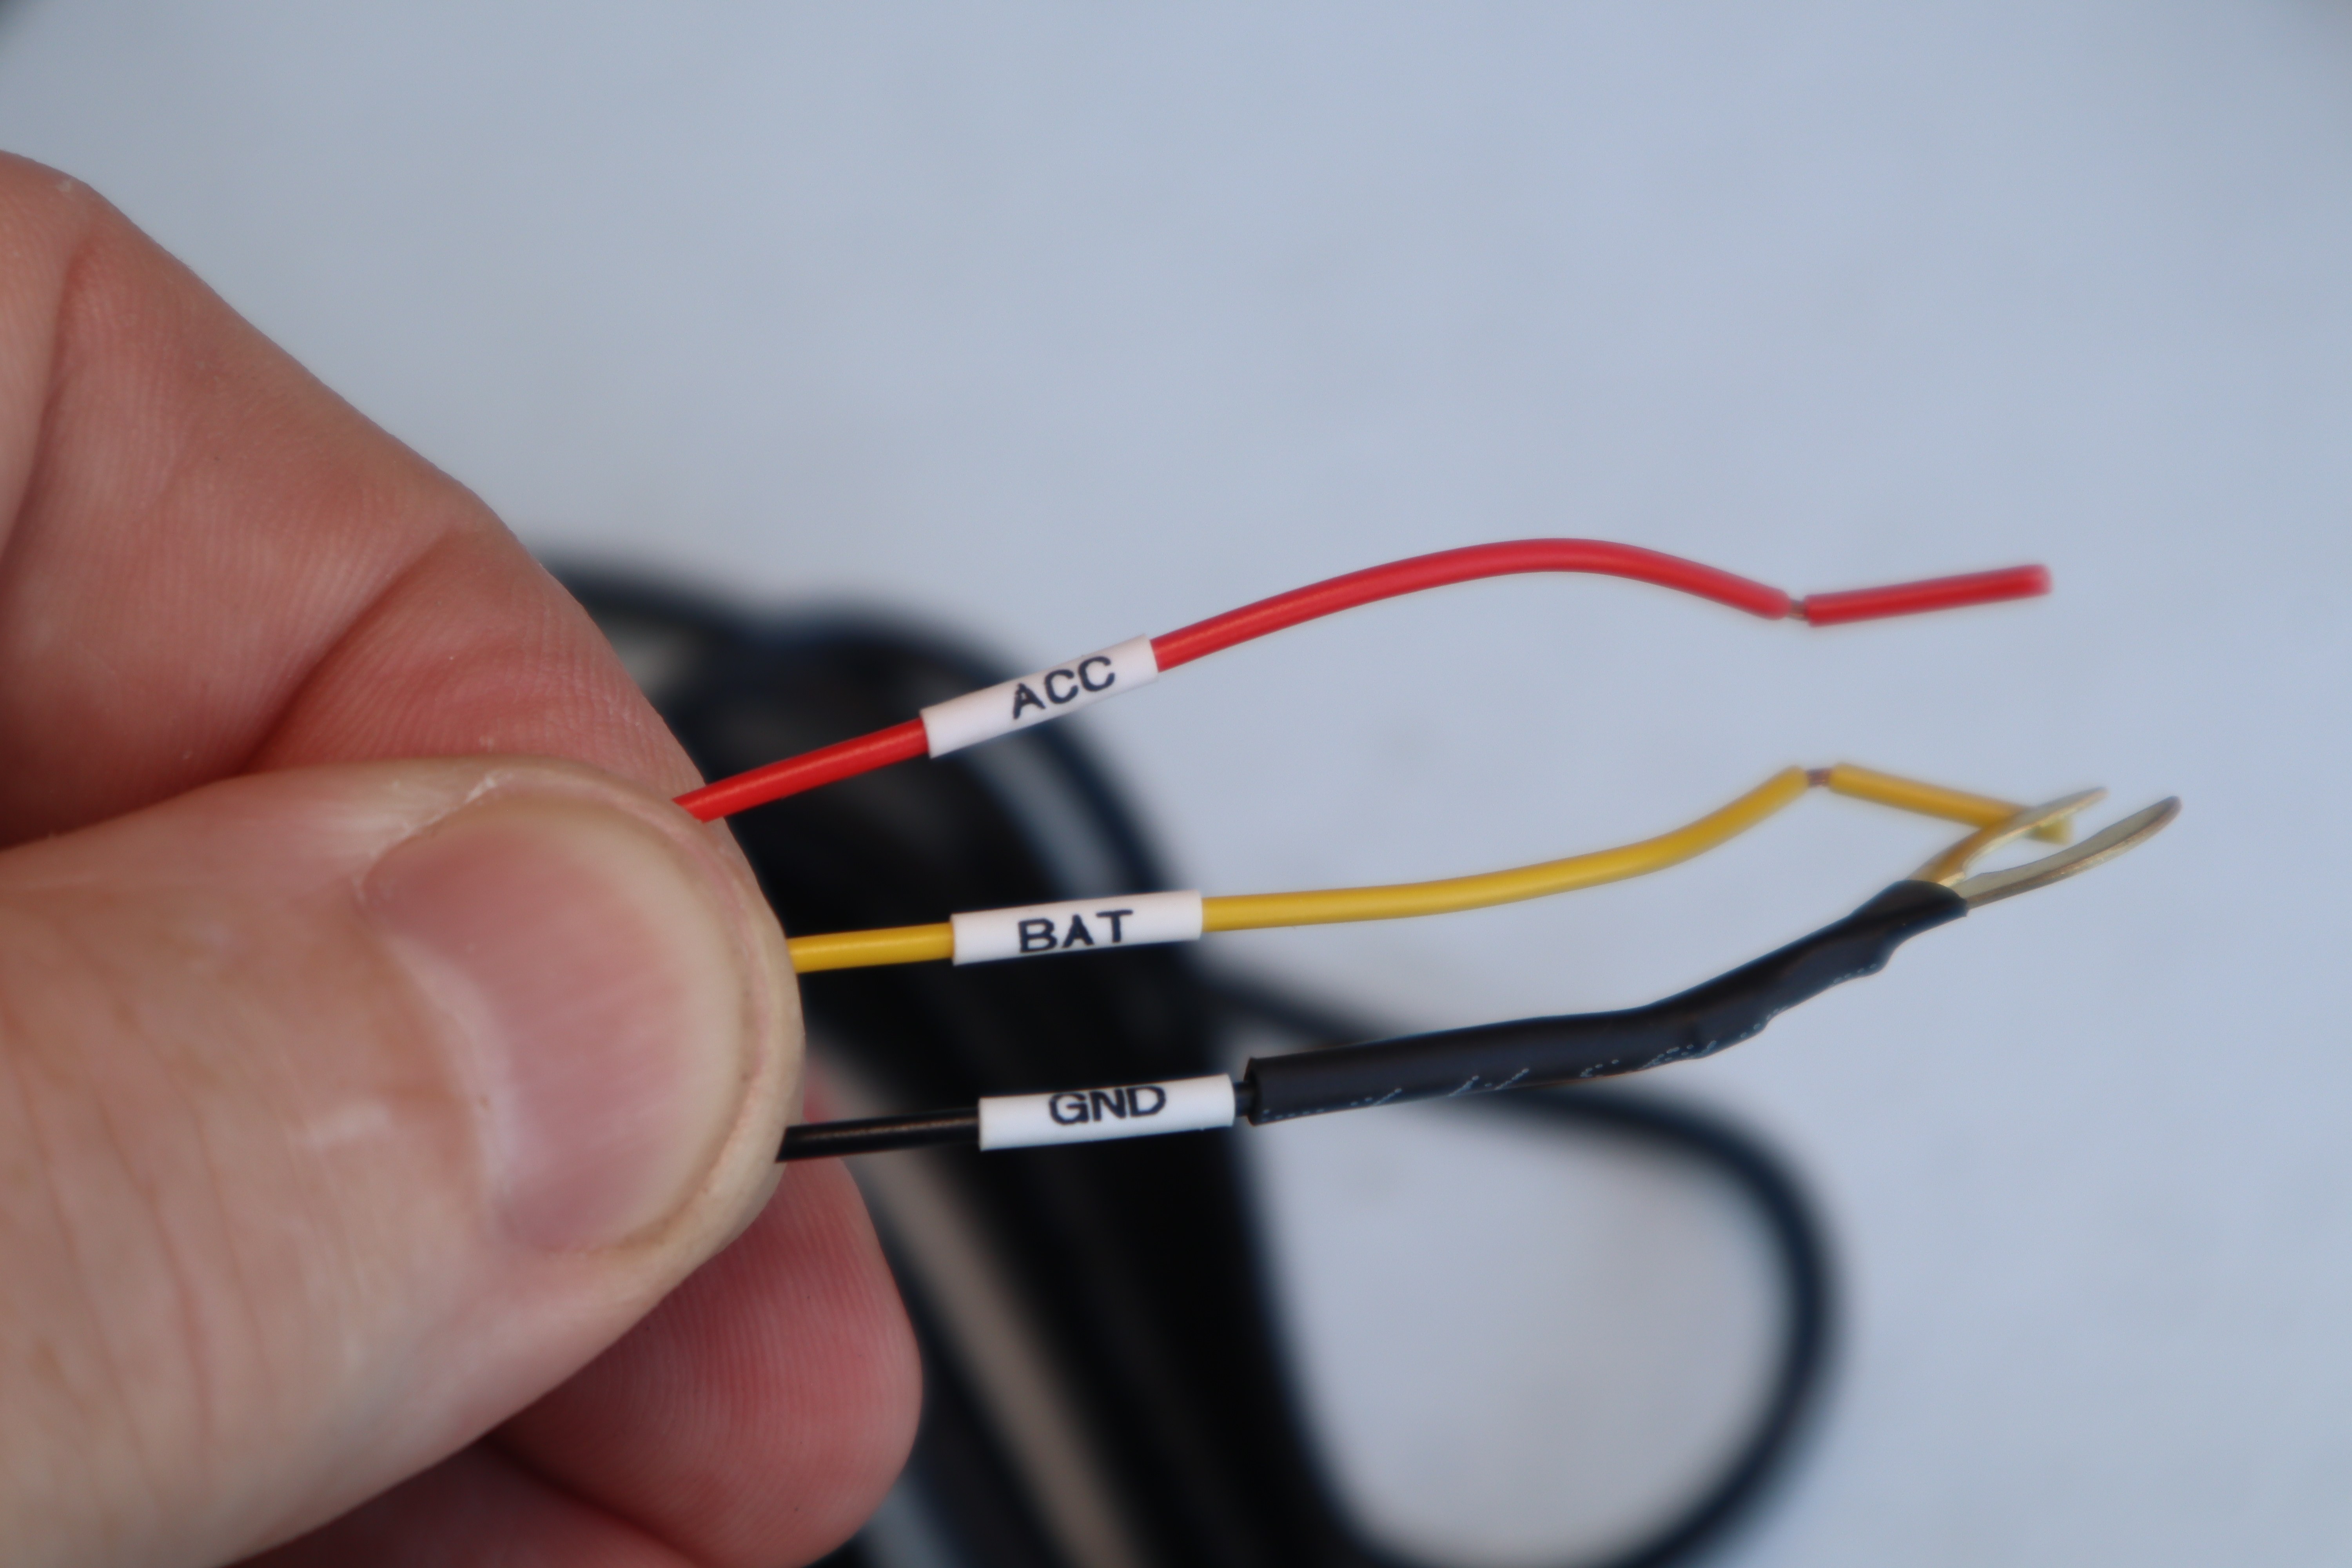
As mentioned earlier, the Vueroid S1 4K Infinite includes a quick-and-easy 12V power port connection and a more dedicated hard wire connection option. If you don’t like things sticking out of your power port all the time, or you’re installing this in a newer Mustang where the power ports shut down when the car isn’t running, you’ll want to use the hard wire connection, which requires 12V constant, 12V switched, and ground (just like a car stereo). Otherwise investigate one of Vueroid’s other power connection options in their store.
For the power connection to the camera system we felt it was better to route the power cable to the left side versus trying to push another wire into the headliner trim on the right, plus the connectors would hit each other going the same direction.

Much like the rear camera cable, we routed the power cable across the top of the windshield between the headlinerand headliner trim using the included trim tool to pry the opening a bit and push the cable into place.
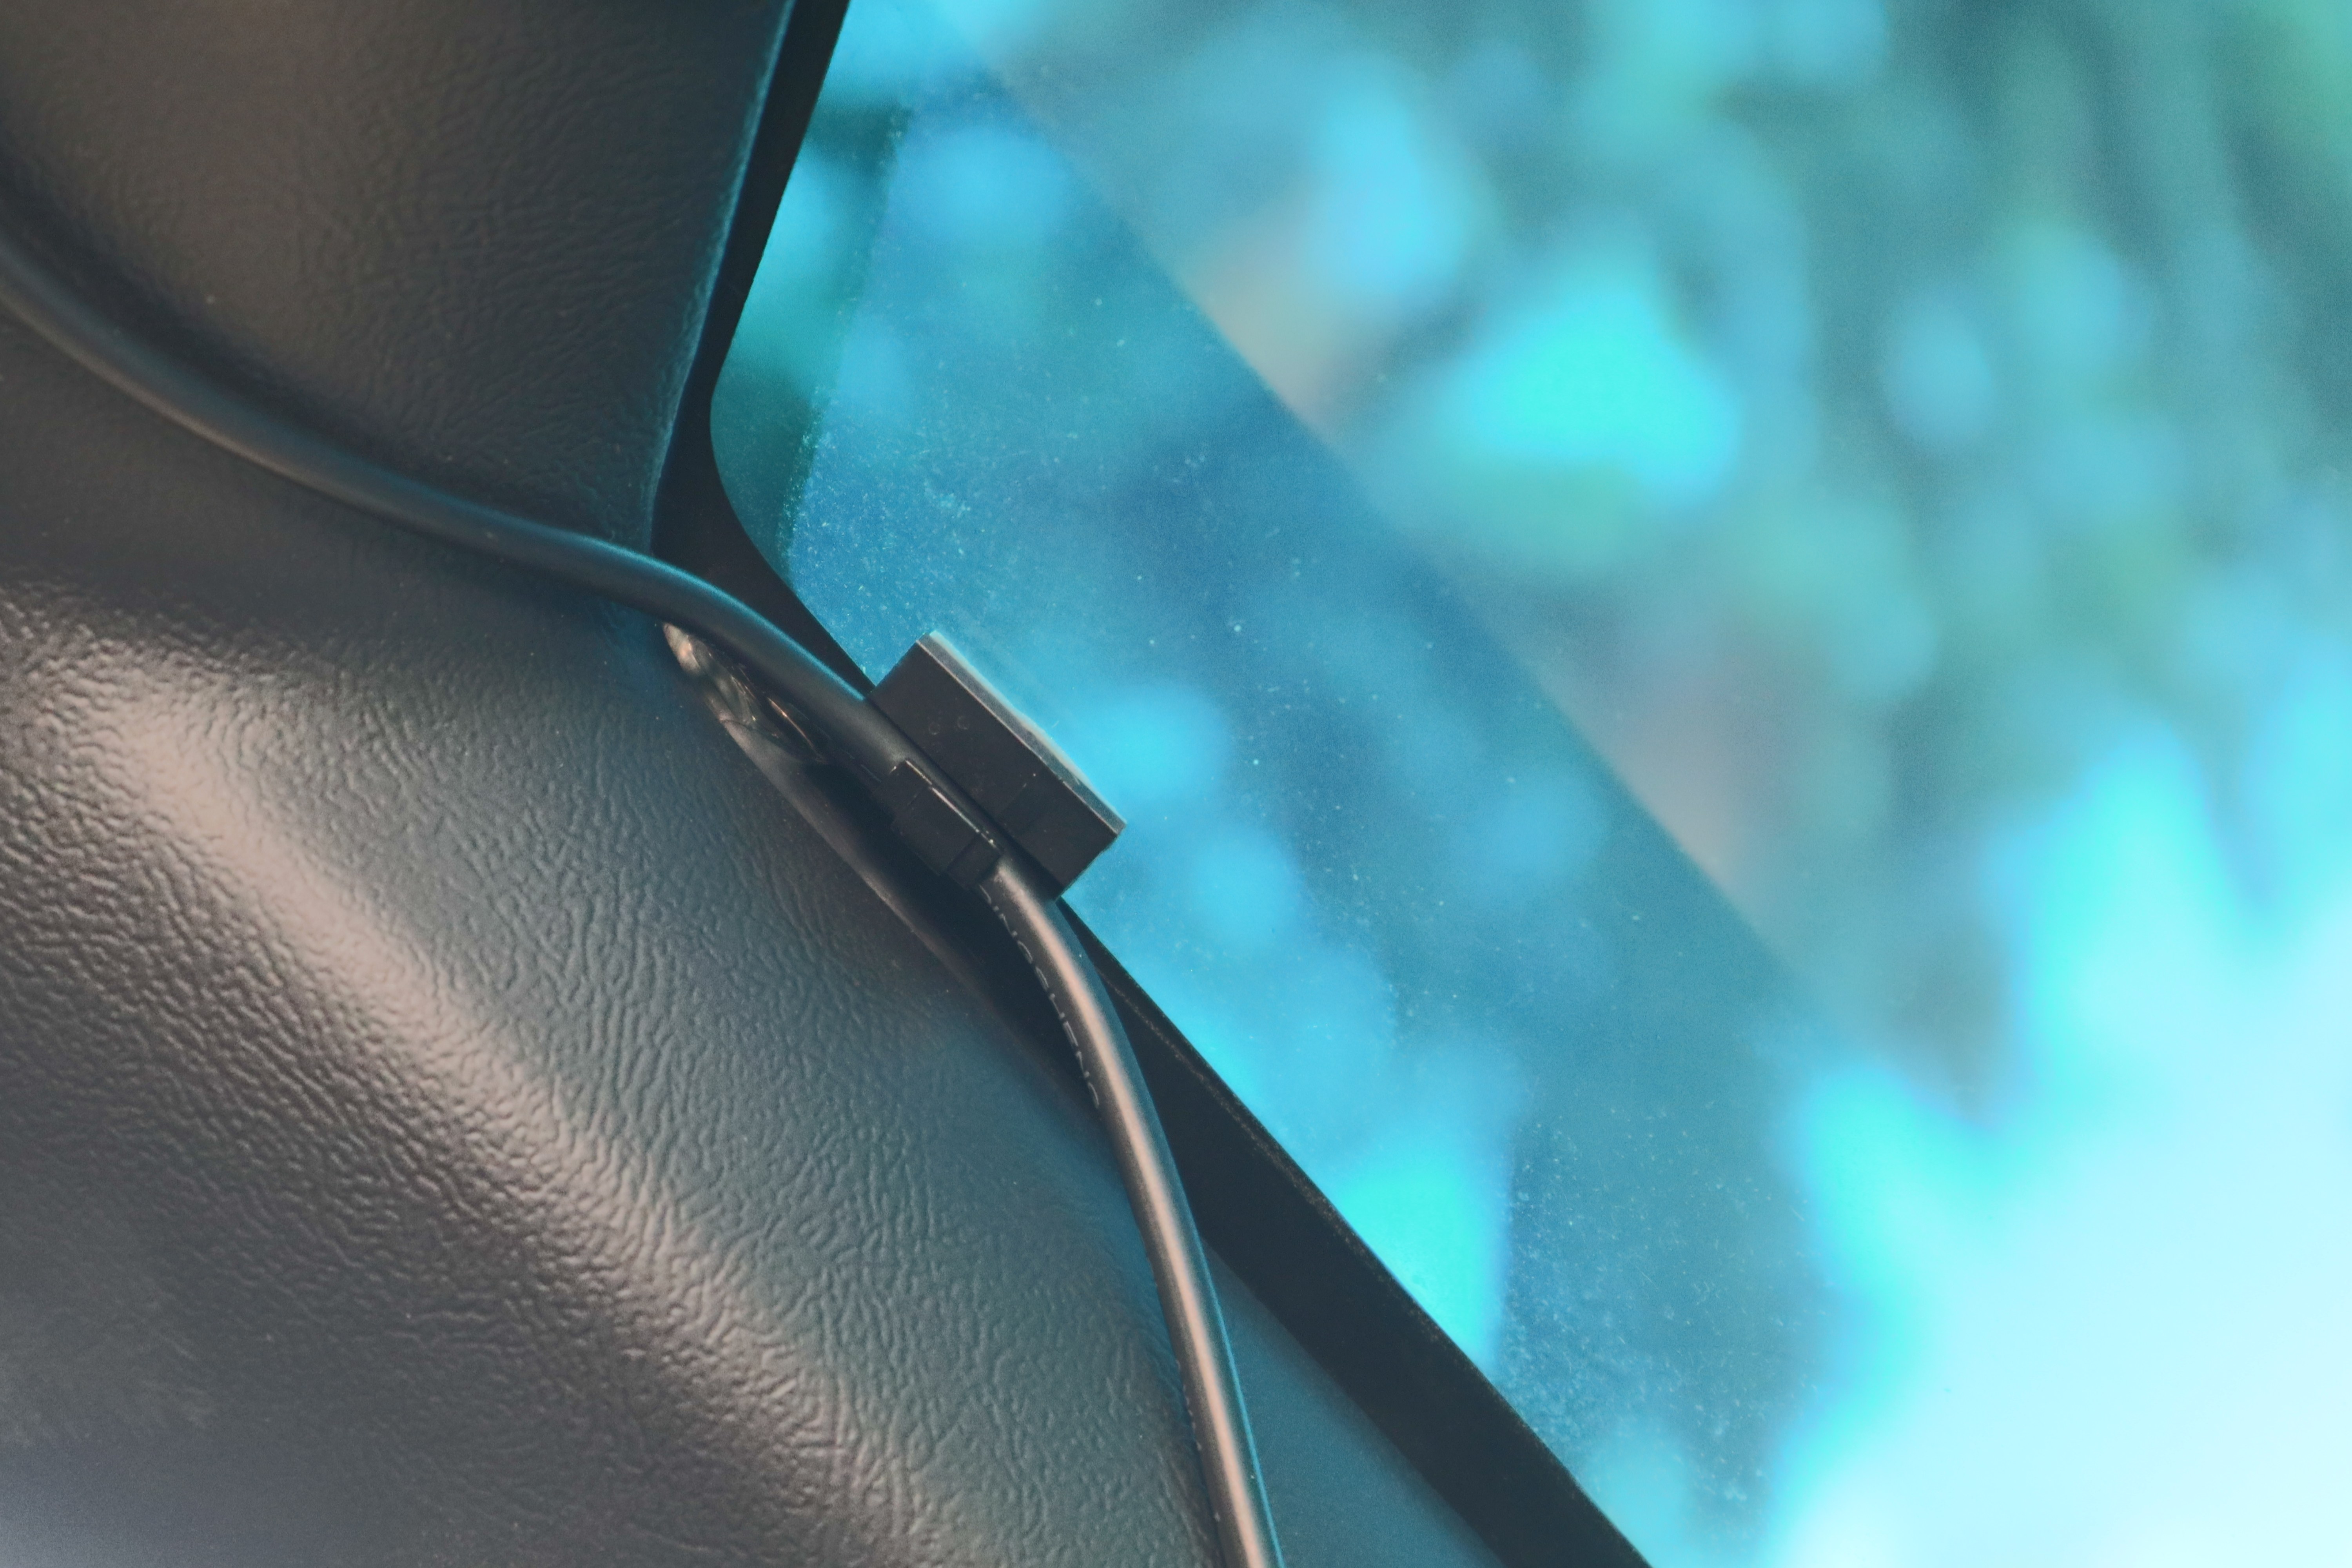
Knowing our 35 plus year old Fox Mustang plastic trim can be a little brittle, we decided to play it safe and route the power cable over the top of the trim in the very corner, using one of the included cable clips to retain it. Much like the Bluetooth mic for our Pioneer double DIN stereo, the black cable blends right in and isn’t noticeable.
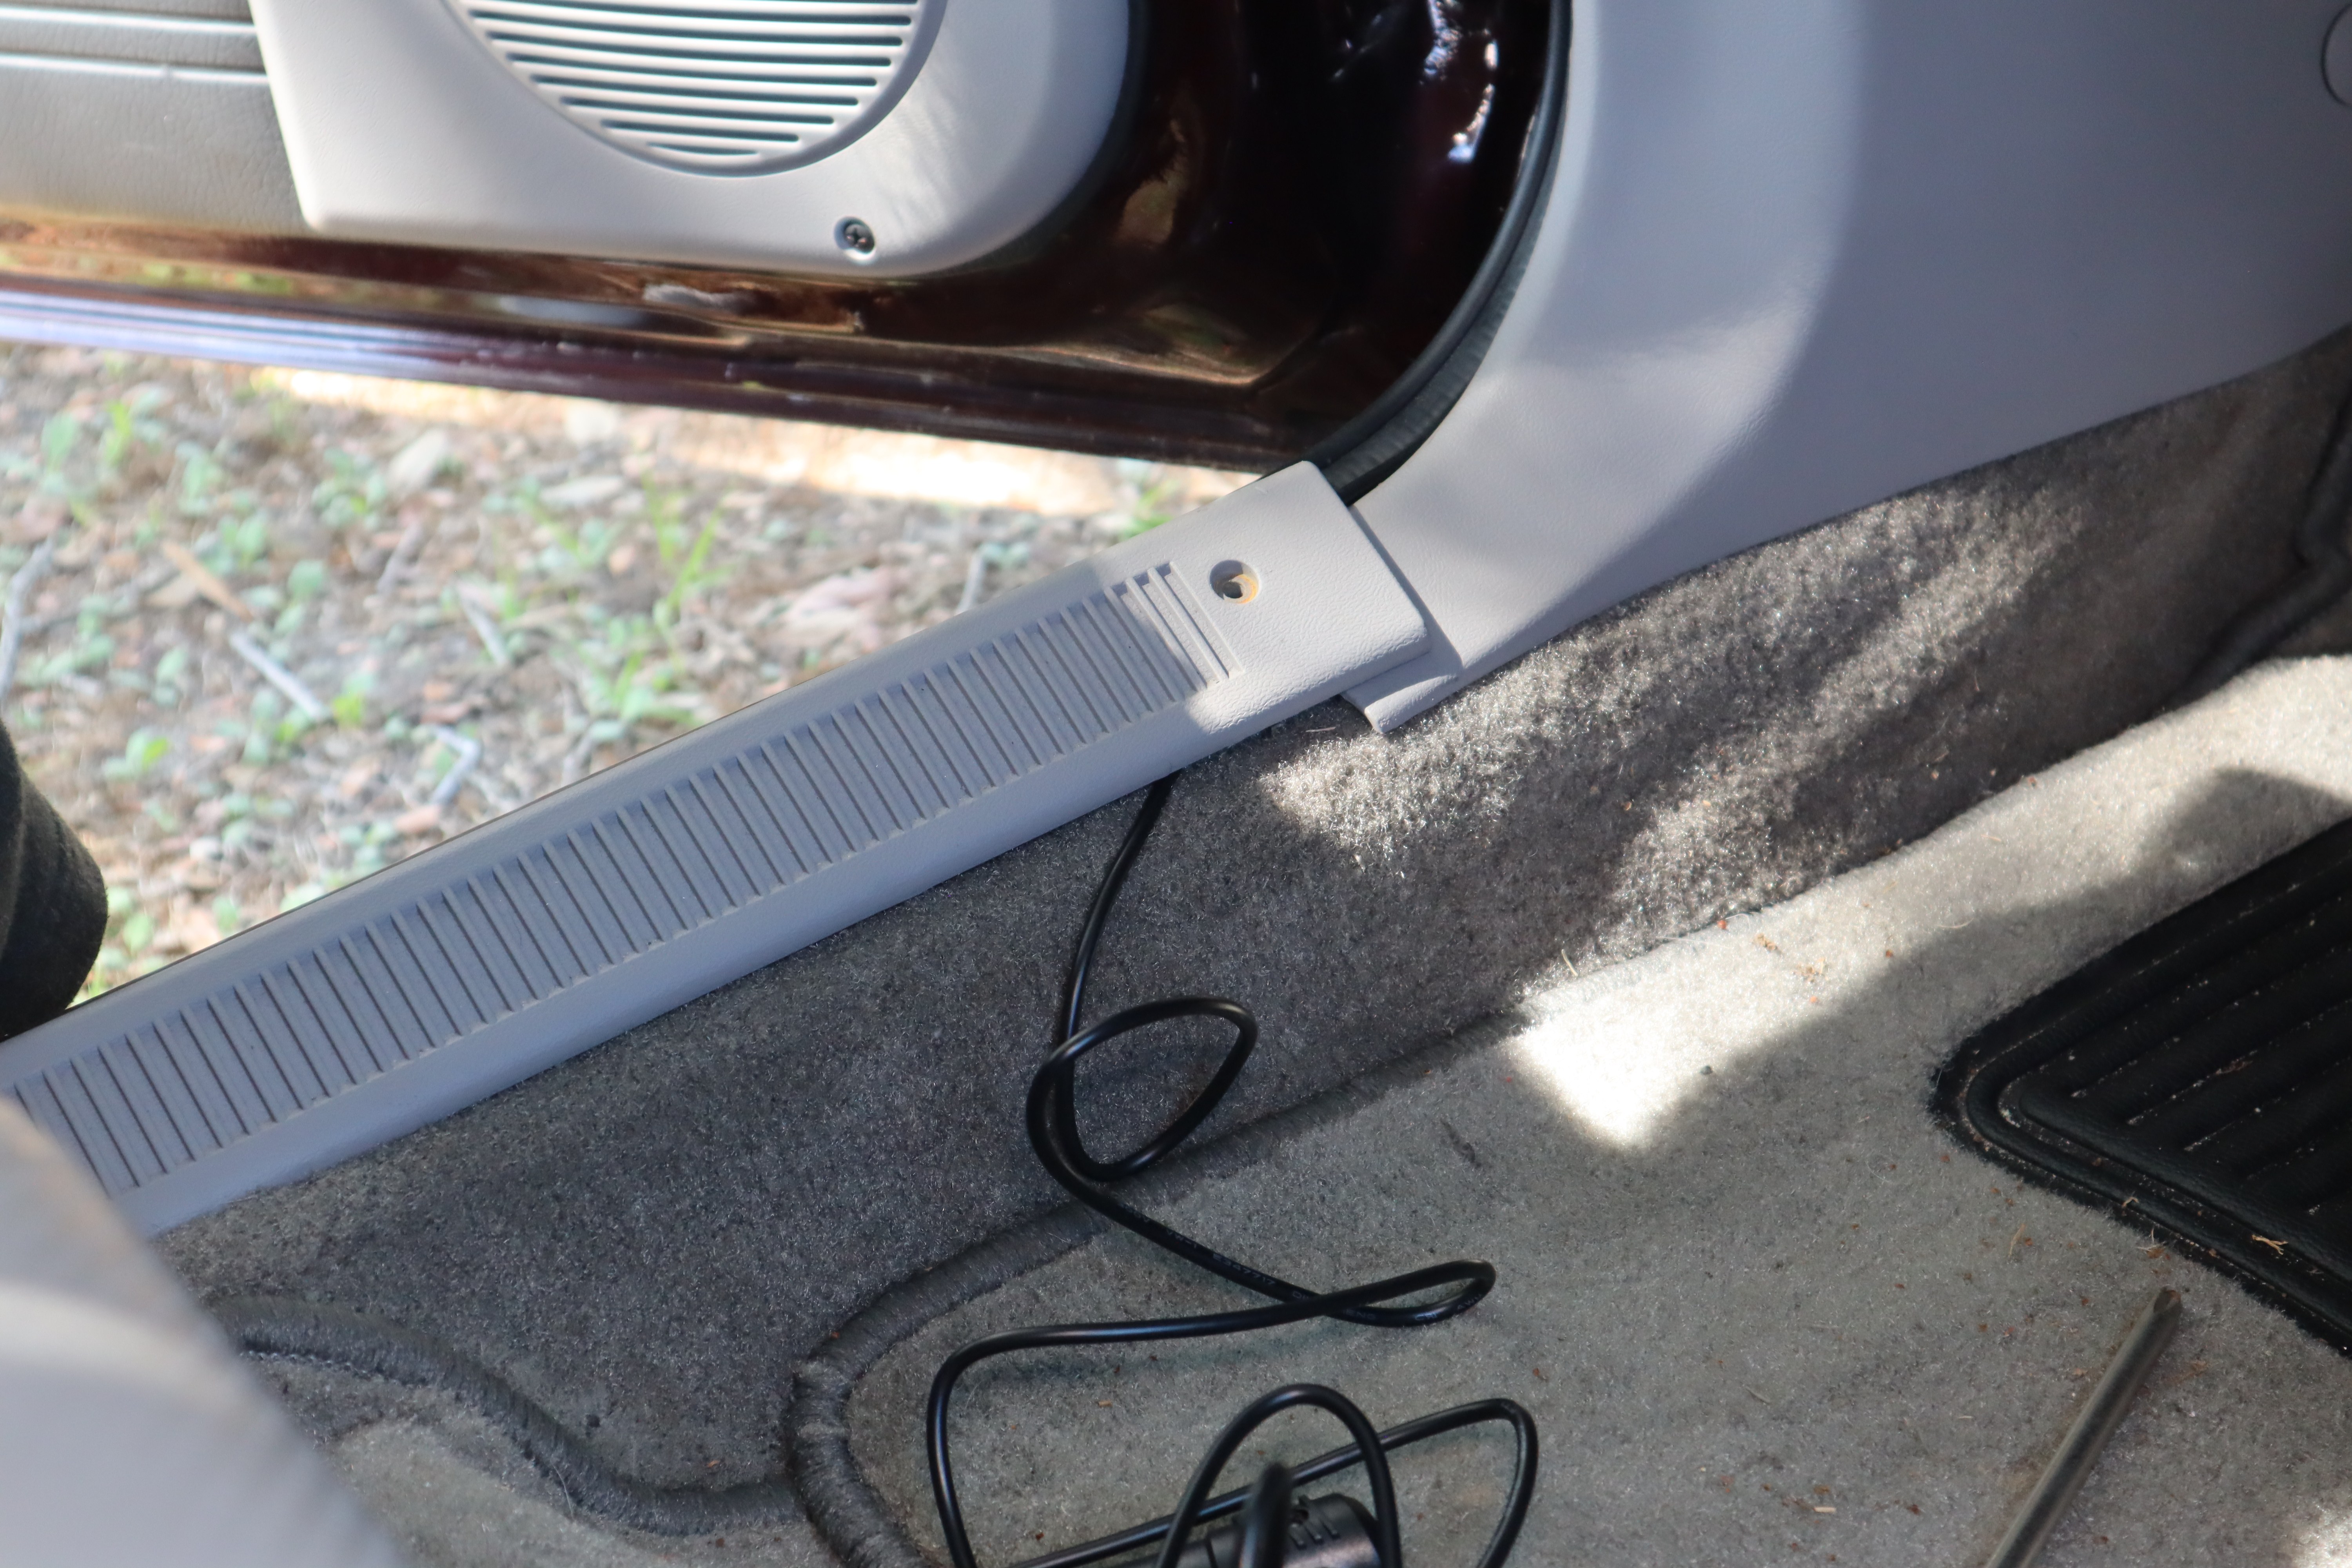
The power cable is routed down the frontside of the A-pillar trim, behind the kick panel, and then along the door sill trim and under the carpet with the goal of routing it under the driver’s seat to the console where our 12V power port is. A small slit in the carpet where our factory fuel pump relay is, allows the cable to pass through.
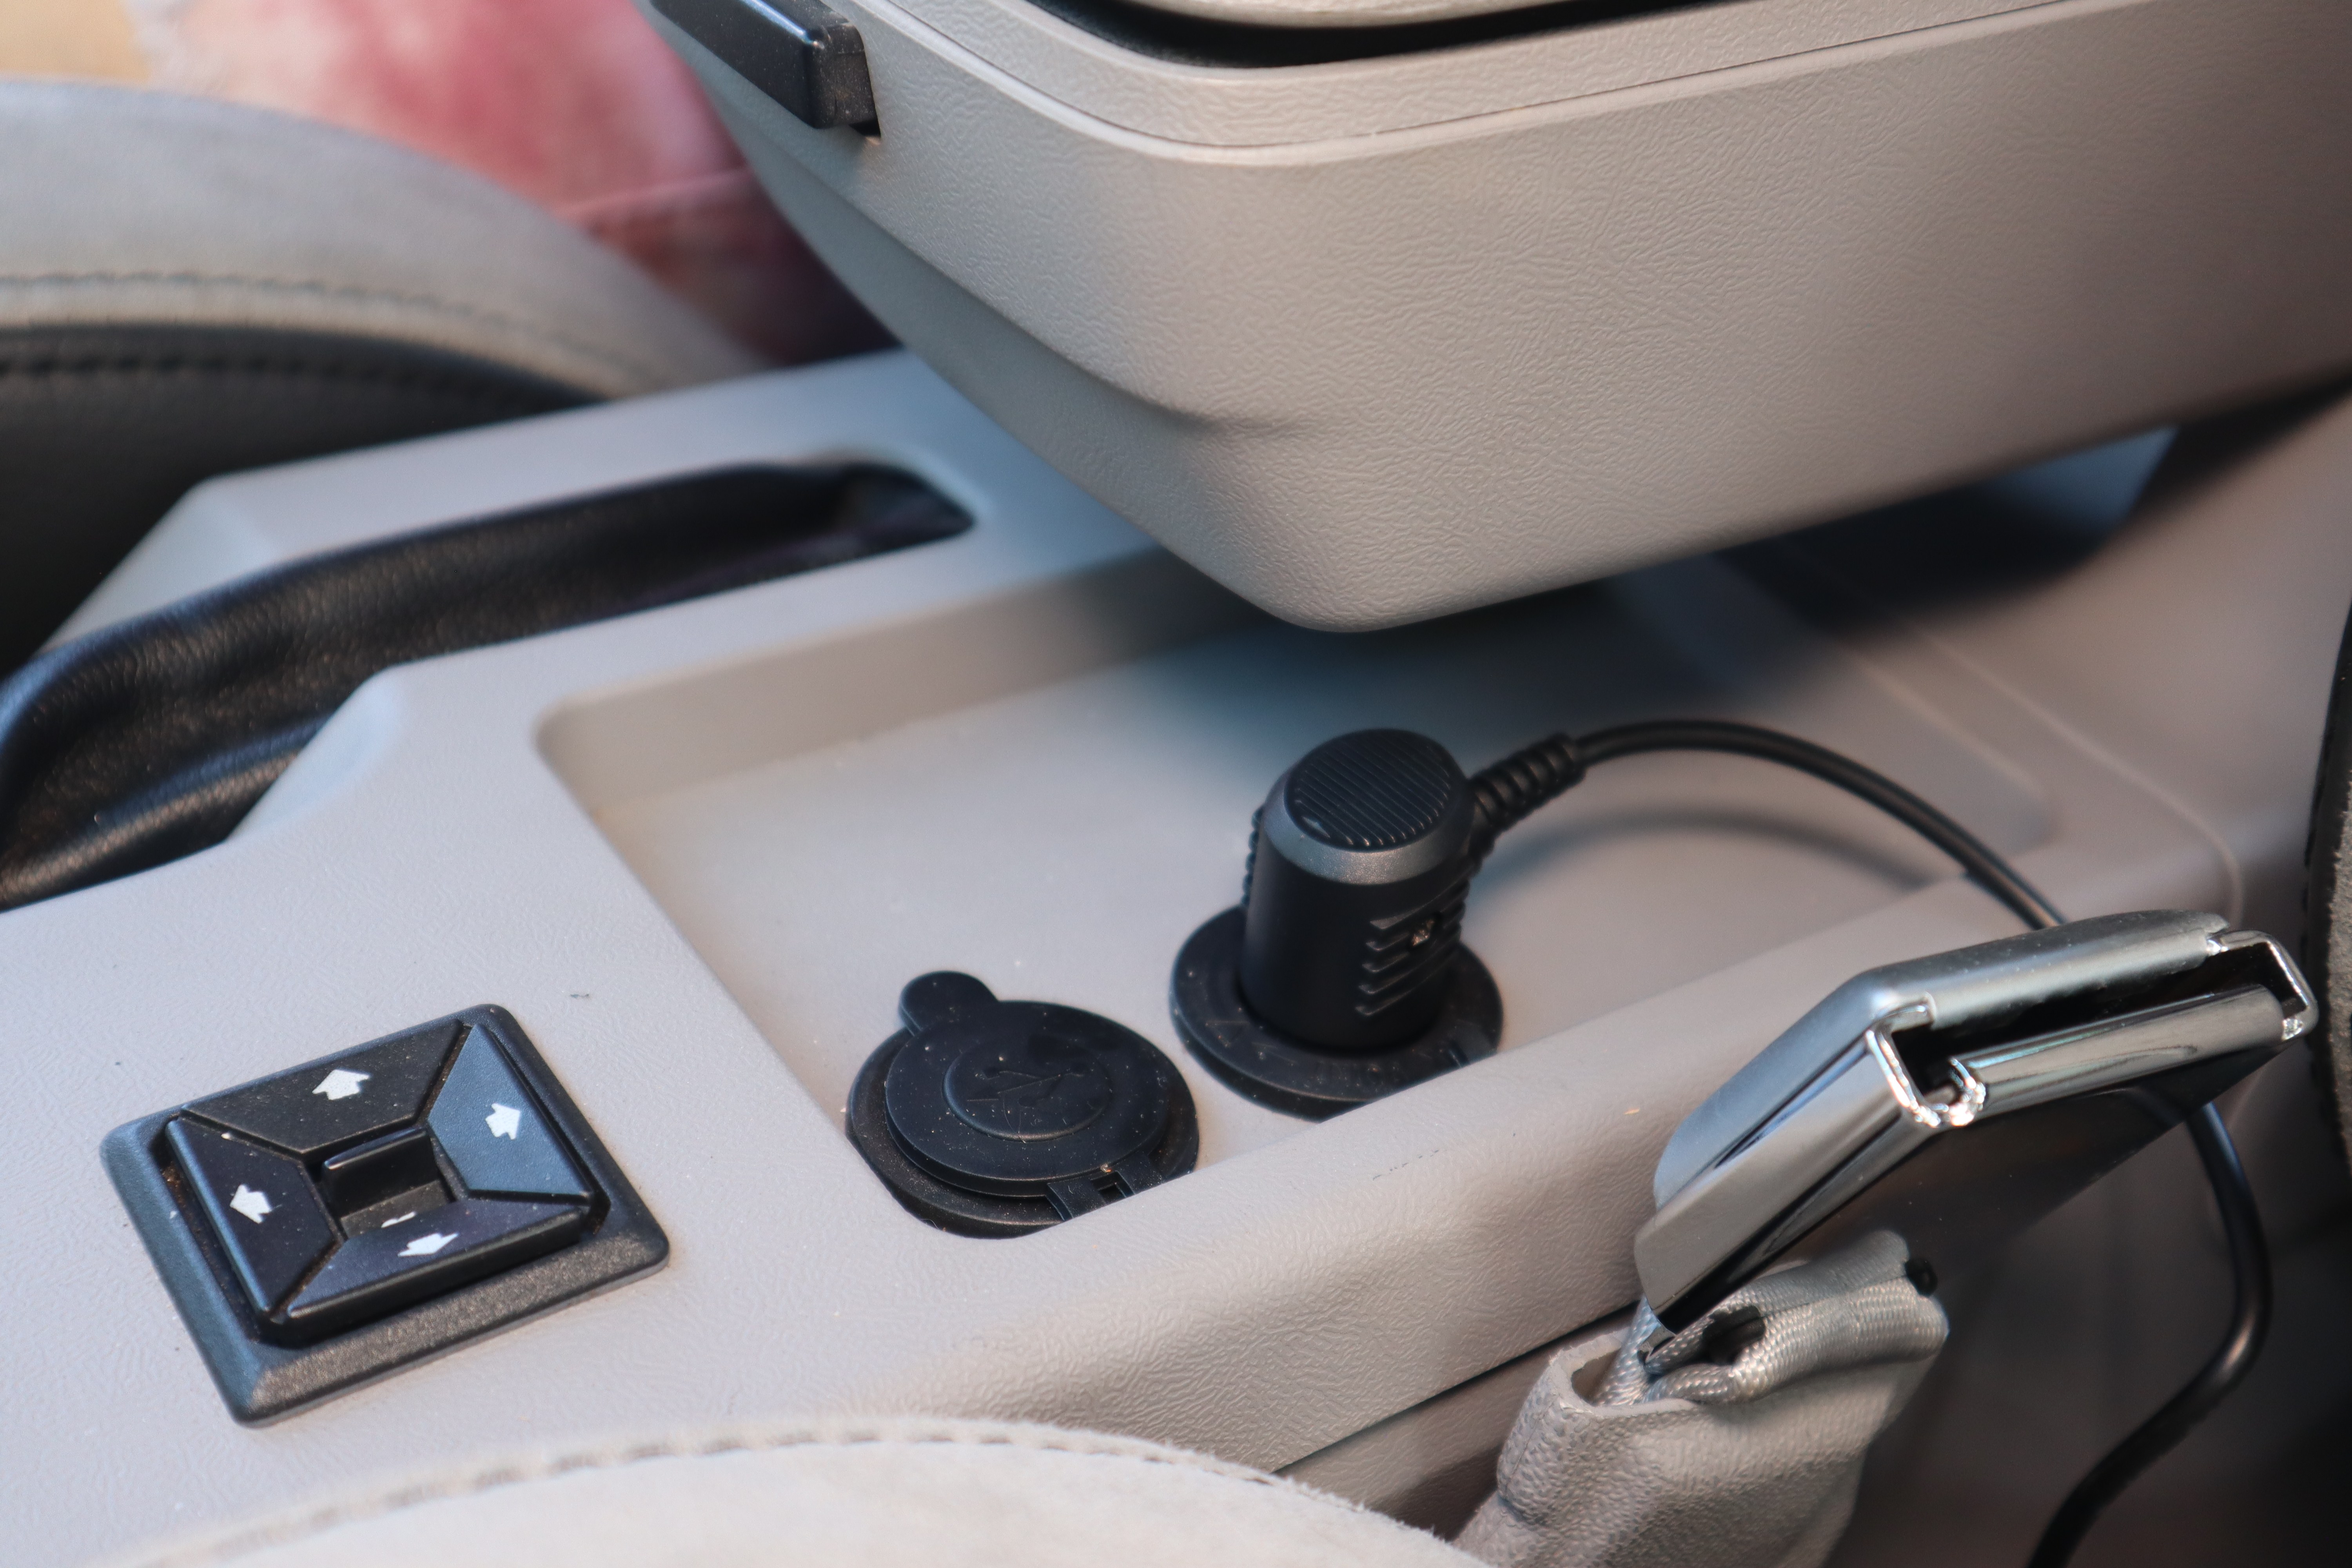
Our 1990 Mustang has a Daniel Carpenter console upper trim panel, which places the 12V power port at the rear, under the arm rest. Since there are two (the forward one has two USB ports) and they are out of the way under the armrest, the connection will not be disturbed or be easily seen.
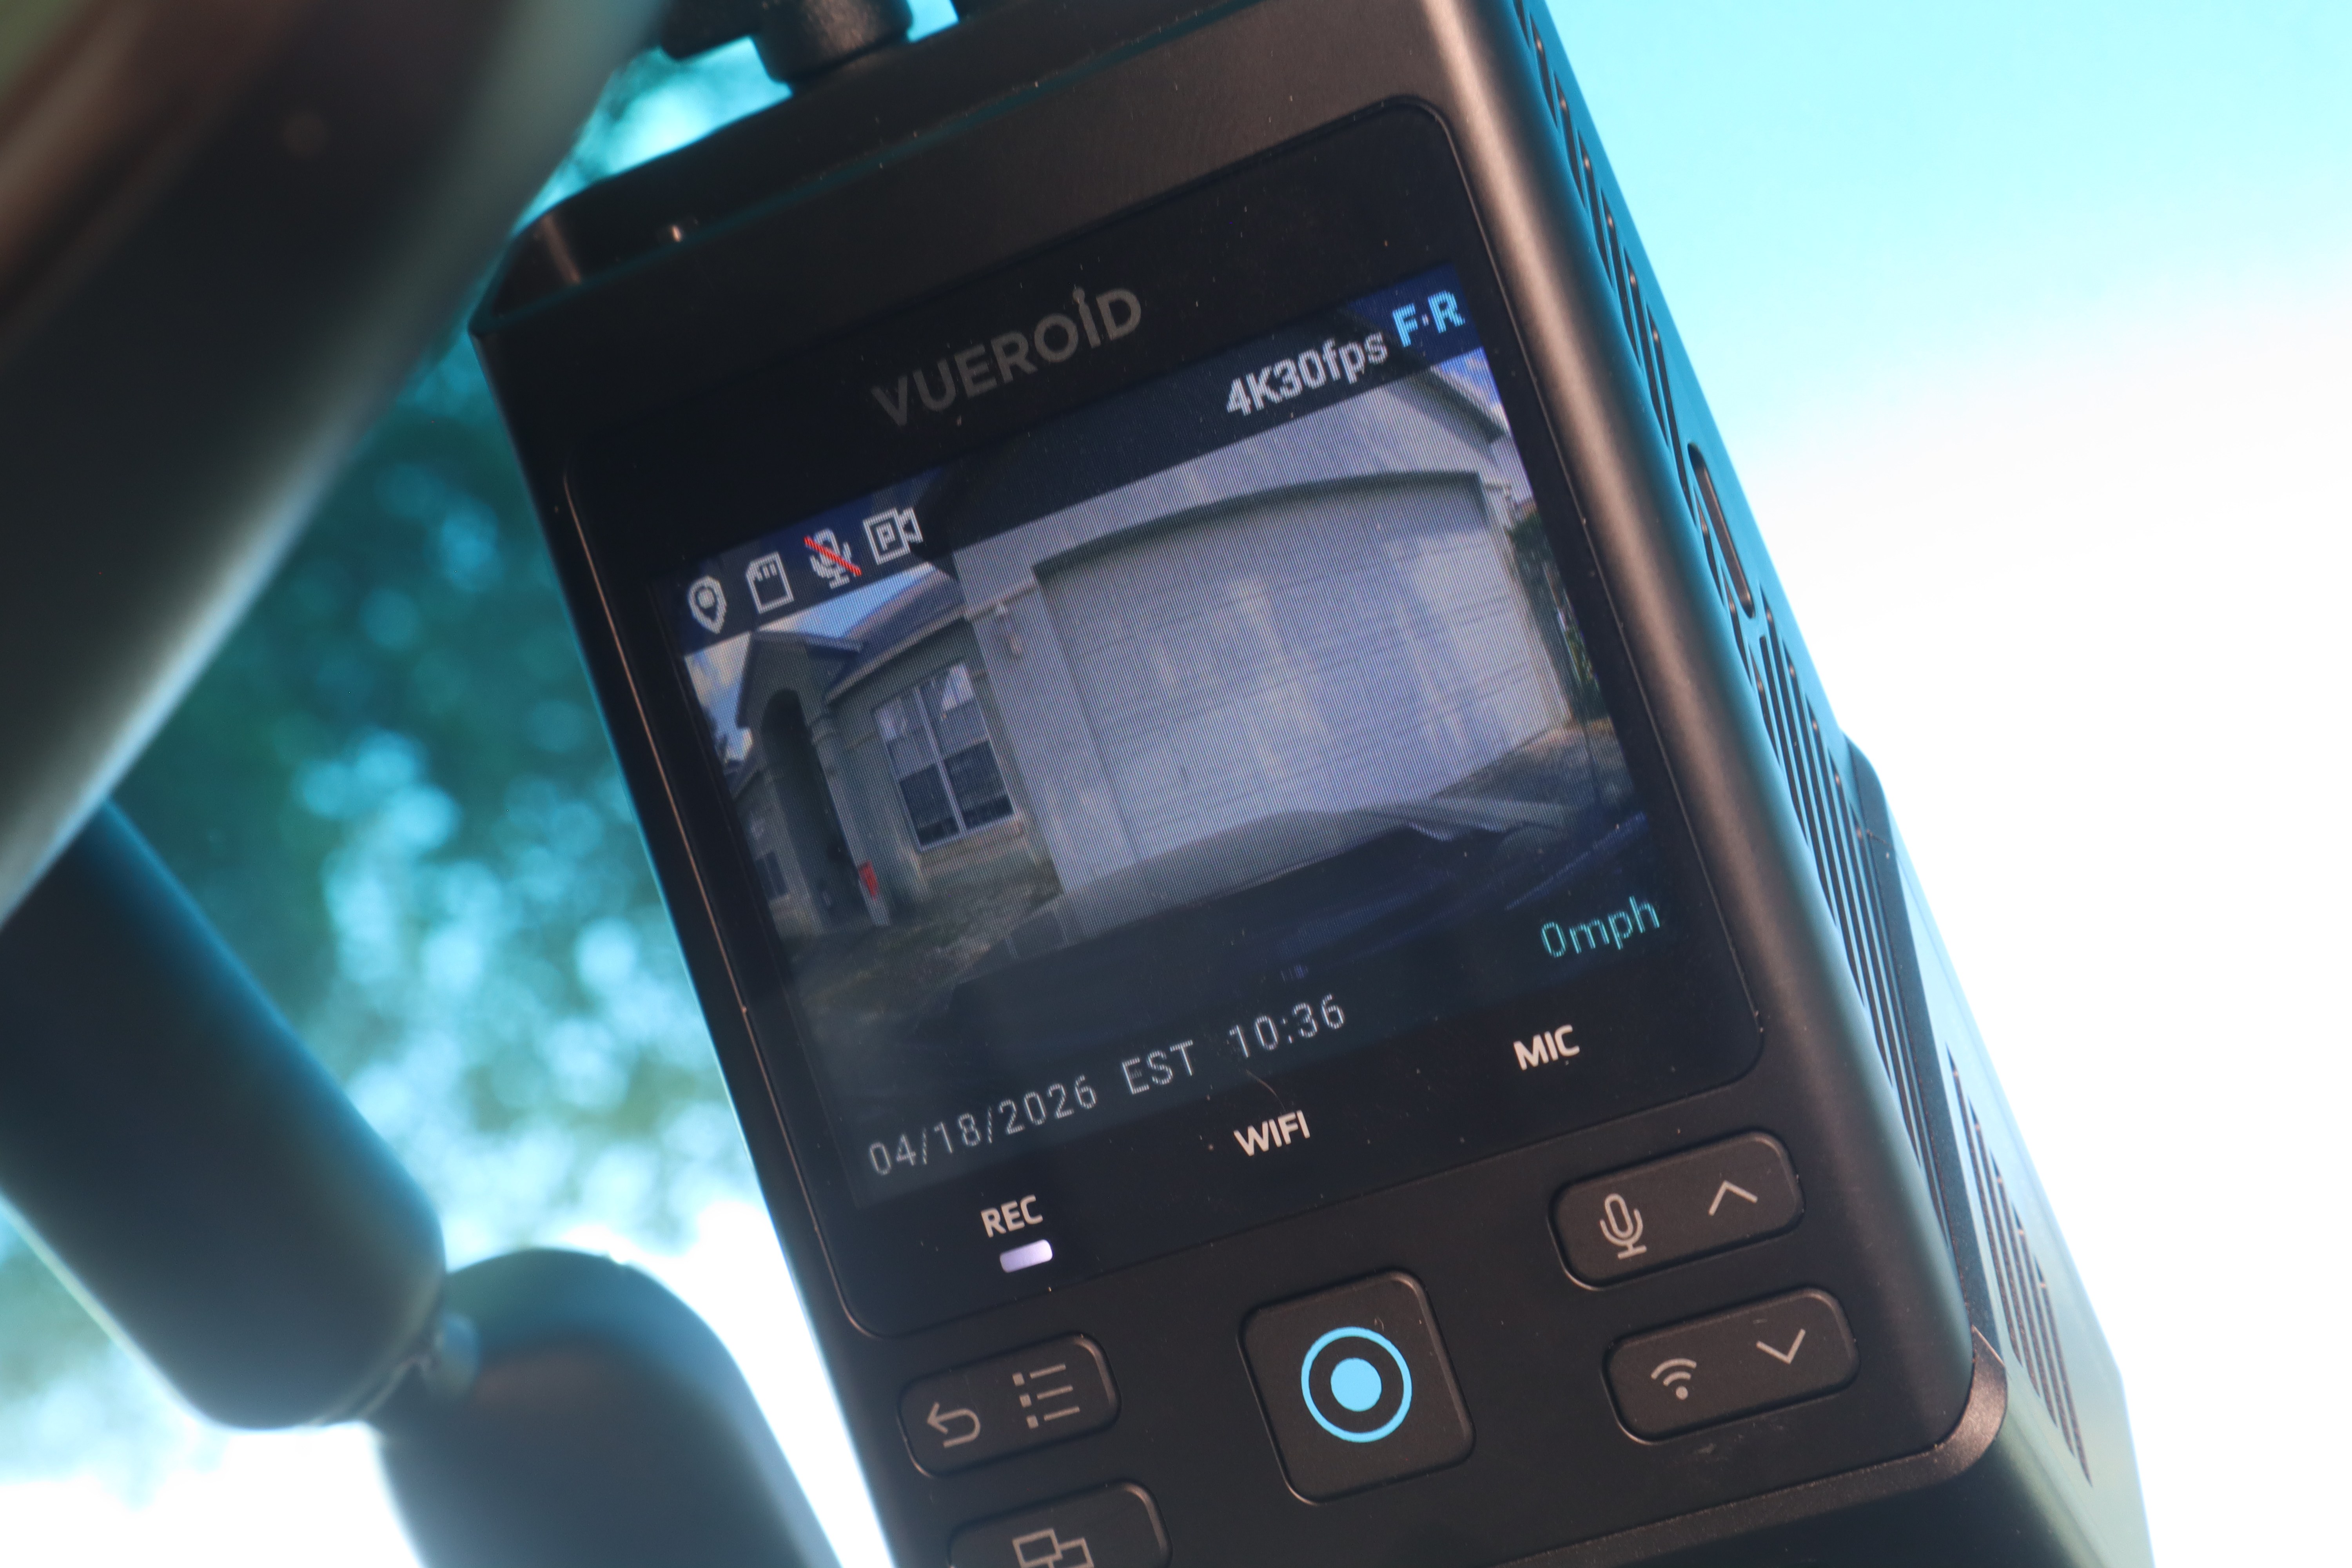
Powering up the Vueroid S1 4K Infinite fo rthe first time you’ll be walked through a couple of basic settings and you’ll be up and running in minutes.
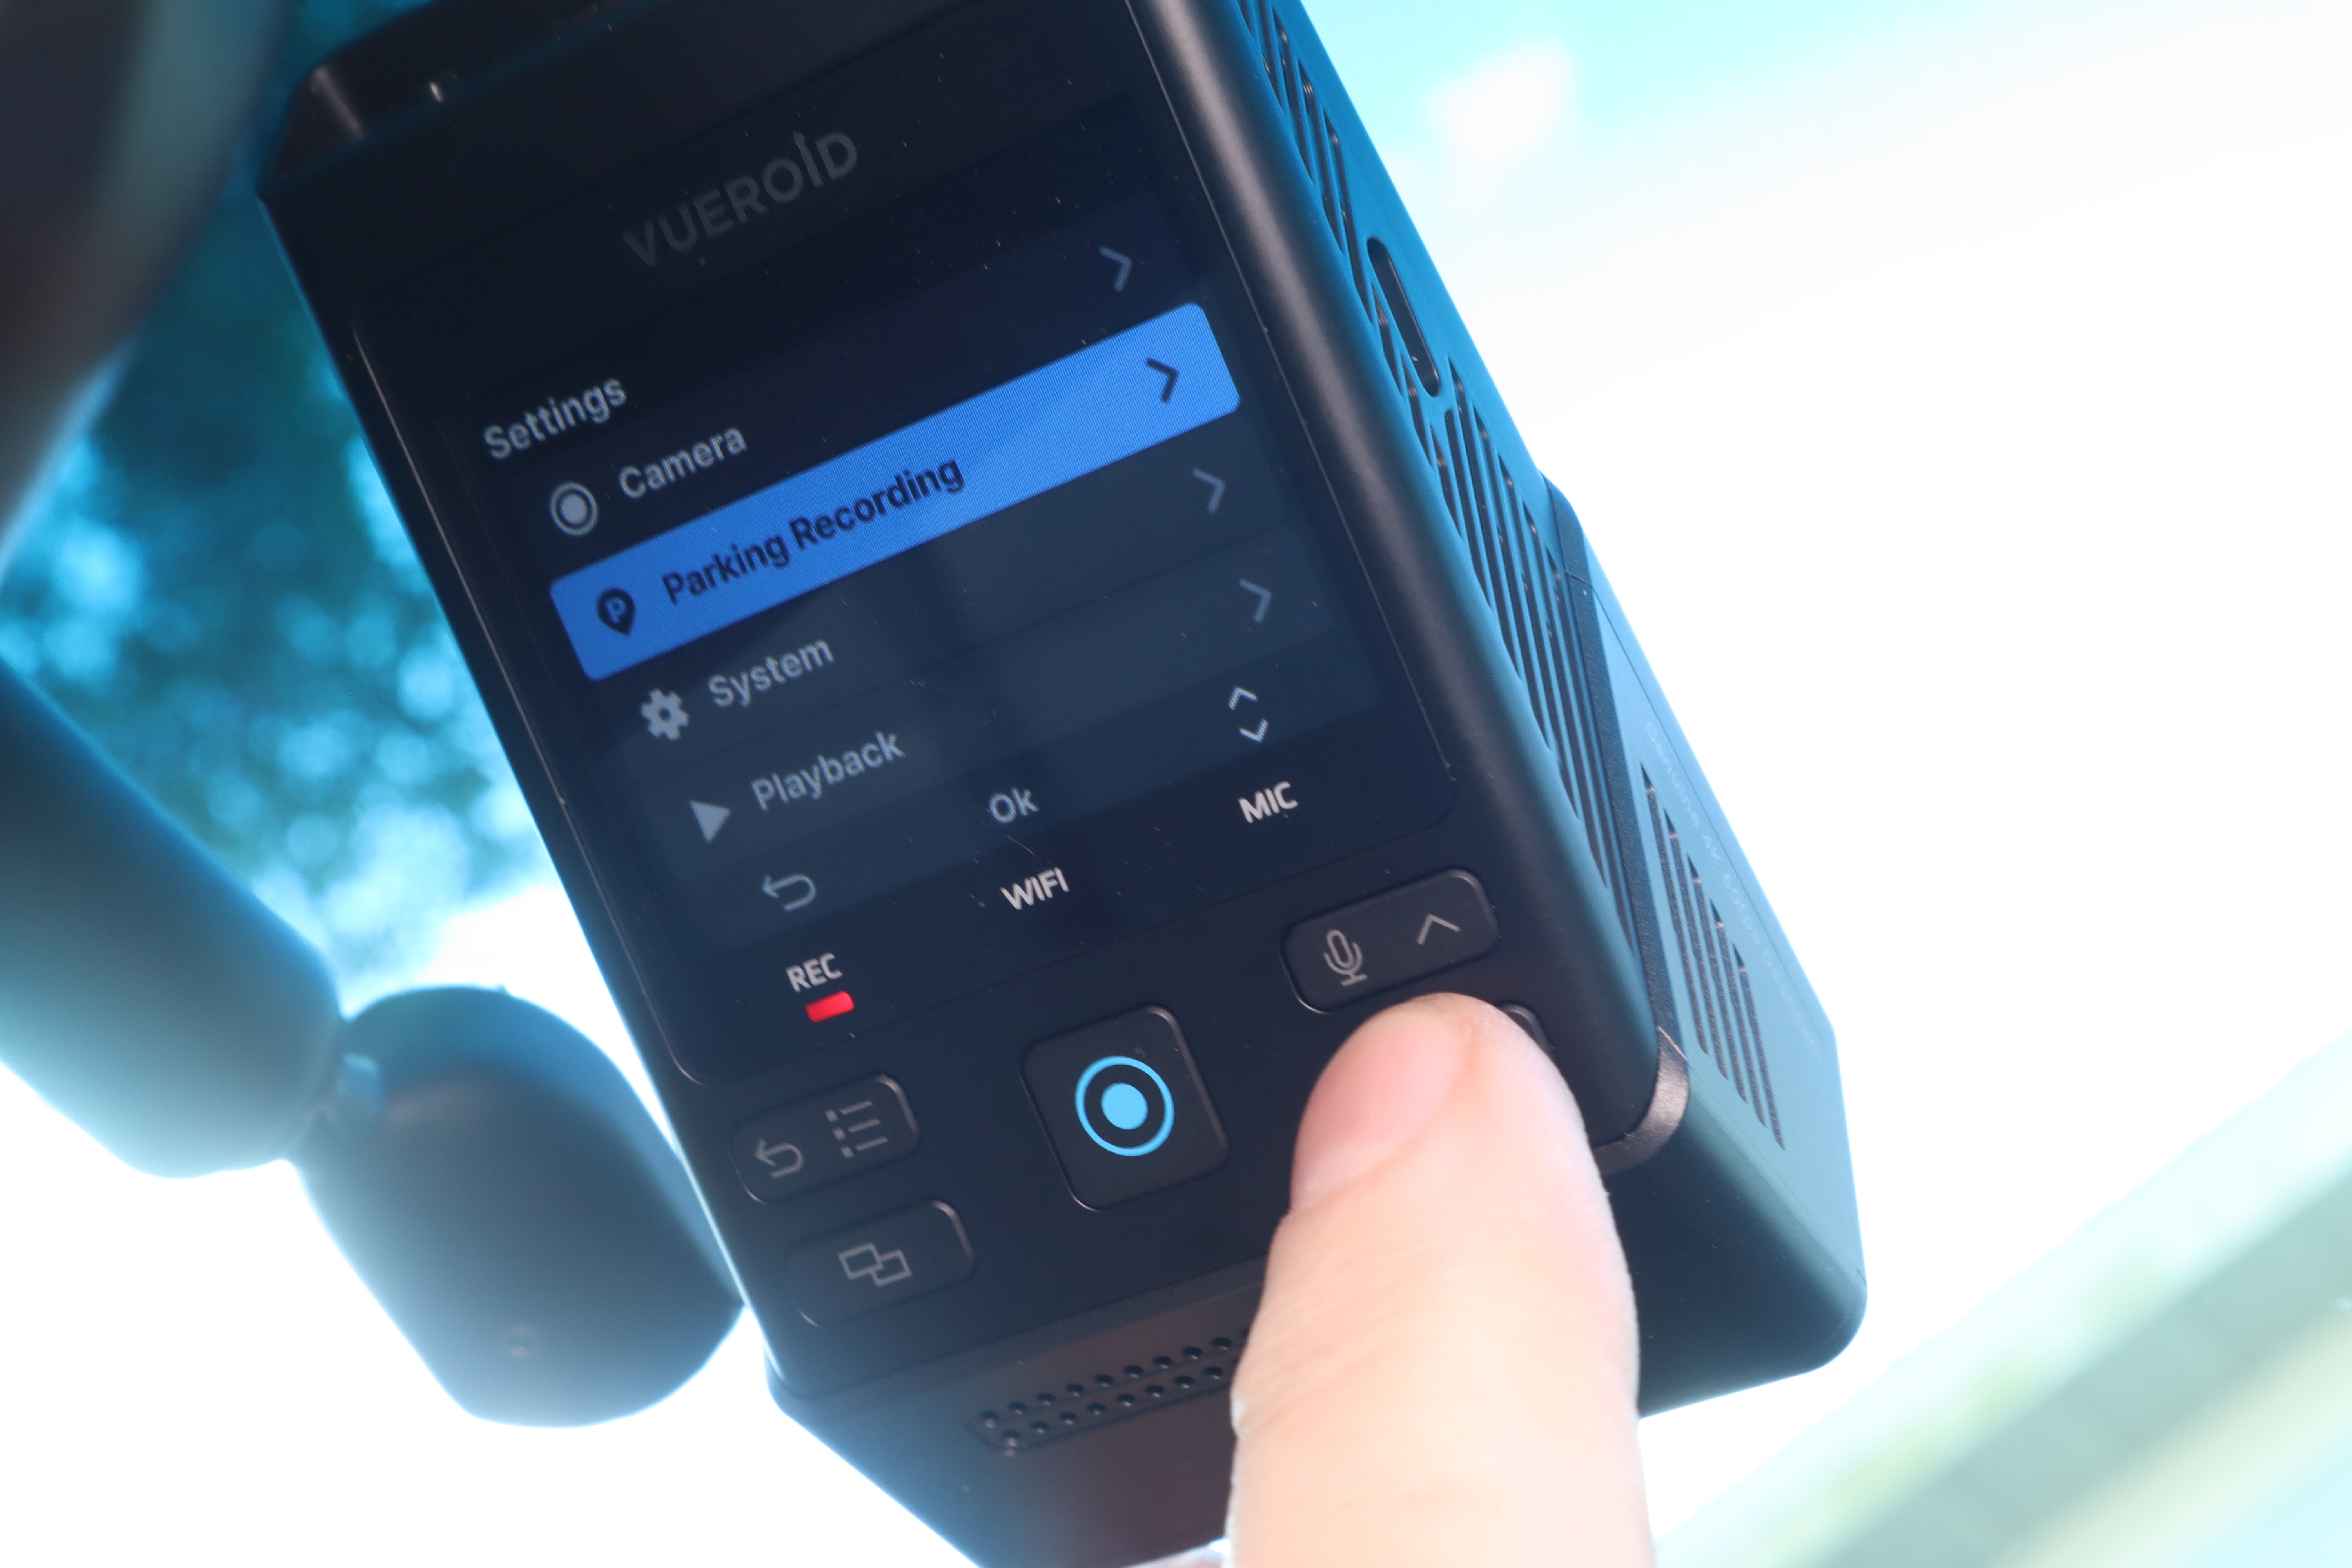
You can easily run through the vast settings that the feature rich Vueroid S1 4K Infinite has, including recording quality, parking recording features, and more right from the front camera unit.
We highly recommend downloading the Vueroid app as well (available for iOS and Android phones from their respective app stores). The app allows you to adjust many of the camera’s functions without having to sit in the car and allows quick viewing of videos that can be shared, still images captured from video, and much more.
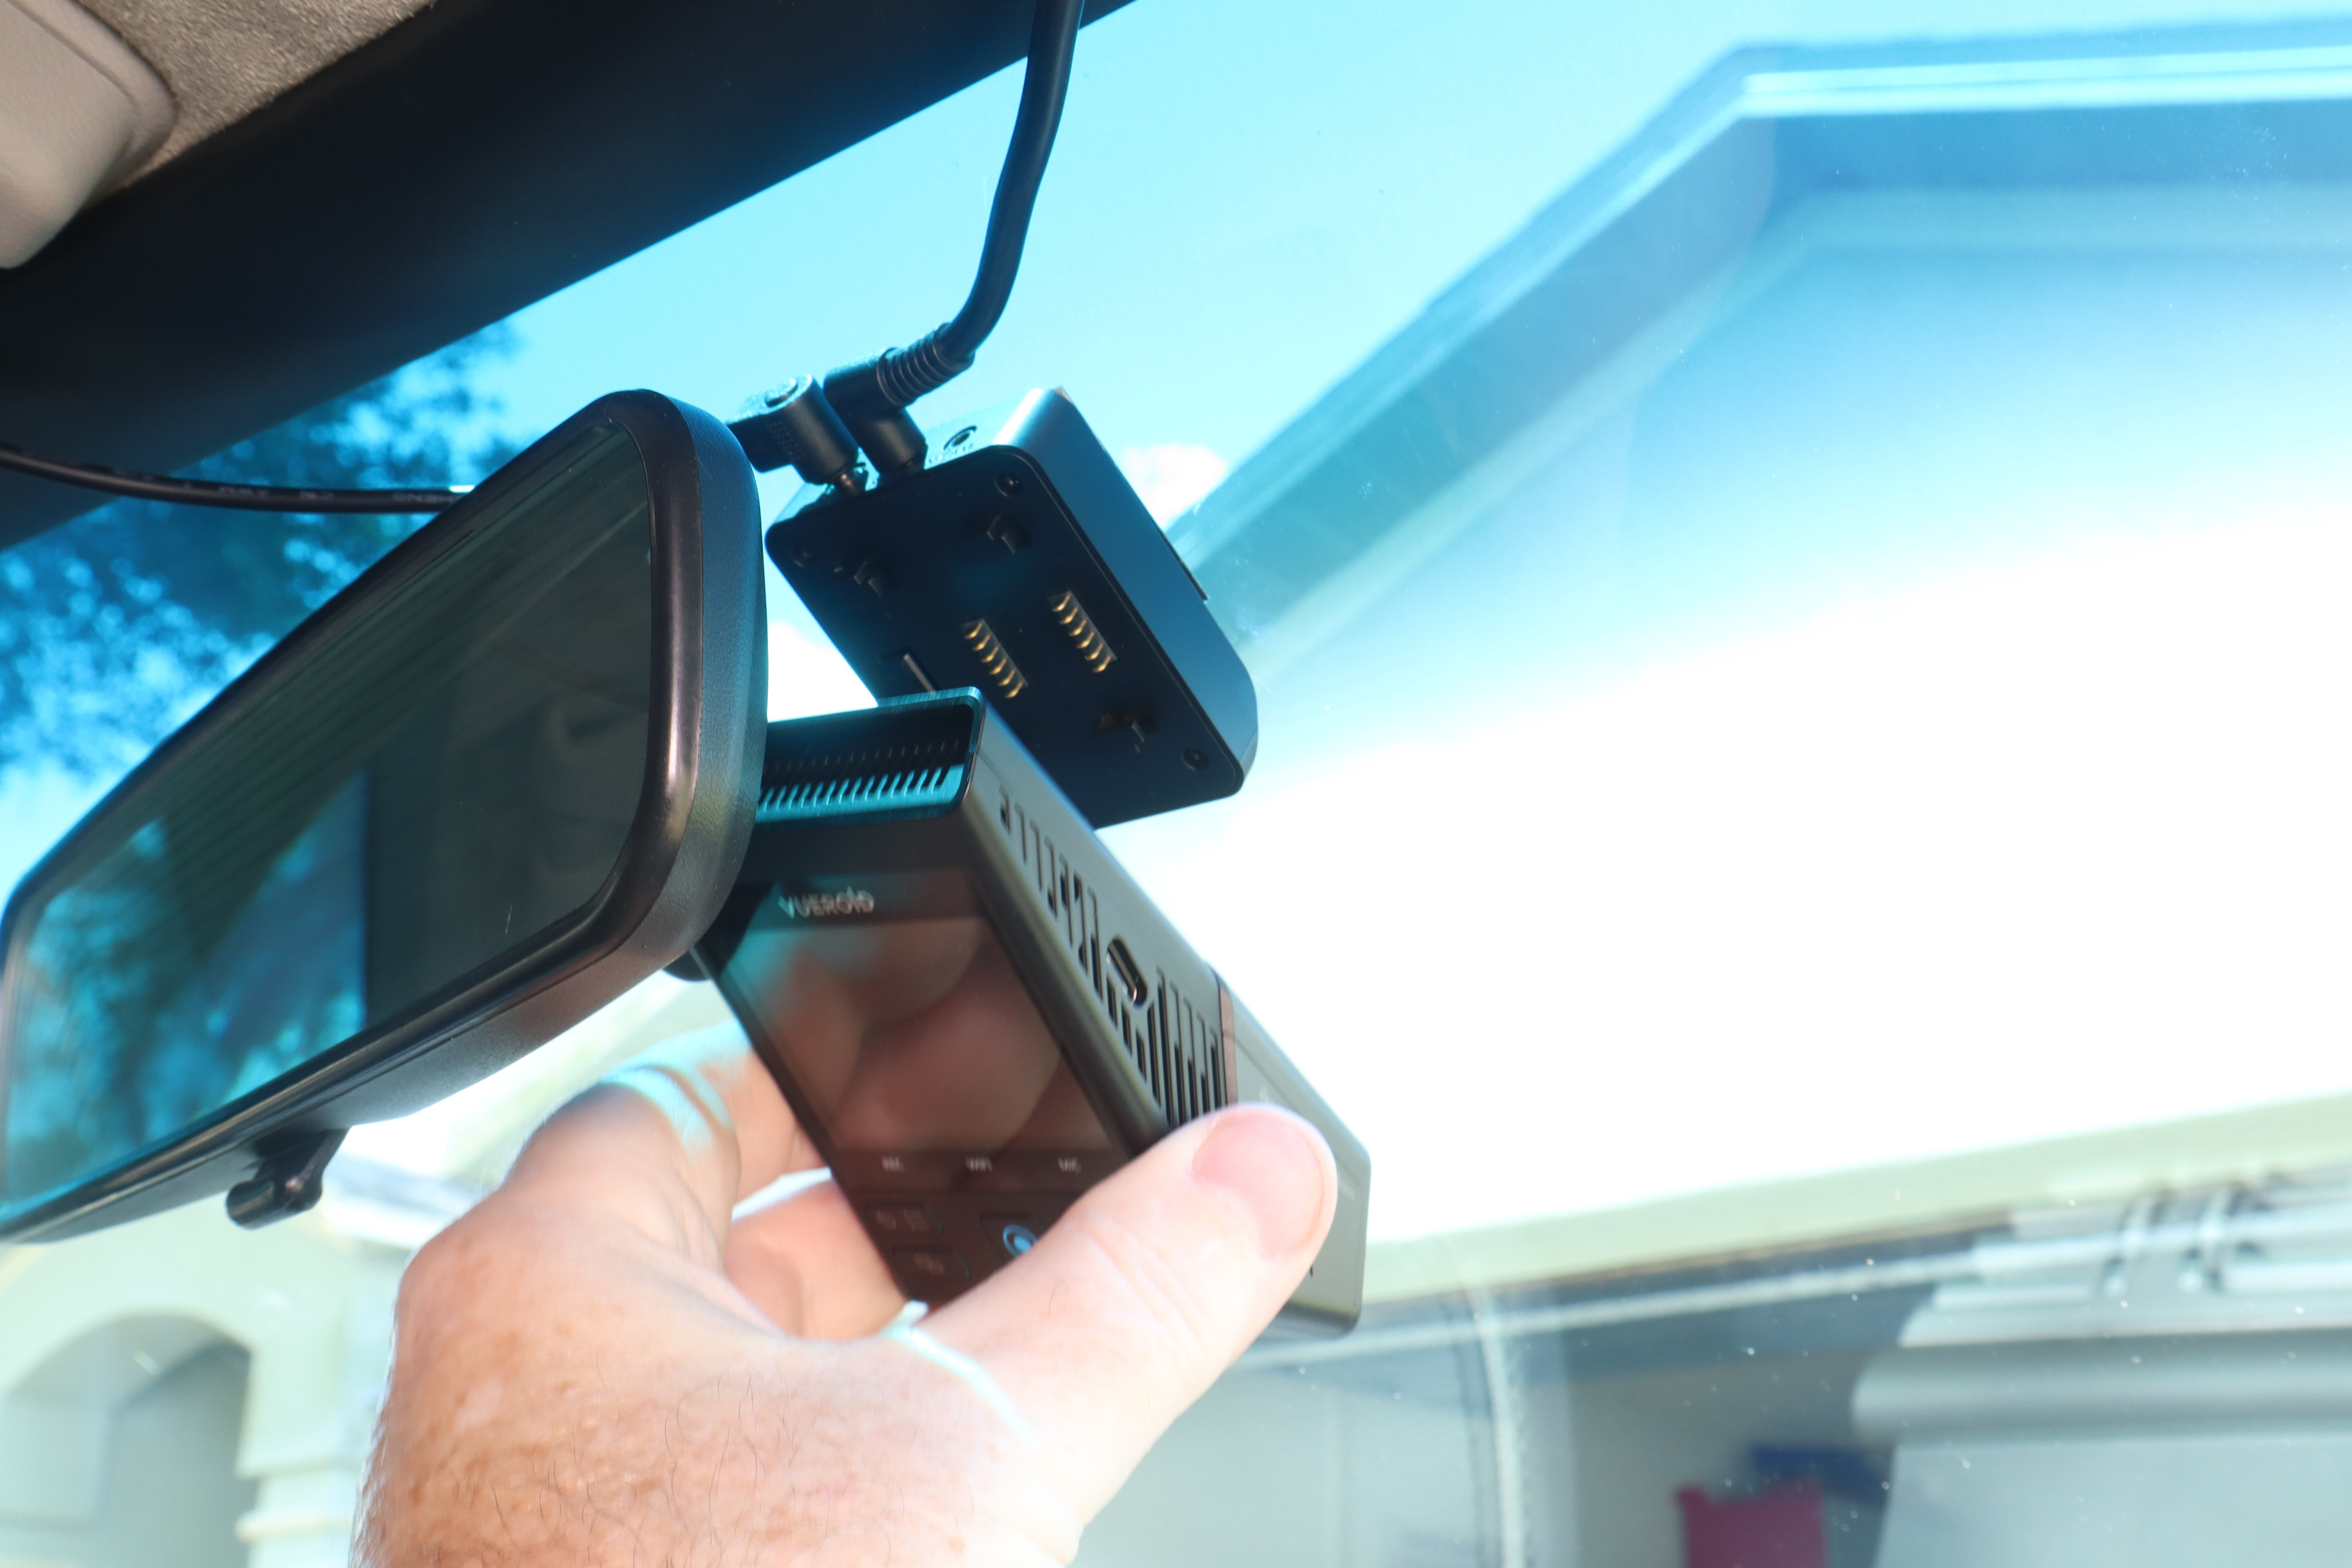
Of special note is that the front camera can be detached from the upper module that is adhered to your windshield. This allows you to connect your camera to your phone, tablet, or computer for transfer of images, firmware updates, and more. If using a computer there is a Vueroid PC Viewer app you can use to make file viewing and transfer easier.
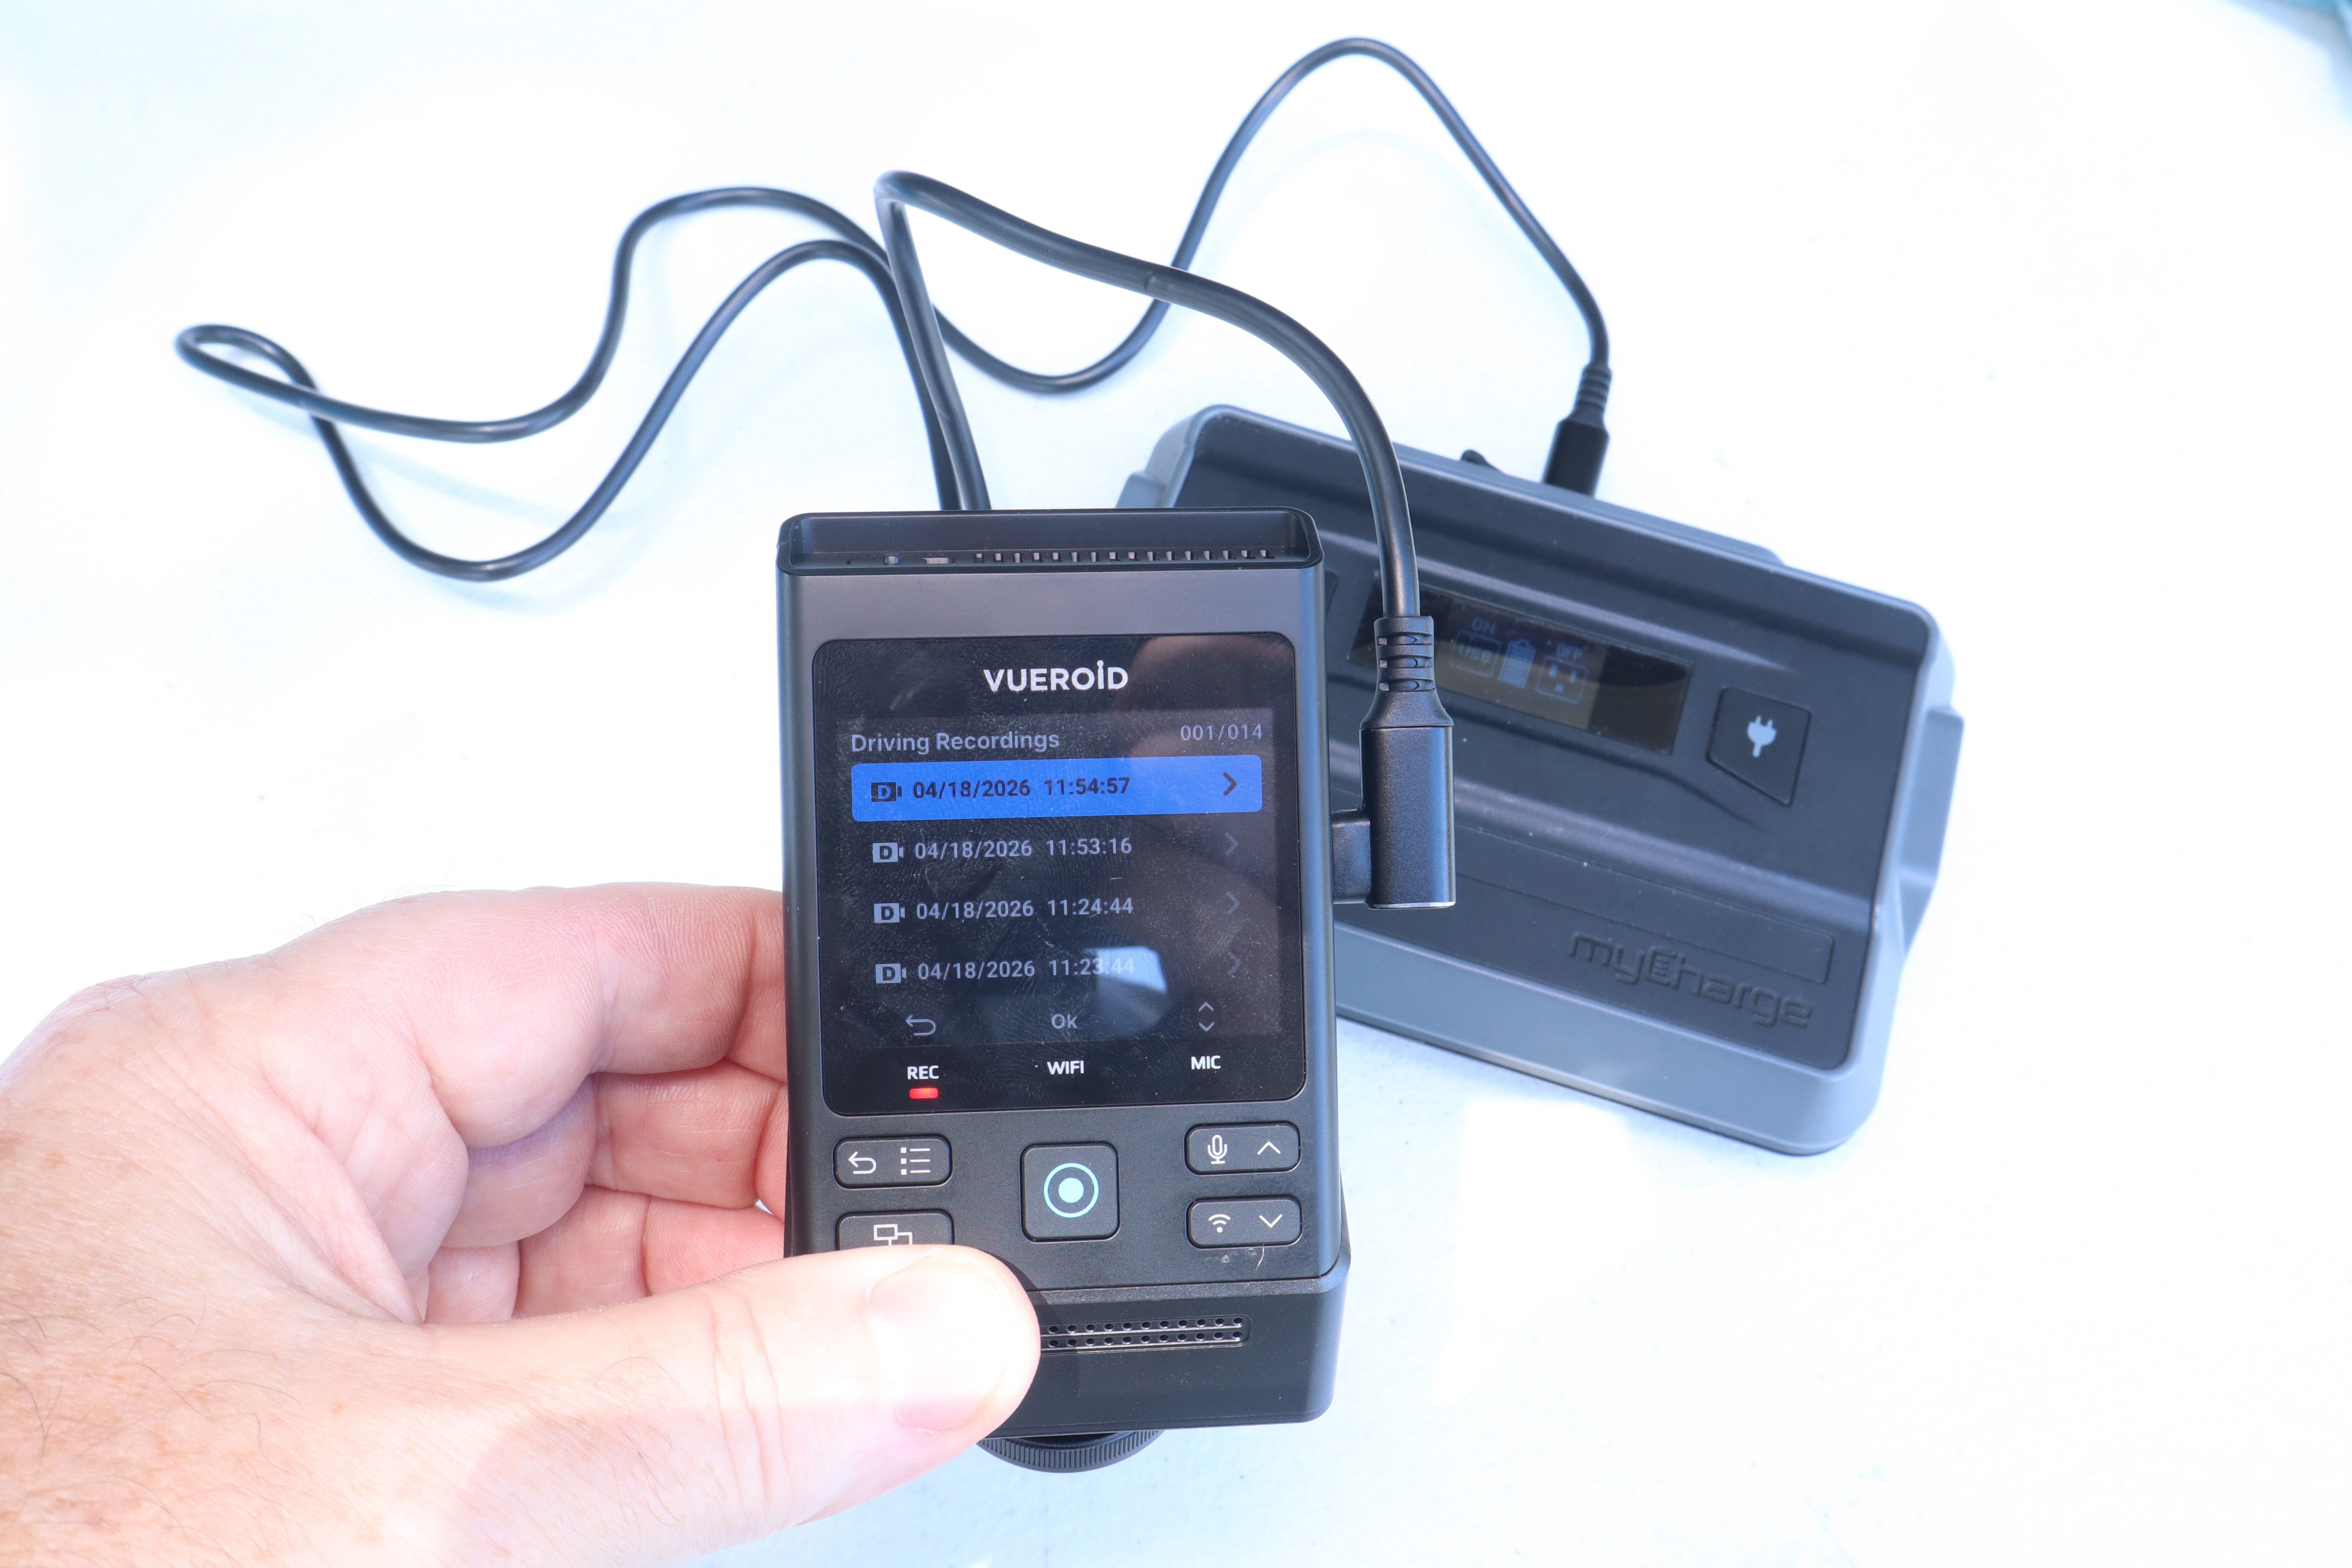
With the included USB-C to USB-C cable you can connect the Vueroid 1S 4K camera directly to your smart phone or tablet for file transfers, or you can power it remotely with a USB power pack to allow access to the camera’s files and more, again without having to sit in the car and do it.


